video

Combining Static Images with Videos in PowerPoint

The design team is thinking of cooler weather (it is summer in Southern California right now, so warm – okay, hot). This a nice slide design demonstrating creative combining of static images with videos all in PowerPoint for dynamic slide design concept.

Here is the .jpg image for this example.

Combining Static Images with Videos in PowerPoint 1

Here is the .mp4 video for this example. Note: the bottom grass area is not going to be seen, or a factor in deciding with video. We are only interested in the moving clouds at the top.

Combining Static Images with Videos in PowerPoint 2

In PowerPoint, the blue sky above the mountain range was removed using the Remove Background tool.

Combining Static Images with Videos in PowerPoint 3

The video was then added and positioned under the mountain image (see, the grass area at the bottom of the video is not see).

Combining Static Images with Videos in PowerPoint 4

Some PowerPoint text was added and here is the final composited slide!

[videopack id=”10661″]https://thepowerpointblog.com/wp-content/uploads/2016/12/unnamed-file-2.mp4[/videopack]

Troy @ TLC

By |2021-05-17T13:08:01-07:00July 24th, 2020|PowerPoint|

Change Shape of a Video

Earlier this month, was how to use PowerPoint’s Change Shape tool. Using the same tool, videos are not limited to rectangles! Essentially the Change Shape for videos crops any video to a new shape.  

First, insert your video and select it.

Change Shape on Video 1

Go to Video Tools > Format Tab, click Video Shape > Oval (or other desired shape).

Change Shape on Video 2

The video is now cropped to an Oval.

Change Shape on Video 3

The same crop tool functionality used on images works on videos. By default, the Video Shape tool crops to the existing rectangle aspect ratio. To make the video playback a perfect circle, use the crop tool to manually change the aspect ratio to 1:1. 

Note: adjust the viewable area of the video by repositioning the video in the cropped area while the crop tool is selected.

Change Shape on Video 4

The video is now a circle, or a star, a heart, or any other shape in the Video Shape library!

Change Shape on Video 5

Whichever shape you select, the video will export and play in that format.

Troy @ TLC

By |2018-06-10T07:51:05-07:00June 29th, 2018|Tutorial|

Using PowerPoint Creatively

Some amazing results can be achieved by using PowerPoint creatively. This slide developed by the TLC Creative Services design team is a great example.

[KGVID]https://thepowerpointblog.com/wp-content/uploads/2017/11/unnamed-file-7.mp4[/KGVID]

To develop this slide, we started with this mountain range image.

Using PowerPoint Creatively  1

Then, we used PowerPoint’s Remove Background feature to eliminate the sky area.

Using PowerPoint Creatively 2

Then we searched VideoBlocks for a timelapse clouds video and selected this video.

By positioning the video behind the mountain range image, we did not worry about the green grass and horizon (they are still there in the above slide, but hidden by the mountain).

Using PowerPoint Creatively  3

Last step was adding the stylized text. Complete!

Troy @ TLC

By |2019-10-31T22:05:22-07:00November 28th, 2017|Portfolio|

Video Across Slides (Sort Of)

Unbeknownst to the world, Microsoft somehow enabled video to play across slides again! This is something I have been requesting since the release of PowerPoint 2010, when video-across-slides stopped working. But don’t get too excited, there are limitations in using it today.

First the technical note: I am using Office 365, PowerPoint 2016 on Windows 10. This is untested on legacy versions or the Mac version.

Here is my sample slide deck; 5 slides with a video on slide 1 and indicator text on balance of slides.

Video Across Slides

When things are setup correct, yes we can play video across slides (yay!) as this video of the sample slides in slideshow demonstrate:

[KGVID]https://thepowerpointblog.com/wp-content/uploads/2017/10/unnamed-file-3.mp4[/KGVID]

Side note: the above video was a Camtasia screen recording, because I discovered that using the Export As Video option does not show the video across slides (which makes sense with the below explanation of why I believe this is working)

[KGVID]https://thepowerpointblog.com/wp-content/uploads/2017/10/unnamed-file-2.mp4[/KGVID]

Backstory:

  • Back in PowerPoint 2003, a video could be set to continue playing across slides and it would!
  • The reason was more of a limitation of PowerPoint that users were able to exploit and make a good thing. Back in PowerPoint 2003  video was not embedded and ran as a separate video player layer on top of PowerPoint. The good news was PowerPoint could keep the external video player going across multiple slides. The bad news was among other things, no PowerPoint content could be on top of the video while it was playing, because it was on top of the slides when playing.
  • Fast forward to PowerPoint 2010 and videos became embedded and content could be on top of videos! The downside was the embedded video removed the hand off to an external video player on top of the slides (but the improvements in reliable playback and styling effects were far superior options to have available!)
  • Today, video across slides works again. Here is my theory:
    • When the play across multiple slides option is selected for a video, the video uses a legacy video player and reverts back to the PowerPoint 2003 model of being a layer on top of PowerPoint. So yes, you can play a video across slides, but the video has a lot of styling limitations.

How to Set a Video to Play Across Slides:

  • Add video to slide (can be an embedded video, no legacy settings needed)
  • My example video was set to play the video automatically 
    Video Across Slides
  • Open the Animation Pane
  • Right-click the video animation 
  • Select EFFECT OPTIONS
  • Go to the EFFECT tab
  • Look in the STOP PLAYING section
  • Change the AFTER dialog to any number of slides needed (maximum 999 slides)
  • Click OKAY
    Video Across Slides

Limitations of Applying Styling Options to Videos That Use The Play Across Slides Option:

  • Below video demonstrates things that do not work when play across slides is set; 3D perspective, distorted aspect ratio, reflection, and more
    [KGVID]https://thepowerpointblog.com/wp-content/uploads/2017/10/unnamed-file-1.mp4[/KGVID]

My Advice:

  • Don’t count on this working in the future. It was broken for years and suddenly started working (thanks to Taylor Croonquist for mentioning it!). It could easily stop working with another update (and the ultimate update would be to enable video to play-across-slides AND maintain the embedded video player for z-order control and styling effects!!).
  • But don’t hesitate to use it if needed. I was recently used a 60 second countdown video to play across a series of slides and all worked perfect (but the request was a circle shaped clock, which I could not do because of the above noted styling limitations). I tested on my show computers and was confident all would work for the meeting. If the same client asks for the same effect next year, I cannot promise it will work until we are close to the meeting date and I can test and confirm it is still a supported feature (eg. I am not sending out Sales Team decks using this feature, because it would be bad for things to stop working in the future).

Troy @ TLC

By |2019-10-31T22:07:25-07:00October 19th, 2017|Resource/Misc, Software/Add-Ins|

Video Frame Rate – A Beginners Guide

Video in presentations has been something I have always embraced as a design tool. Fortunately, my design background includes lots of video production. So the many of the nuances of video files – and the finicky needs of Windows and PowerPoint (especially in legacy versions) – did not leave me with too many problems that could not be resolved. Today, video use is easier (thanks Windows 10 for supporting .MP4!), but it is still good for advanced users to know video format basics.

TechSmith (makers of Camtasia and SnagIt) recently put this tutorial online about video frame rates, which is a technical topic. It explains the concepts easily with video examples and feel it is a good resource to share. Check it out here.


-Troy @ TLC

By |2017-04-19T13:53:08-07:00April 14th, 2017|Resource/Misc, The PowerPoint® Blog|

Hightail Spaces Video Proofing

Hightail, formally YouSendit, has introduced a new tool, Hightail Spaces. So in addition to the file sharing services, they have added an online tool for video and image feedback.

hightail spaces 10

Using Hightail Spaces for client file review is pretty straight forward and similar to Wipster (see previous post). Here is a quick walk through of the collaborative process:

1. Log in (or sign up) to your account, and click on the Spaces tab.

2 Hightail Spaces

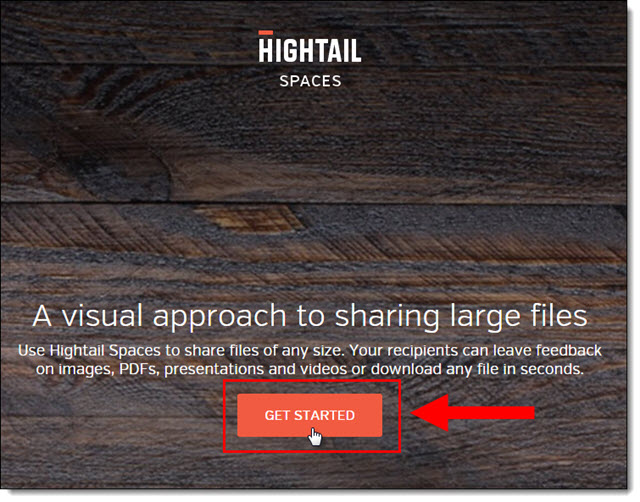
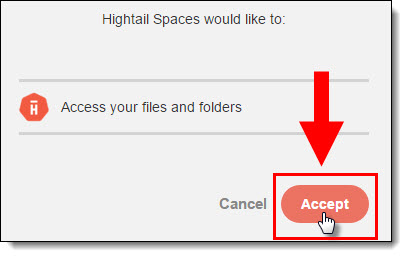
2. If it is your first time accessing, click Get Started, and Accept.

3 Hightail Spaces

4 Hightail Spaces

4. All of your Spaces show up, which makes it easy to have separate folders/Spaces for each client or project.

5 Hightail Spaces

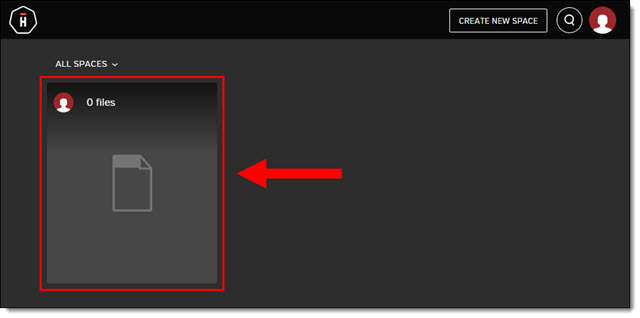
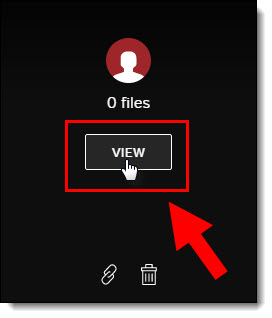
5. Hover over a Space and click to View any files, get a share link, or delete that Space.

6 Hightail Spaces

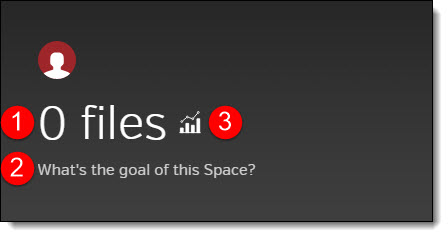
6. Spaces can be personalized to a project or client with a: (1) custom name and (2) description. The (3) chart icon shows the analytics of that Space.

7 Hightail Spaces

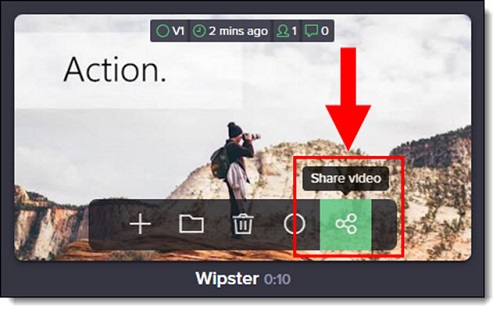
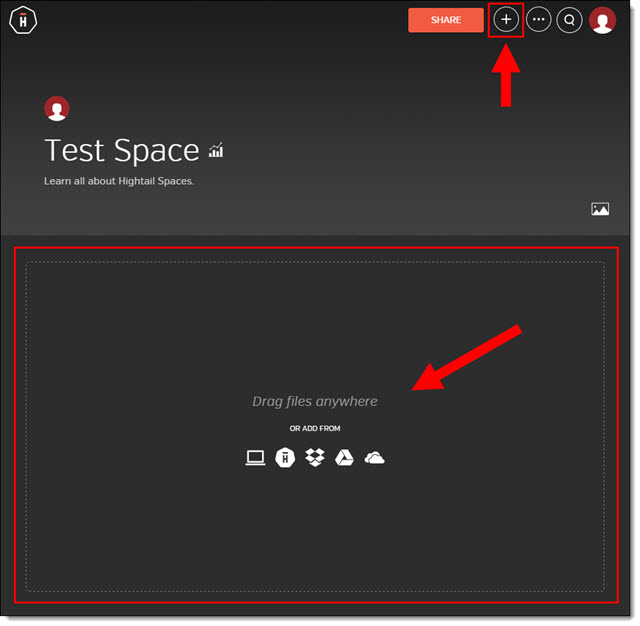
7. When viewing a space, use the Share button to invite clients to securely view any files in there.

11 Hightail Spaces

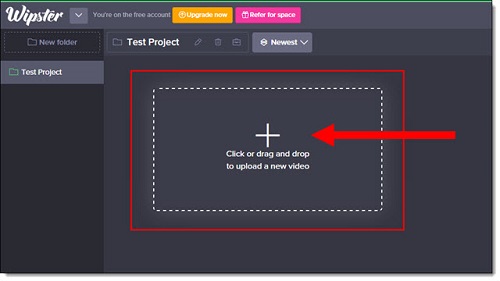
8. To add a video for review, either Drag and drop or click the plus icon (which also allows files to be uploaded from other services: Dropbox, Google Drive or Microsoft OneDrive).

8 Hightail Spaces

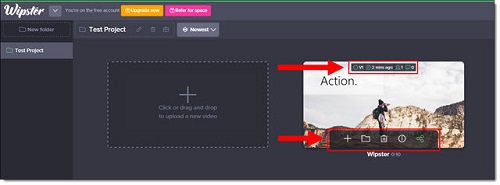
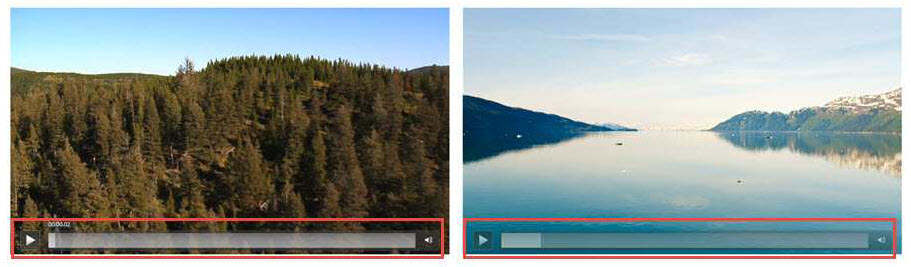
9. Once uploaded, every file is displayed with a preview thumbnail.

9 Hightail Spaces

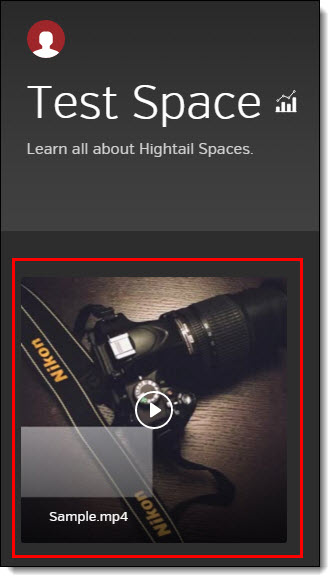
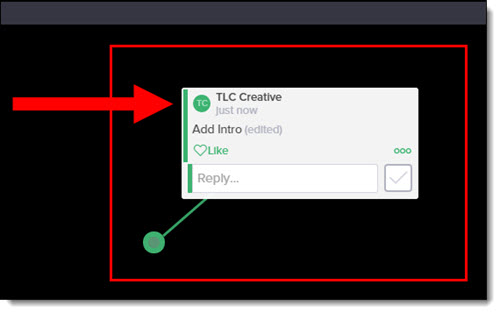
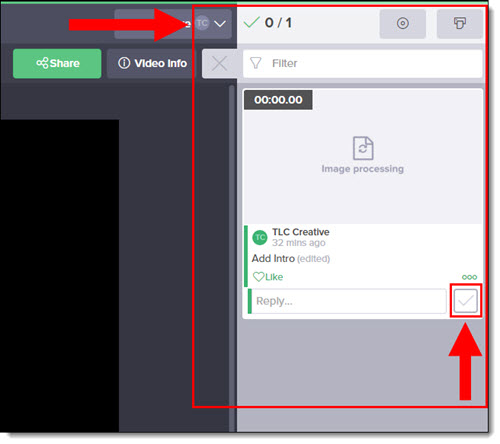
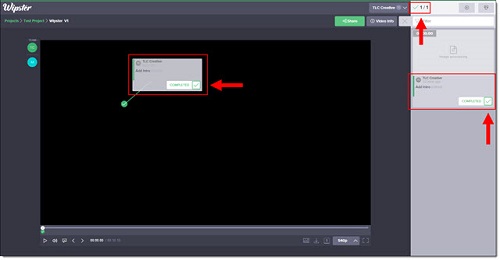
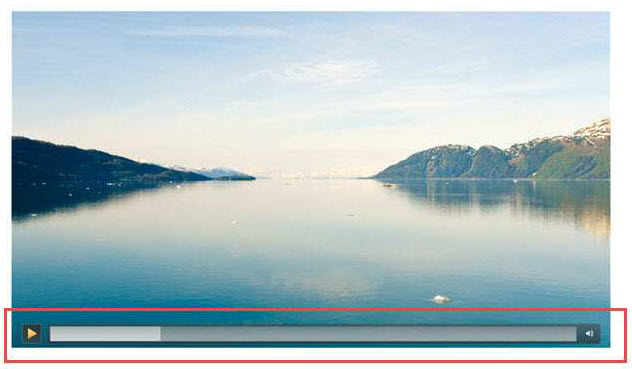
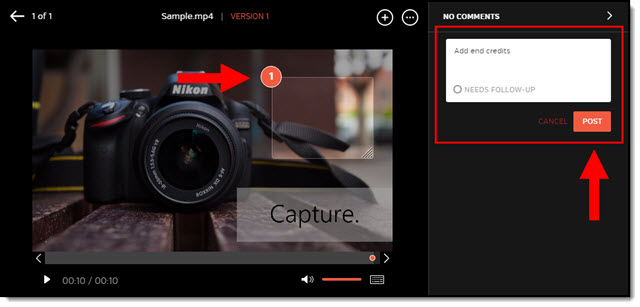
10. To review, your client just clicks on the thumbnail which opens the video preview and the comments side panel. To add a comment, drag a marque directly on the video and type any comment, then click Post.  The comment pane lists all of the comments and replies. A really great feature is that the video playback has a red dot for each comment.

10 Hightail Spaces

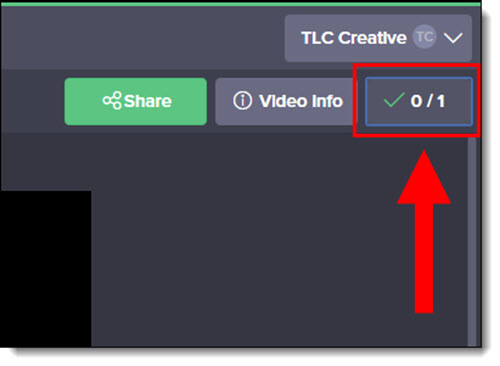
10. Spaces allows multiple versions. The current version is displayed at the top of the page. Previous versions are viewable by clicking on the version number in the list.

12. Access and share links are controlled by the overall Space and the individual files. (1) Access can be public or private (2) Copy a link to send in an email, text or IM. (3) Access options include edit, comment, download, and (4) Share directly on Slack (if you use that).

Note: Download options are only available with a paid subscription.

12 Hightail Spaces

Hightail Spaces is another client review option to check out. There are both free and paid options.


-Troy @ TLC

By |2016-08-10T08:21:07-07:00April 22nd, 2016|Resource/Misc|

Wipster.com – Online Tool for Video Review

Videos projects, or PowerPoint decks exported to video, are sometimes difficult to send to a client due to large file size. They are also difficult for the client to provide exact feedback. Wipster is one online tool that provides a solution to both difficulties.

Wipster_10

Wipster is an online tool that makes getting video to a client, and giving them a way to give you feedback, very easy – and secure. Upload a video to your Wipster account, send a secure link to your client and they can view online, and have a set of tools to make comments and feedback for you to review. Feedback is pinned to a specific frame of the video so you know exactly what is being referenced.

Here is a quick demo of using Wipster to get feedback, or approval, of a video:

1. Upload the video with a drag and drop system (or click upload to get an upload screen).

1_Wipster

2. Review uploaded video or a new version (there is a versioning control built in).  Links can be sent to videos, information can be added and they can be moved to a specific folder or deleted. All the vital information is also available: version number, the upload date, the number of reviewers, and the number of comments.

2_Wipster

3. To share the video, select the Share video

3_Wipster

4. Pick the review options, including feedback notes and an approval button. The video can be password protected, downloads disabled, and commenting turned on/off.

4_Wipster

5. When reviewing, adding comments is super easy and intuitive. Click and drag a window around the exact area, on an exact frame, to provide feedback on. Then, type feedback into the comment dialog box. All reviewers are notified of new comments and they can reply to them.

5_Wipster

6. To view all comments as an action To Do List, click on the button in the upper right hand corner.

6_Wipster

7. A list of all existing comments will expand on the right side of the screen. As you complete each item, check the box next to the Reply…

7_Wipster

If an updated version is created, rather than setting up a new Wipster review, just upload the new version to the original video. Everyone is notified of the new version, the feedback process can simply continue until everything is approved and you get the electronic approval to finalize and turn on the download link so the client can have the video for use.

8_Wipster

There is a free account option, and approximately $15 month for unlimited video proofs. Wipster just announced a new feature last week that integrates directly into Adobe Premiere called “Wipster Review Panel for Adobe Premiere” which may change the way we implement client feedback on video projects.

-Troy @ TLC

By |2016-08-10T08:21:35-07:00April 20th, 2016|Resource/Misc|

How Do You Proof a Presentation…?

Developing a great presentation involves a lot of communication between designer and presenter. There are lots of options for supplying a proof to a client and receiving feedback and direction on content – some proofing rounds and processes are good, some hinder.

proof approved

On The Presentation Podcast, a recent episode was all about design studios sending proofs of presentations from clients, listen to it here.

Here is a quick overview of the 4 most common options for providing a proof:

  • PDFs are easy to create directly from PowerPoint, are easy to email, are mobile device friendly and have a great built-in commenting function. But they are static, so transitions, animation and video are not seen.
  • Video is also easy to export directly from PowerPoint and show all animations, transitions, custom fonts, etc. The downside is that the files can be large and there is not an easy way to provide feedback/comments.
  • Sending an editable PowerPoint file is the easiest option. The biggest concern is version control (who is working and minor items like custom fonts, client changes not being caught [for design, file size, etc.]) and ensuring what was designed is what is being seen.
  • Co-authoring and collaboration, which can be the built-in Office 2016 feature or an external program, have improved to the point of being a valid solution. But I find the most common issue is scheduling – designer and client having same time available to “meet” can be difficult.

The next few posts are going to demo some of the online proofing tools TLC Creative has been using.

-Troy @ TLC


By |2016-08-10T08:23:07-07:00April 18th, 2016|Resource/Misc|

Can a Video Morph in PowerPoint?

Can a video morph in PowerPoint? The answer is yes (but not completely).

The great thing is – a video placeholder works with Morph. Here is my two slide sample, the video on the second slide has been resized to full screen.

video morph-1

In the demo video below, the sample video growing to full slide size with a Morph transition works perfectly. However, due to a limitation of how PowerPoint plays videos, a video cannot play across slides. In this sample, the visual works nicely with the 2nd slide set with a shorter slide transition duration (morph) and a Play-with-Previous to have the video start playing instantly after the morph finishes. But a video with audio or content that would look awkward with a  pause will not work as well (visually).

[KGVID]https://thepowerpointblog.com/wp-content/uploads/2016/03/unnamed-file-6.mp4[/KGVID]

-Troy @ TLC
By |2019-10-31T22:13:58-07:00March 28th, 2016|PowerPoint|

Use The PowerPoint Video Playback Bar

Inserting video into Powerpoint is an easy task. Using the video playback bar also makes controlling the video playback easy.

playback bar 1

The playback bar is available in slide edit view – when a video is selected, it appears. The playback bar can be used to preview the video, click-and-scrub through a video, pause a video, and see a live time code.


During a presentation, when the mouse is moved over the video, a simplified semi-transparent playback bar will pop up. Most of the same functions are available; time code and incremental incremental jumps are not on the playback bar in slideshow.

5-2B

The playback bar position cannot be moved (although this functionality is definitely on my wish list for the Microsoft Dev team). When the cursor is moved off the video, the playback bar hides almost immediately (and reappears with any mouse movement over the video).

Slideshow playback control options:

  1. Play / Pause Button.
  2. Timeline bar (click anywhere on timeline and jump video to that position, click-and-drag and “scrub” through the video forward and back).
  3. Volume Control (very helpful for muting a video during a presentation).


7


The semi-transparent playback bar is not overly distracting because it’s nicely designed. Here are a few examples over different color videos. In addition, these two videos are on the same slide, side-by-side. See demo video of this slide below.

9-1B

Here is a video demo of interacting with videos during a slide show.

[KGVID]https://thepowerpointblog.com/wp-content/uploads/2016/03/unnamed-file.mp4[/KGVID]

-Troy @ TLC


By |2019-10-28T09:58:50-07:00March 23rd, 2016|PowerPoint, Tutorial|
Go to Top