Jake on the TLC Creative design team created this demo slide deck. The goal is to use a complex .svg vector art element and do all styling (color, size, position) directly in PowerPoint – mission accomplished. The second goal is to apply Morph transitions to create a session of seamless motion graphics:
Version 1: No Morph, all legacy animation and fade transitions. This is also how the Morph enabled version will present on systems that do not support Morph (where Morph basically is replaced with fade transitions). For best results on this version, no movement or resizing of the molecule elements or connectors was done, just recoloring (which was accomplished direct using PowerPoint fills, outlines and gradients).
Version 2: Use Morph throughout. But just adding Morph transitions leads to some unexpected animation effects that cannot be controlled no matter how things are setup on the slide. The overall result is a sense of motion and the molecule changing, but there are several areas where the molecule is not visually connected with connector lines flying to different (wrong) molecule elements.
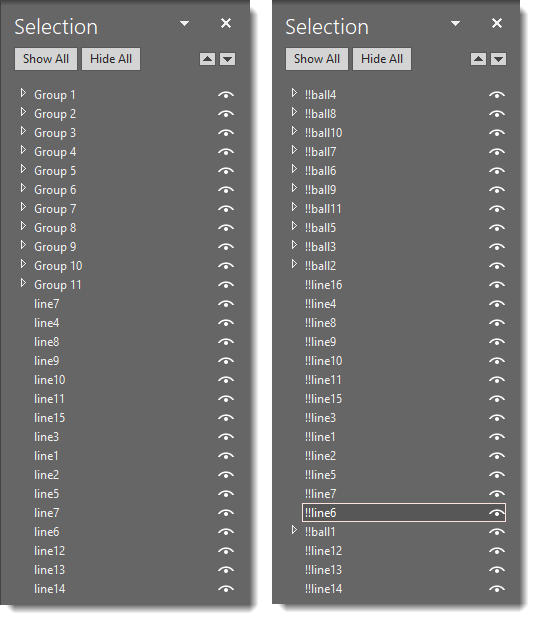
Version 3: Same Morph transitions, but taking time to add Object Tags (naming each art element in the Selection Pane) allows the designer to control Morph and force it so we know how exactly each object on the previous slide will animate and land on the following slide (see below image for Selection Pane comparison). YAY for the new Object Tagging feature to Morph!
[KGVID]https://thepowerpointblog.com/wp-content/uploads/2019/06/unnamed-file-7.mp4[/KGVID]
Left = version 1 & 2 selection pane with PowerPoint automated naming (which changes from slide to slide). Right = version 3 selection pane with each object named in the selection pane using the “Object Tagging” double exclamation “!!” (object names stay the same from slide to slide).
Troy @ TLC