I work with PowerPoint on a daily basis and I am very honored to be a Microsoft PowerPoint MVP. We have a talented team of presentation designers at TLC Creative Services and ThePowerPointBlog is our area to highlight PowerPoint tips, tricks, examples and tutorials. Enjoy! Troy Chollar
Teams – What, The Audience Can See ALL of My Slides!
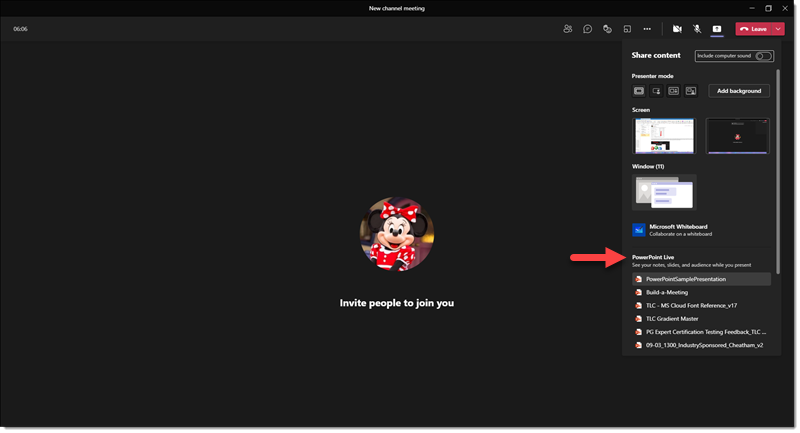
This is a feature – and one we at TLC Creative are not fond of (at least as the default behavior). While sharing a PowerPoint presentation in Teams, participants can scroll through your slides out of sync from you. This means anyone in the meeting can move through your slides, forward or back, away from the slide you are currently speaking to. They can see ahead, effectively ruining any big reveal. They can be distracted looking at other slide content and not focusing on you and the your presentation. AND, this is the default behavior when you present a slide deck in Teams!
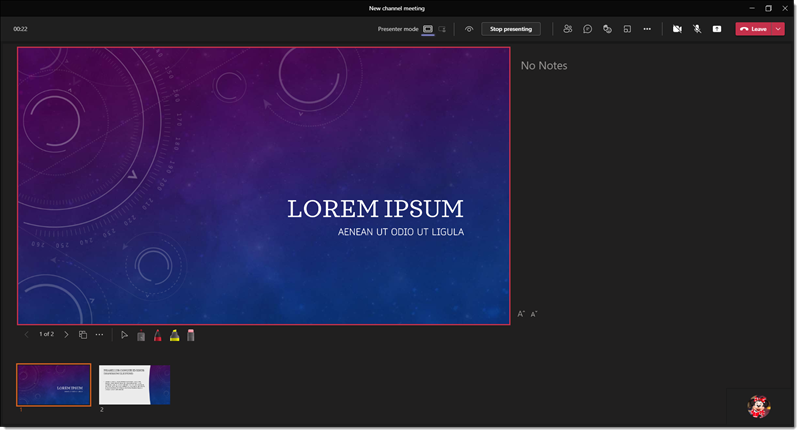
To disable this function, click the eyeball icon next to the “Stop Presenting” button
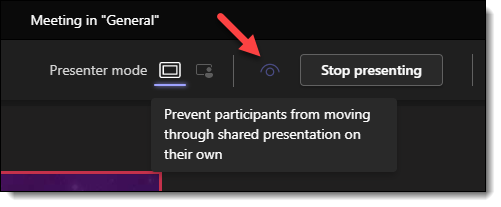
The eye icon will now have a line through it, indicating it is now disabled.

Troy @ TLC