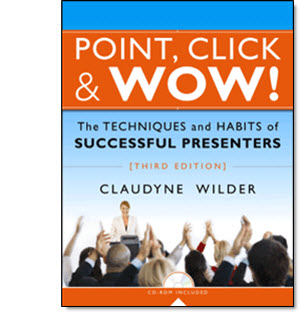
Monthly Archives: September 2008

Point, Click & WOW!

The third edition of “Point, Click & WOW!” is a great resource if you do deliver presentations to an audience of any size. Claudyne Wilder has written a number of excellent books on PowerPoint and presenting, all excellent and provide great insight, support and information that everyone can make use of. And if you happen to be in Boston Thursday, September 18 you can hear Claudyne speak and do a book signing!

Check out the details on her website here (or check out Amazon by searching for the title).

– Troy @ TLC

By |2016-11-17T12:40:23-08:00September 8th, 2008|Resource/Misc|

Blue Lens Template Download

The Blue Lens template I have used as an example was one of the concepts I created for a client. Obviously I ‘debranded’ it by removing any reference to a company or event, but now you can download the full template to review or use!

Download the template (saved as .ppt, not a .pot) here. Enjoy!

– Troy @ TLC

By |2016-11-17T12:41:51-08:00September 5th, 2008|Portfolio, Templates/Assets|

Setup of a Template

With the background elements developed in Photoshop and saved out as .jpg images the rest of the work happens in PowerPoint. Most of the work in setting up a template happens on the Master Slides. So the first thing for me is to set the background of each slide layout with the background artwork.

The Blue Lens template has a Content slide and a Title slide.

Next is to position the text boxes to fit the background, set the font size-color-line spacing and custom bullets:

I also set default slide transitions for each slide layout (in this case both use a FADE SMOOTHLY), format the header/footer text boxes, etc.

One of the things I think a lot of people overlook is customizing the color scheme. I always include a sample chart that shows all of the default colors I have setup.

Now everything is ready to build a slide show!

– Troy @ TLC

By |2016-11-17T12:42:12-08:00September 3rd, 2008|Portfolio, Templates/Assets, Tutorial|

Template Background Design

When creating a custom PowerPoint template the first step is developing the custom artwork for backgrounds. I am going to break down a template recently designed. In PhotoShop I pull in all of the visual assets and stylize an appropriate to the theme canvas for the PowerPoint slides. Here is the content slide design for the “Blue Lens” template.

There are a lot of layers to create the desired effect. Here is the PhotoShop layers for this template (shows both the Content and Title slide background layers). Fortunately this was a fairly light template in terms of layered elements so we can show them all in one easy screenshot.


This is a pet peeve, but I really hate receiving Photoshop files with none of layers named – it’s is a huge waste of my time to go hunting for a needed layer by turning on and off layers. So, as seen, I always label all layers in PhotoShop so modifications are easy because the layers can be quickly identified.

I save out each of the backgrounds as a .jpg with a compression level of 10. From there it is all PowerPoint!

– Troy @ TLC

By |2016-11-17T12:42:56-08:00September 1st, 2008|Portfolio, Tutorial|
Go to Top