
Gradient Triangle Accent Elements
This is another layout recently developed for a project. The goal was to avoid a bulleted list and create a more dynamic, and memorable, graphic layout.
1. Create a tall triangle

2. Using the gradient fill options modify the triangle to move from semi-opaque to transparent
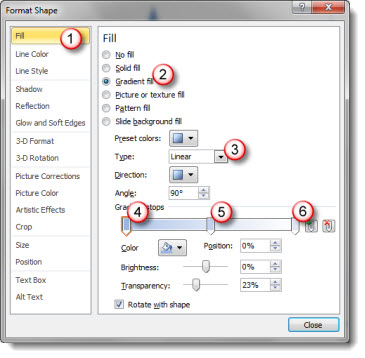
1. Open the FORMAT SHAPE dialog and go to the FILL section
2. Select GRADIENT FILL
3. Make certain the type is LINEAR
4. Stop 1 (top of triangle) is desired color and 20-25% transparency
5. Stop 2 (middle of triangle) is a lighter color and 40-50% transparency
6. Stop 3 (bottom of triangle) is any color and 100% transparency
3. The result transforms the triangle to this

4. And here is an example layout using all PPT shapes and text

5. The great thing is the triangles use transparency and not white, so they can be used on any background

Click here to download the slide layout (29K).
– Troy @ TLC
Gradient Circle Fill Effect
I have been experimenting with gradient fills for a recent project. First, the gradient tool in PPT 2010 is great! It still has some usability issues, but overall it is easy to use and has a lot of flexibility. Here is one effect I developed and below is a link to download a slide with the gradient shape.
1. Start with an oval. No outline and any fill.
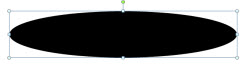
2. After applying a custom gradient fill here is the result.

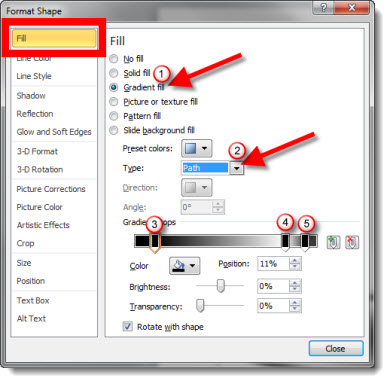
3. To create the gradient fill I adjusted 5 elements:
1. Open the FORMAT SHAPE dialog, go to the FILL section and for fill type choose GRADIENT FILL
2. Change the type of gradient to PATH
3. Make the far left color black. Slide to position of 10-15%. Transparency = 0% (solid black).
4. Move second color to right side at position of 80%. Make color white, or change Brightness to 100% (white) and set Transparency to 100% (no fill).
5. Add a third color bar/stop even further to the right at position of 95%. Make color white (or set brightness to 100% to change any color to white) and make it slightly transparent with Transparency at 25%.
4. Now position gradient cirle under any object for a bit of perspective.
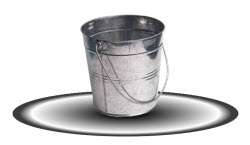
5. Because the shape was created with transparency, it can go onto any color background.

Download slide with gradient shape here (35K).
– Troy @ TLC
Where Have You Been Lately…
Sometimes projects and life just get a bit out of hand. Well I spent the past month developing graphics for a large meeting and the past week on showsite. The great news is the show was awesome. The better news is that after 4 days of non-sleep I am back, sleeping long hours and able to work on this month’s posts!
Here are a few pictures from the show:
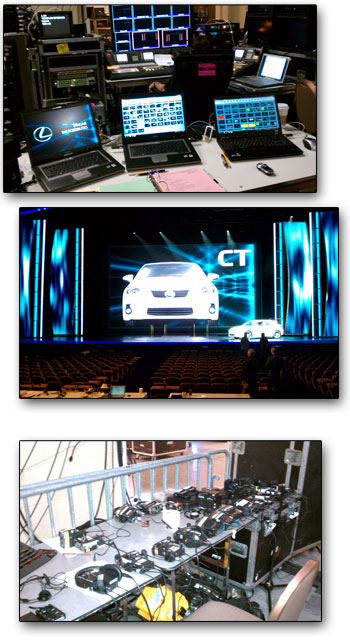
Top: my work area. Fairly simple show from a graphics perspective, single wide screen High Def (1900×1080) presentation. So two show computers (primary and backup), work computer, network, some peripheral equipment and the all-important script book with every presentation cue.
Middle: stage. It was a really, really big widescreen presentation at 60 feet wide x 40 feet tall (that is a real car on stage for perspective).
Bottom: show had a crew over 100 people and communication is critical. These are just the wireless ‘com’ units (most shows has lots of wired headsets and maybe 3-4-10 wireless, this show had 30+ wireless)
Movie Length When Trimming
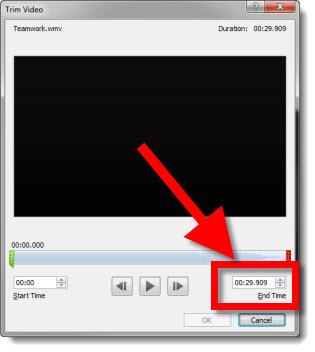
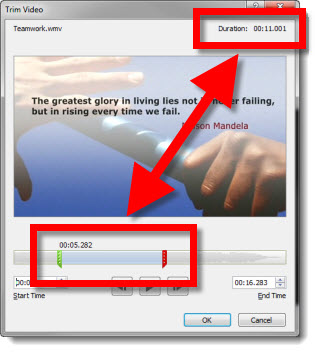
PPT 2010 has added lots of very good video editing tools. In working on a recent project with many videos I happily made use of the Trim feature to set custom start/stop times. But after using a calculator to figure the new section duration (for over an hour), I discovered a new function!
Here is my sample video freshly inserted. The End Time shows the duration of the whole video.
Here is the sample video with custom start and stop times setup. Note the upper right corner where PPT is smart enough to automatically calculate and display the new duration of the video (yeah!)
– Troy @ TLC
Lance Armstrong Animated Slide
People ask all kinds of questions about slides created. If it is a cool topic like this one, Lance Armstrong, I hear “Wow, that is really awesome to work on stuff like that.” But the comment about the same slide from the client is usually, “How long did it take to create that really awesome slide…”. Just depends on your perspective.
But this was an awesome slide to have the opportunity to develop for a presentation. Awesome subject. Awesome photography. Awesome animation. Here is the image preparation needed in Photoshop:
1. Original Photo

2. Drop out background and have just Lance Armstrong

3. Make background without Lance Armstrong

4. Create motion streaks of Lance Armstrong speeding away (key for the animation)

5. Create semi-transparent background image

Here is what it took to create the animated slide:
1. start with opaque background image and .png image of Lance Armstrong (looks like original)

2. Fade in the motion streaks .png image

3. Grow/shrink and slight motion path on Lance Armstrong image and motion streaks. Fade out opaque background and fade in semi transparent background

4. Done. Total billable time – few hours. Result – (hopefully) audience wow.
– Troy @ TLC
Automatically Insert ‘Real’ Lorem Ipsum Text
And there is more!!
In the previous posts we used the secret coding that has been in PowerPoint since at least PPT 2003. With Office 2007, Word got an update to the coding – but not PowerPoint. But in PPT 2010 the update is included! That is to change the typed code to “=lorem()” and get a real “Lorem ipsum dolor sit amet…” text.
Here is my sample slide again, but now the “rand” is replaced with “lorem”.

Click the enter key and I get 3 paragraphs of real lorem ipsum text (note each paragraph is unique text):
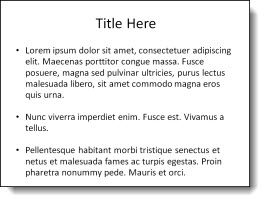
But the ability to customize the number of paragraphs and lines per paragraph detailed in the previous post is not available using the ‘lorem’ option… Maybe in the next version.
– Troy @ TLC
Customize The PPT Auto Lorem Ipsum Text
But wait, there’s more!
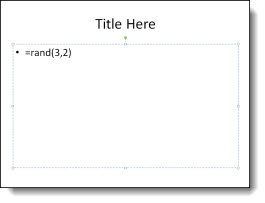
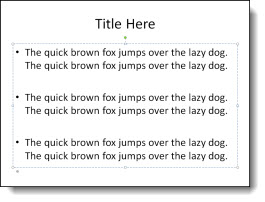
In addition to the secret code shown in the previous post, you can add parameters to control how many paragraphs of sample text – and how many lines per paragraph.
Here is my sample slide, I have have added the parameters to insert 3 paragraphs of 2 lines each with “=rand(3,2)“.
Just click the enter key and it turns into this (3 paragraphs of 2 lines each):
– Troy @ TLC