The PowerPoint® Blog

I work with PowerPoint on a daily basis and I am very honored to be a Microsoft PowerPoint MVP. We have a talented team of presentation designers at TLC Creative Services and ThePowerPointBlog is our area to highlight PowerPoint tips, tricks, examples and tutorials. Enjoy! Troy Chollar

Zoom Demo Webinar Today

Today at 11:00am PST / 2:00pm EST, The Presentation Guild is hosting a Free Webinar with a Microsoft Program Manager demonstrating a new PowerPoint Zoom tool – with Troy Chollar from TLC Creative Services as the moderator/host for this live demo. Hope you can join everyone!

Zoom Demo Webinar

Register and get details here.

Or, view the webinar recording here.

-Troy @ TLC

By |2016-08-24T07:16:50-07:00August 16th, 2016|Resource/Misc|

PowerPoint Content vs. Picture Placeholders

Inserting an image using the preset Picture Placeholders seems like a super shortcut, until things get frustrating with why images do not insert the same way every time a Picture Placeholder is used. The reason, almost always, is knowing there are two types of Placeholders – and each handles images differently.

Here is an explanation and example using a Content Placeholder vs. Picture Placeholder – and as a side note, neither option works the way I feel it really should…

CONTENT PLACEHOLDER

Inserting an image in the Content placeholder, identified by this icon, offers the option of inserting various elements: Tables, Charts, Smart Art, Video, and Images.

Insert Content icons

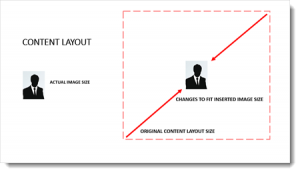
Inserting an image in the Content placeholder adjusts the layout to the size of the actual image. If you insert a small image, the placeholder shrinks to the small size image. If you insert a large image, the image will at maximum be the size of the slide and the placeholder will grow to that size. The downside is the preset position and size on the master layout is ignored and the slide content needs to be manually repositioned and sized.

Content placeholders


PICTURE PLACEHOLDER

Inserting an image in the Picture placeholder adjusts image to fill the size of the layout. The downside here is the image is often cut off and needs to be repositioned and resized using the Crop tool.

Picture placeholders


While both Placeholder options are pro’s and con’s, at least now you have an idea of what PowerPoint is doing and what to expect.


-Troy @ TLC

By |2016-08-09T18:15:45-07:00August 15th, 2016|Tutorial|

Video Demo of Zoom

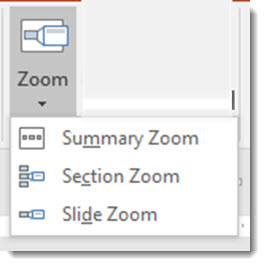
PowerPoint is adding a new feature named ZOOM.

zoom 1

Zoom leverages the Morph transition and Sections to create a new way to quickly develop non-linear presentations with a new dynamic visual effect. Here is a quick demo of how easy it is to create custom shows within a presentation using Zoom.

[KGVID]https://thepowerpointblog.com/wp-content/uploads/2016/08/unnamed-file-2.mp4[/KGVID]


– Troy @ TLC

By |2019-10-31T22:13:10-07:00August 11th, 2016|PowerPoint, Software/Add-Ins|

FREE Microsoft Demo Webinar for PowerPoint Zoom

The Presentation Guild is hosting a FREE webinar next week, and everyone is invited! Derek Johnson, a Microsoft Principal Manager, is the presenter, and TLC Creative’s Troy Chollar is the moderator. Register for the event and get an advanced live demonstration of the new PowerPoint Zoom tool.

PowerPoint Zoom Webinar

The webinar is August 16 at 2:00-3:00 pm EST. It is free and open to everyone. Get details and register here. View the recorded webinar here


Check back this Friday for a quick video demo of one Zoom feature by TLC.


– Troy @ TLC

By |2016-08-24T07:19:51-07:00August 9th, 2016|Resource/Misc|

Using Morph for Animations

The PowerPoint Morph transition is PowerPoint’s best new animation feature!

using morph for animations

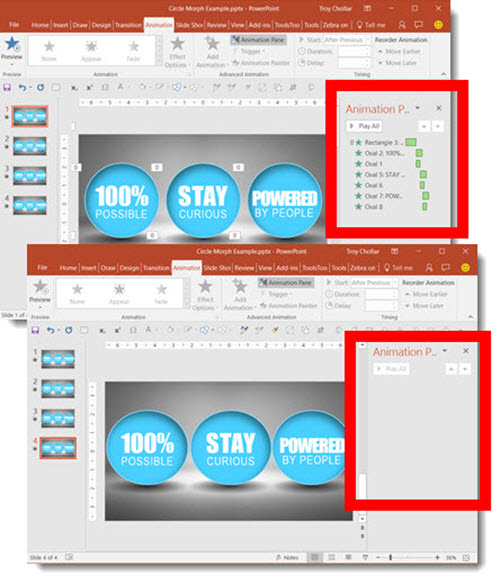
We have been leveraging the fantastic new transition in lots of presentation projects since its release, including using Morph for animations. Here is another example where we used Morph as the animation effect. Our client wanted to show the above three statements. The real request was to emphasize each as they were addressed. Our first step was to convert the provided bullet list into a dynamic visual; the end result was the above slide.

For the “emphasize each” request, using the Morph transition as our animation, we created a dynamic “flip” animation effect. It also was something that did not look like “PowerPoint.” Below is a video of the final animation effect:

  • After the slide layout was approved, we duplicated the slide 3X.
  • On the first slide, we added the animated entrance effect for the 3 circles and text.
  • On the second, third and fourth slides, we simply horizontally flipped each circle. No animation on these slides. The Morph transition created the nice twirl, or flip, animation.
  • Done!

using morph for animations


– Troy @ TLC

By |2025-12-19T13:32:51-08:00August 5th, 2016|Portfolio, PowerPoint, Tutorial|

Probiotics Slide Makeover

This is a slide makeover from a recent presentation design project. For the project, we discussed the styling, end use, presenter style and content with our client. After developing a custom PowerPoint template, visual styling rules, and then a speaker support presentation based on the provided presenter script.

Slide makeover

Not only did we learn a lot about Probiotics, but we developed slides like this that simplified 4 paragraphs of text into a clear visual message.

-Troy @ TLC

By |2016-08-08T10:23:38-07:00August 3rd, 2016|Portfolio|

4th of July PowerPoint Template

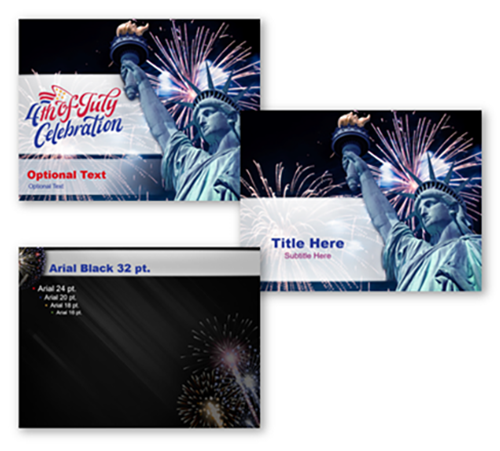
In honor of our Nation’s Independence, we’ve put together a festive 4th of July PowerPoint template that you can download for your own use FREE.  Download this PowerPoint 2016 Template designed by TLC Staff Designer Christie here (1mb).

blog_screenshot

Here is a great article about the 4th of July at History.com. Enjoy!

-Troy @ TLC


By |2016-08-10T08:00:19-07:00June 30th, 2016|Templates/Assets|

NXPowerLite PowerPoint Add-in

PowerPoint file size too big? Sometimes that’s okay if it has embedded videos, or just has a lot of slides. But if your 11 slide presentation has no videos and is 30+ MB, it is time for some file optimization. PowerPoint has built in tools to optimize images and multimedia – and they continue to improve. But for image optimization, I prefer to use one of the 3rd party add-in options, the NXPowerLite PowerPoint Add-in.

For TLC Creative Services, we have NXPowerlite installed on all computers and use as needed. As stated on their site, what this add-in does is, “Shrink Your Files.” I’ve put together a quick explanation of how we use this at TLC.

NXPowerLite

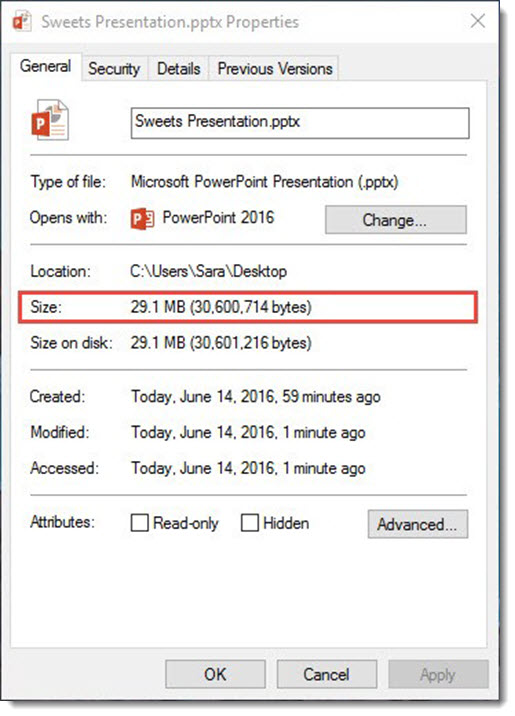
In this example, we’ve added a HiRes image to a PowerPoint Presentation. Our simple 10 slide presentation is a 29.1 MB file.
NXPowerLite PowerPoint Add-in-1

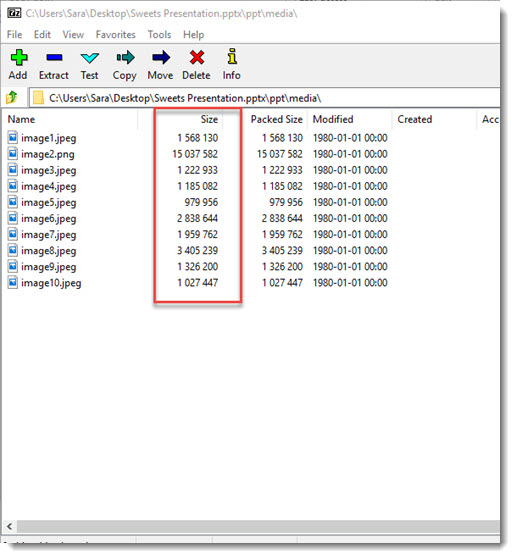
The images within the presentation are 15MB, because they are far larger than HD projection, most are “print” quality resolution. By using the NXPowerLite PowerPoint Add-in, we can optimize these images in order to reduce file size.
NXPowerLite PowerPoint Add-in-2

Step 1: Save your presentation.

Step 2: Go to the ADD-INS tab > OPTIMIZE WITH NXPOWERLITE

NXPowerLite PowerPoint Add-in-3

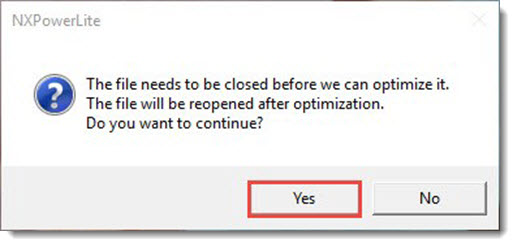
Step 3: Select YES at this pop up dialog (unless you do not want to save over this file because you did not do Step 1 yet, then cancel, save the presentation and come back to this step when you can select YES).
nxpowerlite-4

Step 4: Custom the NXPowerLite SETTINGS.
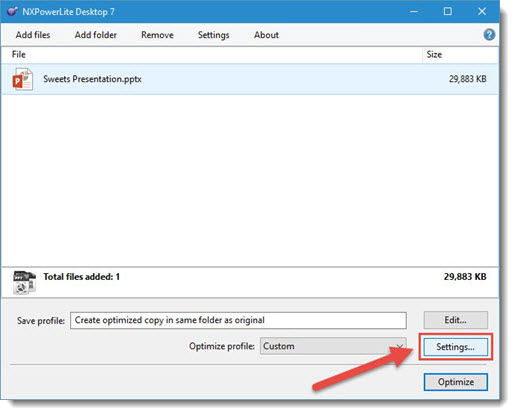
NXPowerLite PowerPoint Add-in-5

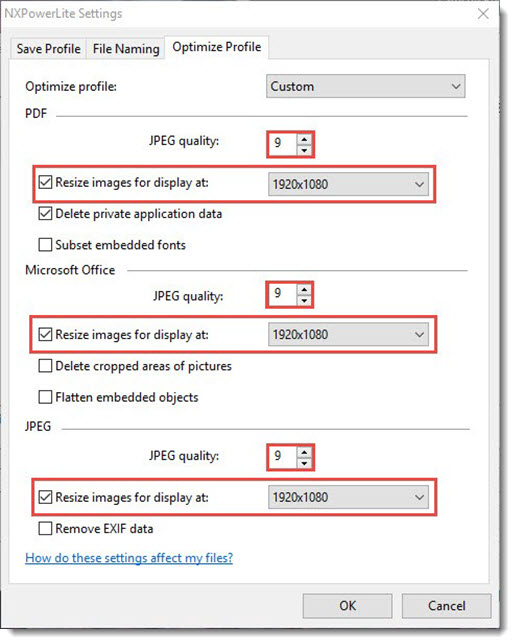
Step 5: This should be a one-time process as NXPowerlite will remember your custom settings.

  • JPEG quality =9 on all three options
  • Resize Images For Display At = 1920×1080 on all three options
  • delete Cropped Areas in Pictures = NOT checked
  • Flatten Embedded Objects = NOT checked
  • Click OK to save these settings and close the Settings dialog box
NXPowerLite PowerPoint Add-in-6

File Naming

Before we Optimize the file click on the File Naming tab. Here you can customized the text prior to Optimizing the file.

1) File Naming Tab

2) You can add custom text that will be added to your Original file name

3) The custom name will be added AFTER your file name

4) The custom name will be added BEFORE your file name

NXPowerLite PowerPoint Add-in-12


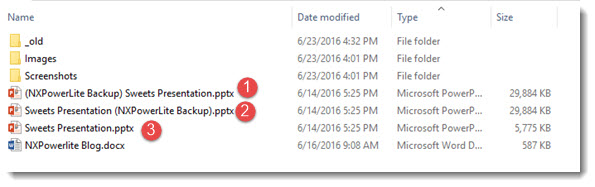
Here’s an example of the Outputted files

1) Backup of the original File name with the Custom Text BEFORE

2) Backup of the original File name with the Custom Text AFTER

3) Optimized file gets outputted with Original File Name
nxpowerlite-11


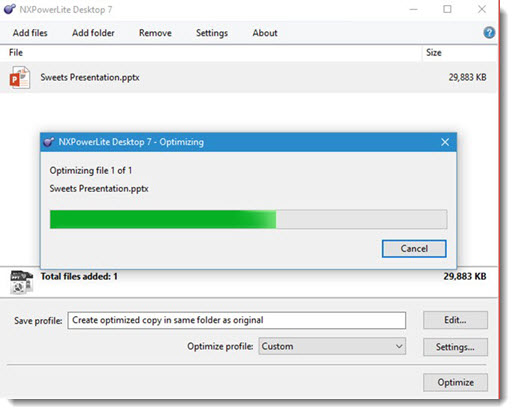
Back in the NXPowerLite dialogue, confirm the presentation is selected and click OPTIMIZE.
NXPowerLite PowerPoint Add-in-7

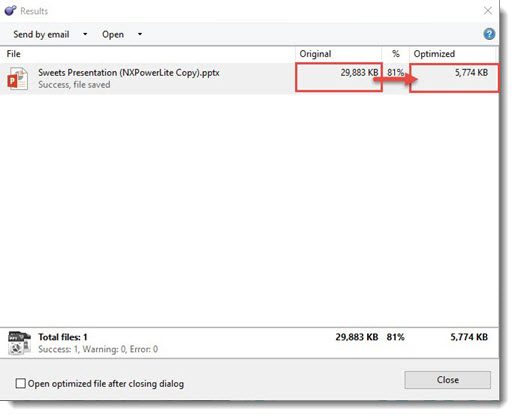
When NXPowerlite is finished, it displays the original and the optimized file size. In your project folder will be both the original (name now appended) and the new optimized version.
NXPowerLite PowerPoint Add-in-8

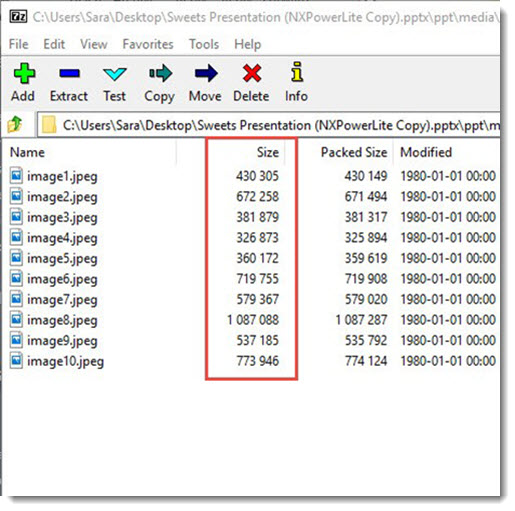
Looking at the new optimized file, all of the images have been adjusted to HD (1920×1080 display resolution) and are approximately 6 MB (with no visible quality loss for the slide show)!
NXPowerLite PowerPoint Add-in-9

From the entire TLC team, thank you to the NXPowerLite PowerPoint add-in for making our jobs a bit easier and quicker!


– Troy @ TLC

 

By |2016-08-10T08:00:49-07:00June 29th, 2016|PowerPoint, Resource/Misc, Software/Add-Ins|
Go to Top