The PowerPoint® Blog

I work with PowerPoint on a daily basis and I am very honored to be a Microsoft PowerPoint MVP. We have a talented team of presentation designers at TLC Creative Services and ThePowerPointBlog is our area to highlight PowerPoint tips, tricks, examples and tutorials. Enjoy! Troy Chollar

Find and Replace Double Spaces in a Presentation

[text]Presentations are the creation of many people copy/pasting content into a single slide deck. One of the common content edits is double spaces in sentences. Here is a quick and easy method for removing them.[/text]
[text]1. On the Home ribbon, select “Replace” on the far right.[/text]

replace double spaces 1

[text]2. Under “Find what:” Hit the space bar 2x. Then, under “Replace with:” Hit the space bar 1x. Click “Replace all.”[/text]

replace double spaces 2

[text]3. PPT will find all instances of double spaces and replace with a single space with 1 click! It searches the Notes section as well as slides, but it’s certainly very helpful in catching the ones hiding in slide content.[/text]

replace double spaces 3

[text]4. If you wanted to see exactly where the erroneous double spaces are, you can opt to click “Find Next” and PPT will take you slide by slide highlighting where the spaces are. You can then choose which ones to change by clicking “Replace” rather than “Replace all.”[/text]

replace double spaces 4

By |2016-08-10T09:02:39-07:00July 22nd, 2015|Tutorial|

Awesome Screenshot.com – online screen capture app

[text]All of the designers at TLC use Snagit for screen shot needs; it is installed on every computer we have. Windows and Mac OS both have built in screen capture options that are cute and nice, but not robust. We recently found Awesome Screenshot.com which is a great online screen share, and edit app, something we can use when working on a guest computer.[/text]

Awesome screenshot 12

[text]Awesome Screenshot is free for 30 images and 1 project folder. The premium option (currently $8.99 promo, regularly $11.99 year) has unlimited image captures and project folders. The Chrome browser is the only one that supports the add-in, but the annotation and editing features can be used on any browser. The Chrome add-in makes Awesome Screenshot a more full featured option (eg. Use Chrome for this app).
[/text]

Awesome_1

[text]Possibly one of the coolest features of Awesome Screenshot is adding comments to screenshots (much of what we use SnagIt for) and sharing directly from the site. In addition, other users are able to comment on the screenshot image as well, so this can make collaborative feedback simpler than ever! Some other cool tools are highlighting or blurring text. But the editing tools are more limited than other apps with fewer less colors, shapes, etc. Still, the ability to organize the screenshots by project is unique and pretty awesome (pun intended)![/text]
[text]Use Chrome and create an account. Under the Tools tab, select Add to Chrome, and follow the steps to install.[/text]

[text]After installed, Chrome has this app icon.[/text]

Awesome_2

[text]Click the Awesome Screenshot icon to view capture options.[/text]

Awesome_3

  • Capture visible part of page: Captures only the visible area of the current browser page
  • Delayed capture: Captures only the visible area of the current browser page three (or five) seconds after clicking
  • Capture selected area: Allows you to select the area of the current browser page to capture using a marquee selector
  • Capture entire page: Captures the entire area of the current browser page (include non-visible areas that require scrolling to see)
  • Select a local image: Allows you to choose an image that is saved locally to your computer or drive[/list_item]
  • Capture desktop: Allows you to select from any open windows or computer screen(s) to capture
  • My projects: Takes you to the Projects library
  • Options: Allows you to update the settings, such as image format, shortcut, and delay time specifications

[text]In addition, you can drag and drop existing images into the open project folder of your choice or select “Add images” from the project folder page on the website.[/text]

[text]Capture a screenshot (all or part of the screen) and it shows up in the simplified Annotation (or edit) screen. Save the image to a project folder to get to the full editing options.[/text]

Awesome_4

[text]There are several save options – save online for best collaboration.[/text]

Awesome_5

[text]To edit, click the Annotation icon while hovering over the image.[/text]

Awesome_8

[text]The top bar is the editing tools: Crop, draw, shapes (rectangle or oval), arrows/lines, text, blur, color, line weight, undo, redo, reset, delete shape, and zoom.[/text]

Awesome_9

[text]Save edits and add comments. By default, it goes to the comments page. You can also select other images in the project folder, share the image, return to the Annotation page, or view the comments list.[/text]

Awesome_10

[text]Click the “eye” icon to exit the page, or right-click select Save image as to get a local version of the image on your computer – which can be added to a presentation.[/text]

Awesome_11

[text]Thanks to staff designer Michelle for this review.
– Troy @ TLC[/text]

By |2016-08-10T09:03:57-07:00July 17th, 2015|Software/Add-Ins|

Office 2016 for Mac – Available!

Office for Mac 2011, the current version, has been in existence for 4.5 years. That is a very long time between upgrades. But Microsoft has (finally) released Office 2016 for Mac – and it is a very good upgrade.

O2016

If you are an Office 365 subscriber, Office 2016 for Mac is part of the subscription and an easy upgrade. If you are a retail or corporate licensing client, you may have a few months until Microsoft has it available to you.

I have been fortunate to be running the beta version for the past few months and have found Office 2016 has good parity with Office 2013 for Windows (not perfect, but much, much better). The interface uses the Ribbon styling (although not all buttons and options are in the same place or available) and the functionality is near identical. The ability to move presentations between platforms has never been better (again, not perfect, but a huge step forward). This is a major undertaking by the Microsoft Mac Office team (completely coding a new version of Office) and I expect Office 365 subscribers to have a steady stream of refinements rolled out (which is great!).

– Troy @ TLC

By |2016-08-10T09:04:24-07:00July 14th, 2015|Software/Add-Ins|

Adobe Stock Image Service

For TLC Creative Services’ design projects, we have multiple stock asset subscriptions for images, video, music, etc. I recently noticed Adobe has a new stock image option called “Adobe Stock.” Being an Adobe Creative Cloud subscriber, I was excited that this may be a new CC benefit – which it is, and is not.

adobe stock 1

Adobe Stock is a new service that offers royalty-free, high quality photos and graphics. Currently Adobe lists a library of 40 million “world-class, curated images and graphics.”  The image selection is very high quality, but many images are the same (or very close) to those found on other services (which is not necessarily bad). I was hoping to find it an included option with Creative Cloud subscription (wishful thinking), which it is not (reality). It is a separate paid service that can be added to a Creative Cloud subscription.

adobe stock 3

One interesting difference from other services is there is only one size available, BIG. File formats are .jpg or .eps. The other big differentiator from other services is images can be managed directly from Photoshop, Illustrator, and InDesign using Libraries. Watermarked preview images are saved directly to your Adobe CC account’s library as they are added to work. If you decide to purchase, it can done directly inside the app AND the watermarked images are automatically updated to the high res, non-watermark version (which is a pretty fantastic feature!).

adobe stock 4

Cost:

    • $30 monthly for 10 images. Unused images will rollover for up to 120 images. Additional images cost just $2.99 each.
    • The other plan available is $200 a month for 750 images.

Will we be adding Adobe Stock to TLC Creative Services’ options? Not immediately. The cost (for the 750 images per month) is competitive with what we are currently using. When subscription services are up for renewal, Adobe Stock will definitely be one of the options to consider.

– Troy @ TLC

By |2016-08-10T09:05:05-07:00July 10th, 2015|Resource/Misc|

PowerPoint for Print Poster Design

“PowerPoint Documents” is our internal term for using PowerPoint as the design tool for print/PDF documents. These do not use slide transitions, animations, or other “presentation” features. This example is a part of previous post project (sync’ing narration to animated slides), where in addition to the presentation design we developed a 24″x36″ poster that visually coordinated with the presentation design.

SofnetPosterImage_1 SofnetPosterImage_2

Note: Typically we would design this in Adobe InDesign for assure print quality, full bleed design, etc.

The request was to develop in a PowerPoint so edits could be completed by the client for each talk. We setup with a custom page size, optimized the graphics for the larger slide size, added the requested content. The end deliverable was the 2 posters, 2 slides in a PowerPoint document. The client was able to revise content, create PDFs to send out or print (and we included print quality specifications regarding PDF from PowerPoint resolution).

– Troy @ TLC


By |2016-08-10T09:05:34-07:00July 8th, 2015|Portfolio, PowerPoint|

Talk Narration in the Presentation

With audio being so easy to embed into PowerPoint, we are having many clients request we create a version of the presentation with their talk embedded into the slides.

PowerPoint does have audio recording features, but we opt for pre-recorded audio that is recorded distraction free of the slides, higher audio quality and we can edit in an audio editing program. We also develop 1 audio file per slide (if a client provides one audio file for the entire presentation we chop it into multiple files using Adobe Audition, or directly in PowerPoint by trimming the file to each slide needs).

Sofnet_1

For this specific project, we were provided individual audio clips for each slide. We sync’d the animations to the audio narration, which is a great end result, but a tedious process of listening and re-listening to the entire audio file while adjusting the animation timing to get everything perfect (an animation timeline feature I would really like to see the Microsoft PowerPoint team update!). Slide transitions and all animations were set to automatic.

Sofnet_2

We provided 3 deliverables for this project:

1. Editable PowerPoint, with on-click animation and transitions.

2. Editable PowerPoint presentation with audio narration embedded and animations & transitions set to auto.

3. A video version of the presentation (exported direct from PowerPoint).

– Troy @ TLC

By |2016-08-10T09:06:05-07:00July 6th, 2015|PowerPoint|

TLC Creative Services Receives “Best Of” Award

It is small and for local businesses. But not that small of an area, TLC Creative Services is in a small city of 100k, bordered by cities of another 200k. I know there are not a lot of graphic design companies in our area, but we are very proud to receive one of the BEST OF 2015 awards!

2015_Murrieta_Award

– Troy @ TLC

By |2016-08-10T09:07:23-07:00March 21st, 2015|Personal|

PowerPoint vs. Word vs. InDesign – Which Should I Use?

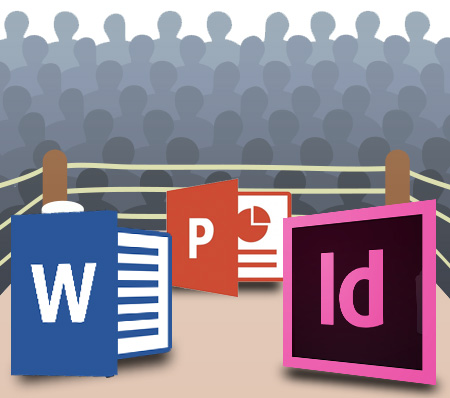
Every program has strengths and weaknesses. Below is what the TLC Creative Services design team views as the strengths and weaknesses of designing for print among the 3 major applications we use. So here is how Microsoft Word, Adobe InDesign and Microsoft PowerPoint fight it out in the boxing ring:

PPT_Print_Applications

Adobe InDesign   PPT_Print_Adobe Application

– PRO: Professional desktop publishing software that has the highest level of control of layouts, print specific output, multipage control, unlimited master layouts with finite control, and no size or resolution constraints. Excellent image control and color use tools (in RGB, CMYK, Spot, etc.).

– CON: large learning curve, specialty software that costs more (and usually not provided across corporate users).
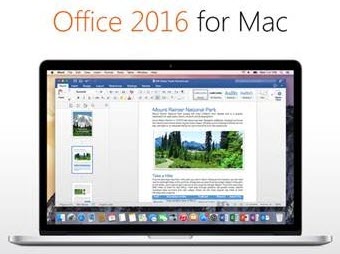
Microsoft WordPPT_Print_ Word Application

– PRO: Installed on virtually every computer (and many tablets & Smartphones). Very good control over text flow, line wraps, and text across multiple pages. Good output to print needs.  Easy and professional table and chart creation. Very good color use tools (if setup in document template correctly).

– CON: No bleed or printer crop marks, limited (or difficult to setup/use) multiple master layouts, difficult working with inserted graphics/tables/charts that do not align to column layout.

Microsoft PowerPointPPT_Print_PowerPoint Application

– PRO: Installed on virtually every computer (and many tablets & Smartphones). Great multiple master layout capabilities, great layout customization per page, excellent image control. Easy and professional table and chart creation. Very good color use tools (if setup in document template correctly).

– CON: Limited to low resolution output (it does not matter if you have a high res 300DPI image, it is output the same as lower res images). No bleed or printer crop marks (although, there are tricks to manually adding – but it is not like InDesign’s automatic features).


AND THE WINNER IS…. PPT_Print_8

There is no clear winner. Everything depends on what application you use most, what application you have installed and what the final print document is going to be used for. But for TLC Creative Services, the order is:

1. InDesign: This is the industry standard, the best option for print layout projects, and we have a professional team of designers that know this application. This is our go-to application when we are working with print-houses, publishers, etc.

2. PowerPoint: We are presentation design focused, so we know PowerPoint. PowerPoint’s multiple master layouts and flexible per page layout options are wins for us in developing custom layouts, similar to how we approach layouts in Adobe InDesign. We use PowerPoint for print-to-PDF (where a PDF document is the final “print” piece) because it allows clients the flexibility to update documents on their own.

3. Word: The few advantages Word offers (multipage text flow, image wrap, etc.), do not win over the flexible nature of PowerPoint – unless it is client request.

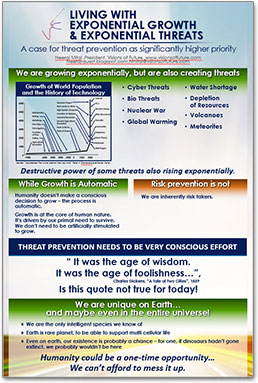
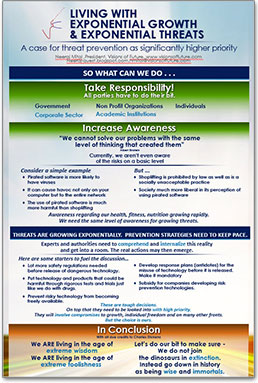
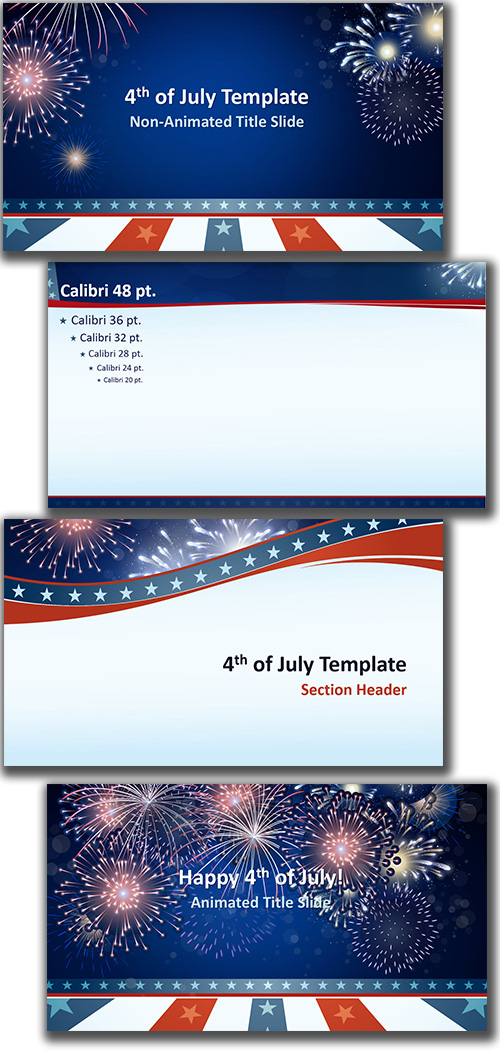
Up next, some examples of PowerPoint-to-Print projects.

– Troy @ TLC


By |2016-08-10T09:07:41-07:00March 4th, 2015|Resource/Misc|

PowerPoint for Print Document Design (Really!?)

PowerPoint is designed for visual presentation design and projection. I clearly remember several meetings and discussions with Microsoft as they worked on PowerPoint 2007 about improving the print capabilities of PowerPoint – the laser printer, handout, PDF capabilities. Fast forward to Office 365 and PowerPoint 2013 and I am seeing a significant number of project requests and forum questions on how to use PowerPoint to design print documents. For this full month, ThePowerPointBlog is focusing all posts on using PowerPoint for print document design.

PowerPoint for print 2

Before we dive in with showing examples of PowerPoint for Print projects TLC Creative has done or providing tutorials on how to setup PowerPoint for print, let me establish a few technical terms and perspective:

  • Quick Print and Laser Print: This is printing a document on a black/white or color laser printer, it can be sitting on your desk or a large system at a Kinkos. They all have the same traits, digital printing and not capable of printing to the edge of the paper.
  • Offset Printing: This is “real” printing. Print design files are output to separated film and each plate is applied as individual passes of ink. From the printer, the paper needs to go to finish cutting to have a ready-to-use print document. Note: Offset printing can have the print image go to the edge of the paper.
  • Resolution: Web and presentation images are 72DPI – or low resolution (and this is a big generalization for the sake of an easy conversation). Print (eg. offset press) is 300DPI – or high resolution.
  • Vector Graphics: Images, or text, that are based on geometric shapes and mathematical equations (see that high school geometry class was important after all!). Note: Vector graphics can be enlarged to any size without quality loss.
  • Raster Graphics: Images that are created from dots or pixels. Note: The image is at a set size and enlarging lowers the visual quality.
  • Bleed, Printer vs. Reader spreads, CMYK vs. RGB, and many other print industry terms need to be understood by those using PowerPoint to create print documents.


So, why am I qualified to lead a discussion on PowerPoint-for-Print? Because before digital printers had quality output, and before PowerPoint (Flash, Director, and Harvard Graphics) made it easy enough for virtually anyone to create layouts, I worked in the print industry turning design files into separated film plates for the printing press operators. I am not saying I am old, but as a youngster I was lucky enough to enter the design industry as the digital revolution was in process. I experienced the true printing process and learned the classics of visual design – all great things that carry over into the wonderful world of PowerPoint presentations.

PowerPoint for print 3

Because now, everyone has a computer – tablet – and smartphone that has PowerPoint (thanks Microsoft for making Office available everywhere!), everyone can now use PowerPoint to design more than slides. In addition, the ease of sourcing images, video, custom fonts, design accent graphics and low cost printing all have created an environment in just the past few years for PowerPoint to become the default print design application – if only it did not have so many limitations!

Next post is “PowerPoint vs. Word vs. InDesign – which should I use?

– Troy @ TLC

By |2016-08-10T09:08:03-07:00March 2nd, 2015|Personal, Resource/Misc|
Go to Top