Resource/Misc

Using Adobe Typekit Fonts

Adobe Typekit is a combination between an online tool that previews fonts and an installer that adds them to a computer. Adobe TypeKit is included with Adobe Creative Cloud subscriptions.
Adobe TypeKit -1


Can Presentation Apps Use Adobe Typekit Fonts?

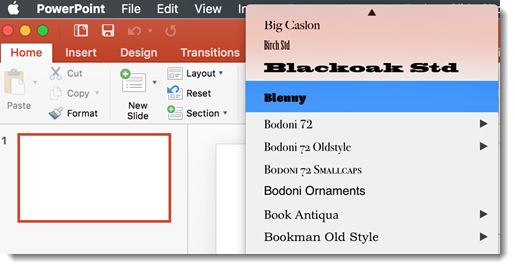
Yes, if we are talking about desktop PowerPoint and Keynote. Once the Adobe Typekit font is selected and synced to the computer, the font is available in other applications. At TLC, we use PowerPoint for Windows and Mac and Apple Keynote – we can confirm Typekit fonts are available for all of them. Note: PowerPoint may need to be restarted for the font to become available in the font menu.

Adobe Typekit Windows Mac
PowerPoint YES YES
Keynote N/A YES


HOW TO FIND AND INSTALL ADOBE TYPEKIT FONTS

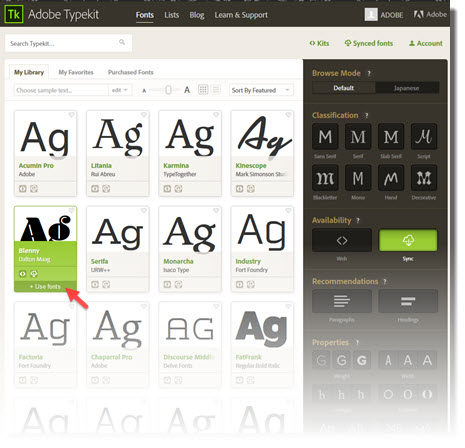
Adobe Typekit is a hybrid app that is web-based, and can also be viewed through the Adobe Creative Cloud app and most Adobe applications (PhotoShop, Illustrator, InDesign, etc.). For our example, we are looking at Typekit through a web browser, which has the most options. Select the font to use in your presentation by going through the font library, select by clicking +USE FONTS (there are a lot of ways to view and search for fonts, and there are thousands of fonts).
adobe typekit menu


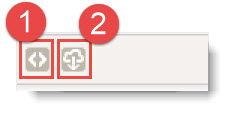
This is where things get a bit confusing. There are two options for using the font: (1) Web Sync, which will make the font available for web use (ie. a website), or (2) Creative Cloud Sync, which will make the font available for use in Desktop apps on a computer. We are installing fonts to a computer for use in PowerPoint.
adobe typekit

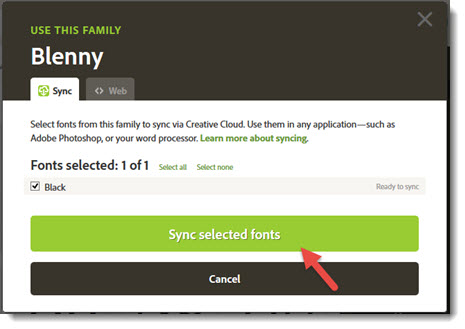
After selecting fonts and use, click SYNC SELECTED FONTS and they will  be installed on the computer.
adobe typekit sync

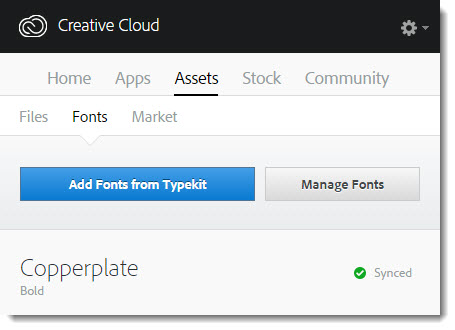
The Creative Cloud Desktop application will open and prompt you to add fonts from Typekit. Below that is a list of all Adobe Typekit fonts currently available.
adobe typekit -1

PowerPoint and Adobe Typekit

All Adobe Typekit fonts can be used by PowerPoint on both Windows and Mac, but there are some considerations:

  • PowerPoint needs to be started AFTER fonts are installed, or the new fonts will note show up in the font list.
  • Typekit fonts are considered “custom fonts” and will need to be installed on any computer that is going to show the presentation.
  • Only a computer that has Adobe Creative Cloud installed and has an active user account logged in to an Adobe CC account is going to be able to sync and install Typekit fonts.
  • PowerPoint will not warn you that fonts are missing, nor will it tell you where the fonts are from (So an end user needs to look at the font list for missing fonts and know they are Typekit fonts that they can install. TIP: Add a hidden slide or off-slide note about custom fonts and where to find them to help other users).
  • Typekit fonts installed on a computer are not actual files that can be accessed and copied to other computers.
2

Keynote and Adobe Typekit

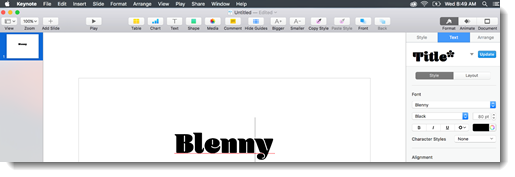
All Adobe Typekit fonts can be used by Keynote, but there are some considerations: Keynote dynamically recognizes newly installed fonts, so there’s no need to restart it after fonts are installed (great!).

  • Adobe Typekit fonts are considered “custom fonts” and will need to be installed on any computer that is going to show the presentation.
  • Only a computer that has Adobe Creative Cloud installed and has an active user account logged in to an Adobe CC account is going to be able to sync and install Adobe Typekit fonts.
  • Adobe Typekit fonts installed on a computer are not actual files that can be accessed and copied to other computers.
2


-Troy @ TLC


By |2016-08-10T08:17:25-07:00May 4th, 2016|Resource/Misc, Software/Add-Ins, Tutorial|

Fonts You Can and Can’t Use in PowerPoint

With the millions of designs available, fonts have the ability to make text display anywhere from serious to fun.

Fonts_1

Fonts are separate files that must be installed on each device the custom font is needed. There are Microsoft Fonts, Adobe Creative Cloud Typekit, Google Web Fonts, custom fonts from Font Foundries and websites everywhere – but what is a presentation to use? When selecting fonts, you are selecting physical files.

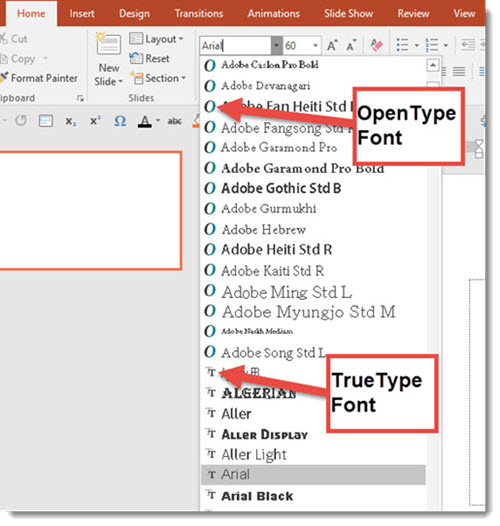
For example, in PowerPoint, all fonts shown in the font drop down menu are actually individual files installed on that computer (TIP: If there is not an “O” or “TT” icon next to a font, it is not installed on that computer and is not going to display as designed). So first, let’s overview the common types of fonts that can installed.

font-type-3


OpenType

font_types-1

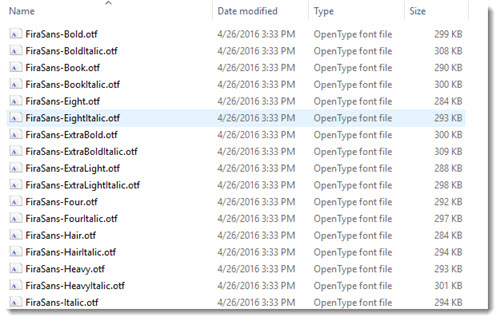
In the history of digital fonts, OpenType is the newest format, with applications adopting its use around the 2,000’s. The extension for OpenType fonts is .OTF and in PowerPoint’s drop down font list, OTF fonts are identified by a large “O” icon. One advantage of OpenType fonts over others is the font file format provides more typographic design options which means more symbols/glyphs/language support/display options. The greater display options (OpenType does not have one display method, but the ability to use legacy display standards and new display standards) mean it is the font file format of choice for newer devices and OS’s – think mobile everything.

Fun Fact: OpenType is a registered trademark of Microsoft, and was developed because Microsoft was unable to license Mac’s “GX Typography” system. Microsoft and Adobe partnered to develop OpenType. Get the full history of OpenType development at this wiki page.


TrueType

font_types-2

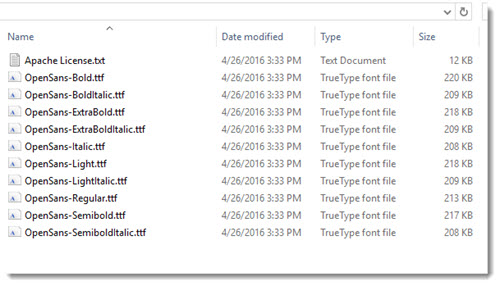
TrueType is still the most common font file type. The extension for TrueType is .TTF and in the PowerPoint font drop down, TrueType fonts are identified with a “TT” icon. True Type is older (than OpenType), a bit less robust when it comes to designing and displaying fonts, but it is the dominant font format used – partially because it is less expensive to license.

Fun Fact: Apple was the first to use TrueType in its 1991 OS with 4 fonts (Times Roman, Helvetica, Courier, Pi), which is originally licensed to Microsoft for free. Full history of TrueType development at this Wiki page.


PostScript

The last font file format for this discussion is our oldest digital font format, which is the most complex. PostScript fonts are actually 2 files. One is for the onscreen display and the other is used for printing where it literally outlines every letter and symbol sent to the printer. The extension is .PS, and PowerPoint does not support PostScript fonts – so we do not see them in the font drop down menu, even if they are installed on the computer. What makes PostScript fonts important for today’s presentations is PostScript fonts were the first font technology to use mathematical computation to dynamically redraw fonts with vector Bezier curve to allow fonts to be any size. PostScript fonts were also the first to contain multiple character sets (ie. multiple languages).

Fun Fact 1: I remember working with PostScript fonts as the only solution for high quality graphic design and typographic work – and spending huge amounts to buy a custom font for projects.

Fun Fact 2: Printers used to be “PostScript-Ready,” meaning the printer actually had PostScript processing built into it.

Fun Fact 3: Adobe developed Type 1 and Type 3 fonts, which are PostScript file types, back in 1984! There was an earlier Type 0 before those, and development with Type 3-4-5-up to 42 (which was introduced in 2010). Full history of PostScript development at this Wiki page.


-Troy @ TLC

By |2016-08-10T08:18:10-07:00May 2nd, 2016|Resource/Misc, Tutorial|

Hightail Spaces Proofing Tools

Hightail’s newest feature, Spaces, offers lots of online proofing and collaboration tools (see previous post for review of using Spaces video proofing). In addition, Spaces is able to upload and review a variety of different file formats.

hightail_10

Video files (.mp4, .wmv, .mov, etc.):

Allows you to view the video directly in the Spaces browser window (not necessary to download), comments can be placed on specific frames throughout the video as well.

1 Spaces Proofing

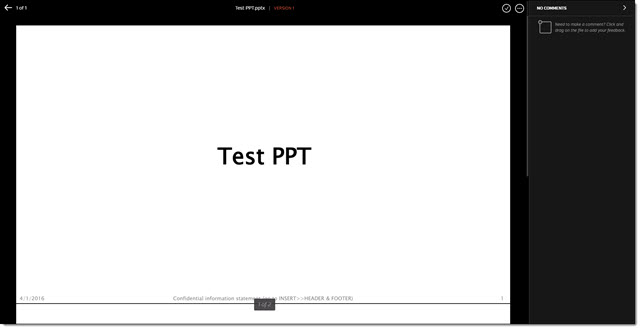
PowerPoint (.ppt, .pptx):

Allows you to view previews of the slides but the preview is a static rendering of each slide – no animation/transitions/videos (like a PDF proof).

2 Spaces Proofing

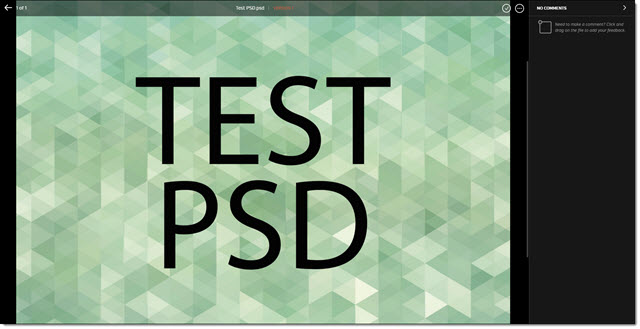
Photoshop (.psd), Illustrator (.ai), Image (.png, .jpg, etc.), and PDF:

All show a preview image of the file, which is fantastic to preview the editable files, but only on the viewable layers when the files were saved.

3 Spaces Proofing

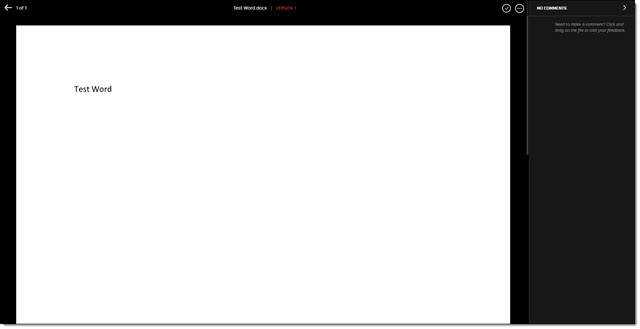
Word (.doc, .docx):

Only shows a preview of the file – again like a static PDF proof; however, you can use the comment feature to highlight changes needed.

4 Spaces Proofing

Overall, the features offered by Spaces are very useful to anyone reviewing and collaborating on a project of any kind.  The only real drawback is the limitation with previewing PowerPoint files directly in the browser (which is a big deal to us!). Other than that, proofing is very simple and worthwhile to ensure a smooth collaboration process.


-Troy @ TLC
By |2016-08-10T08:20:48-07:00April 25th, 2016|Resource/Misc|

Hightail Spaces Video Proofing

Hightail, formally YouSendit, has introduced a new tool, Hightail Spaces. So in addition to the file sharing services, they have added an online tool for video and image feedback.

hightail spaces 10

Using Hightail Spaces for client file review is pretty straight forward and similar to Wipster (see previous post). Here is a quick walk through of the collaborative process:

1. Log in (or sign up) to your account, and click on the Spaces tab.

2 Hightail Spaces

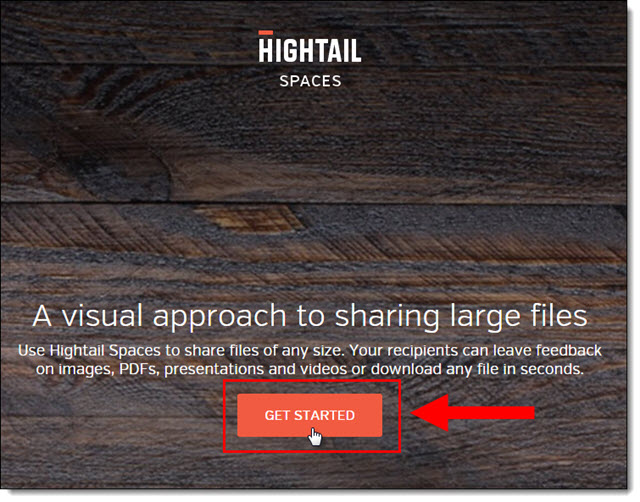
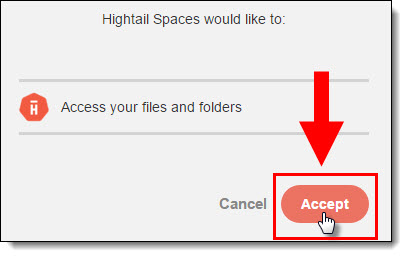
2. If it is your first time accessing, click Get Started, and Accept.

3 Hightail Spaces

4 Hightail Spaces

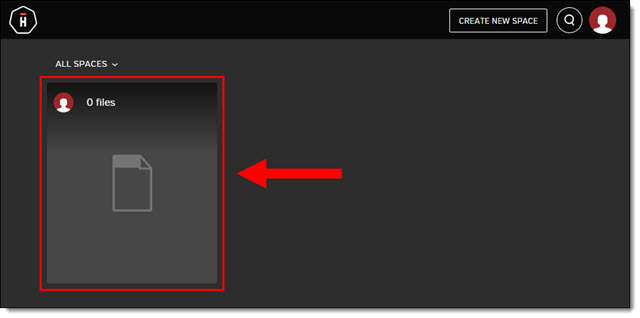
4. All of your Spaces show up, which makes it easy to have separate folders/Spaces for each client or project.

5 Hightail Spaces

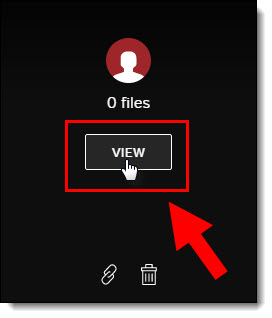
5. Hover over a Space and click to View any files, get a share link, or delete that Space.

6 Hightail Spaces

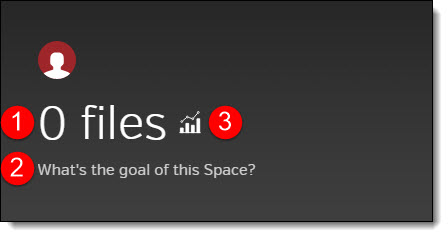
6. Spaces can be personalized to a project or client with a: (1) custom name and (2) description. The (3) chart icon shows the analytics of that Space.

7 Hightail Spaces

7. When viewing a space, use the Share button to invite clients to securely view any files in there.

11 Hightail Spaces

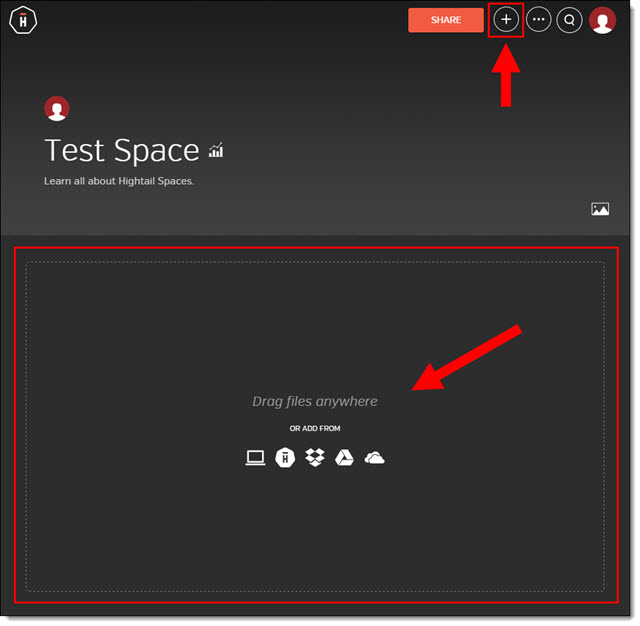
8. To add a video for review, either Drag and drop or click the plus icon (which also allows files to be uploaded from other services: Dropbox, Google Drive or Microsoft OneDrive).

8 Hightail Spaces

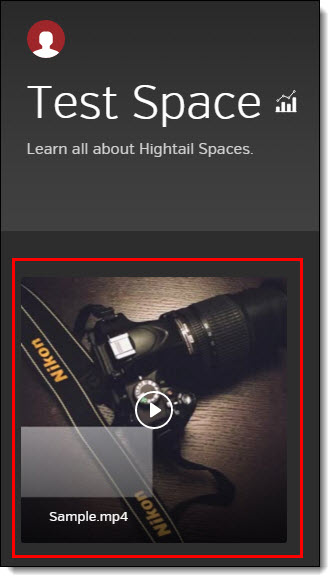
9. Once uploaded, every file is displayed with a preview thumbnail.

9 Hightail Spaces

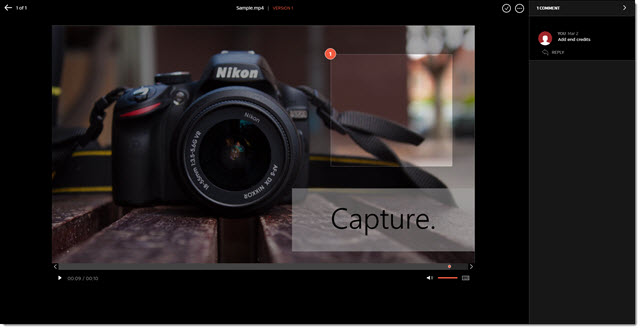
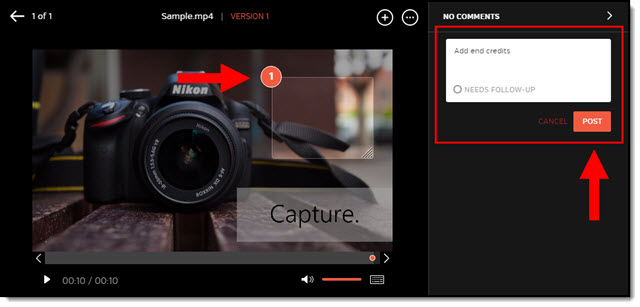
10. To review, your client just clicks on the thumbnail which opens the video preview and the comments side panel. To add a comment, drag a marque directly on the video and type any comment, then click Post.  The comment pane lists all of the comments and replies. A really great feature is that the video playback has a red dot for each comment.

10 Hightail Spaces

10. Spaces allows multiple versions. The current version is displayed at the top of the page. Previous versions are viewable by clicking on the version number in the list.

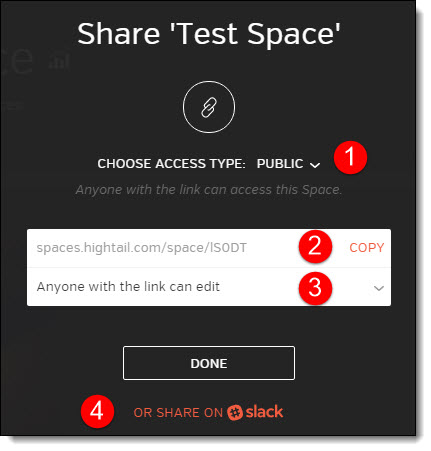
12. Access and share links are controlled by the overall Space and the individual files. (1) Access can be public or private (2) Copy a link to send in an email, text or IM. (3) Access options include edit, comment, download, and (4) Share directly on Slack (if you use that).

Note: Download options are only available with a paid subscription.

12 Hightail Spaces

Hightail Spaces is another client review option to check out. There are both free and paid options.


-Troy @ TLC
By |2016-08-10T08:21:07-07:00April 22nd, 2016|Resource/Misc|

Wipster.com – Online Tool for Video Review

Videos projects, or PowerPoint decks exported to video, are sometimes difficult to send to a client due to large file size. They are also difficult for the client to provide exact feedback. Wipster is one online tool that provides a solution to both difficulties.

Wipster_10

Wipster is an online tool that makes getting video to a client, and giving them a way to give you feedback, very easy – and secure. Upload a video to your Wipster account, send a secure link to your client and they can view online, and have a set of tools to make comments and feedback for you to review. Feedback is pinned to a specific frame of the video so you know exactly what is being referenced.

Here is a quick demo of using Wipster to get feedback, or approval, of a video:

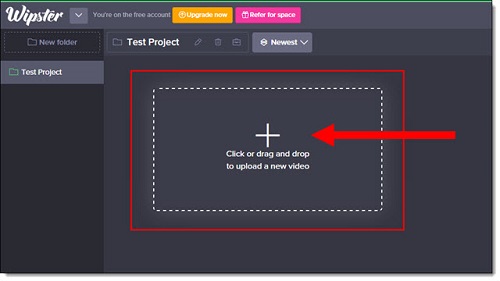
1. Upload the video with a drag and drop system (or click upload to get an upload screen).

1_Wipster

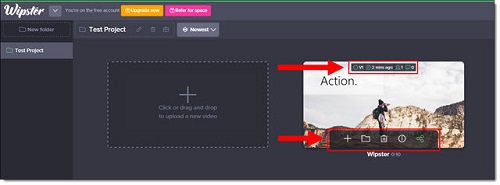
2. Review uploaded video or a new version (there is a versioning control built in).  Links can be sent to videos, information can be added and they can be moved to a specific folder or deleted. All the vital information is also available: version number, the upload date, the number of reviewers, and the number of comments.

2_Wipster

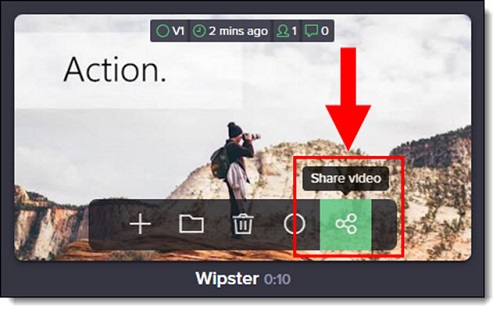
3. To share the video, select the Share video

3_Wipster

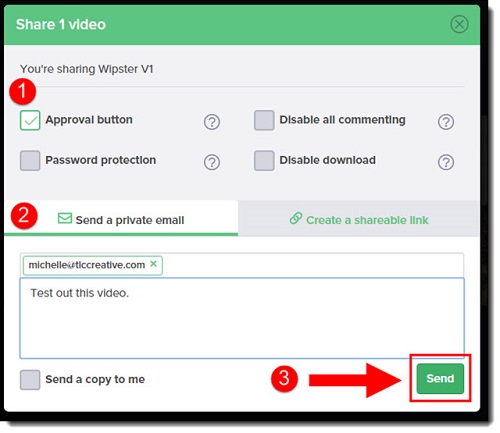
4. Pick the review options, including feedback notes and an approval button. The video can be password protected, downloads disabled, and commenting turned on/off.

4_Wipster

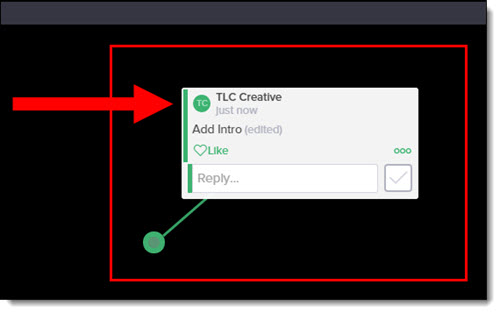
5. When reviewing, adding comments is super easy and intuitive. Click and drag a window around the exact area, on an exact frame, to provide feedback on. Then, type feedback into the comment dialog box. All reviewers are notified of new comments and they can reply to them.

5_Wipster

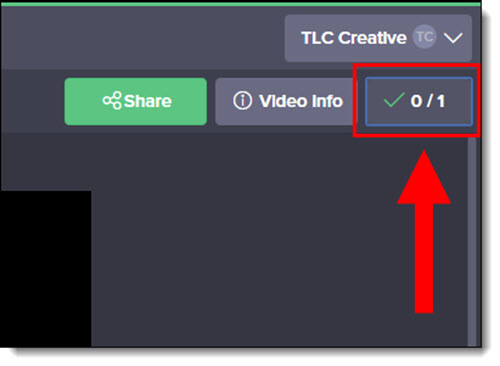
6. To view all comments as an action To Do List, click on the button in the upper right hand corner.

6_Wipster

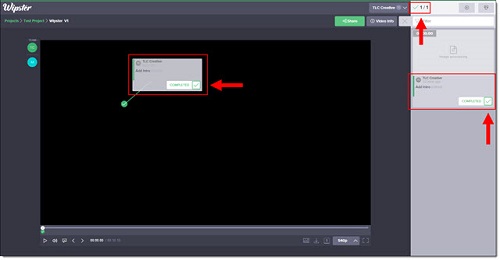
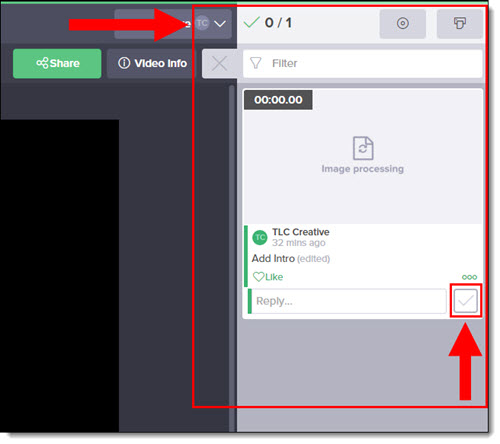
7. A list of all existing comments will expand on the right side of the screen. As you complete each item, check the box next to the Reply…

7_Wipster

If an updated version is created, rather than setting up a new Wipster review, just upload the new version to the original video. Everyone is notified of the new version, the feedback process can simply continue until everything is approved and you get the electronic approval to finalize and turn on the download link so the client can have the video for use.

8_Wipster

There is a free account option, and approximately $15 month for unlimited video proofs. Wipster just announced a new feature last week that integrates directly into Adobe Premiere called “Wipster Review Panel for Adobe Premiere” which may change the way we implement client feedback on video projects.

-Troy @ TLC
By |2016-08-10T08:21:35-07:00April 20th, 2016|Resource/Misc|

How Do You Proof a Presentation…?

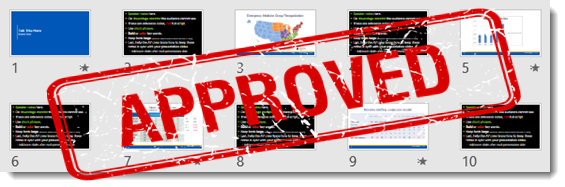
Developing a great presentation involves a lot of communication between designer and presenter. There are lots of options for supplying a proof to a client and receiving feedback and direction on content – some proofing rounds and processes are good, some hinder.

proof approved

On The Presentation Podcast, a recent episode was all about design studios sending proofs of presentations from clients, listen to it here.

Here is a quick overview of the 4 most common options for providing a proof:

  • PDFs are easy to create directly from PowerPoint, are easy to email, are mobile device friendly and have a great built-in commenting function. But they are static, so transitions, animation and video are not seen.
  • Video is also easy to export directly from PowerPoint and show all animations, transitions, custom fonts, etc. The downside is that the files can be large and there is not an easy way to provide feedback/comments.
  • Sending an editable PowerPoint file is the easiest option. The biggest concern is version control (who is working and minor items like custom fonts, client changes not being caught [for design, file size, etc.]) and ensuring what was designed is what is being seen.
  • Co-authoring and collaboration, which can be the built-in Office 2016 feature or an external program, have improved to the point of being a valid solution. But I find the most common issue is scheduling – designer and client having same time available to “meet” can be difficult.

The next few posts are going to demo some of the online proofing tools TLC Creative has been using.

-Troy @ TLC
 

By |2016-08-10T08:23:07-07:00April 18th, 2016|Resource/Misc|

NEW Podcast on Presentation Design!!

Yes! It’s true! You can now hear me and other Presentation Design professionals on a new Podcast entitled The Presentation Podcast! New episodes will be available 2 times a month and we’ll cover different topics each week!

new podcast logo_forPPTBlog

I am constantly listening to Podcasts, so I am extremely excited about the opportunity to put together a new Podcast specific to the presentation industry. The hosts are Nolan HaimsSandra Johnson and Myself. We will have discussions all about presentation design, best practices, running a design studio, tips & tricks and lots more so be sure to tune in!

Add The Presentation Podcast to your iTunes Podcasts and join us for the fun!

-Troy @ TLC
By |2016-08-10T08:29:12-07:00March 30th, 2016|Resource/Misc|
Go to Top