Using Morph for Animations
The PowerPoint Morph transition is PowerPoint’s best new animation feature!

We have been leveraging the fantastic new transition in lots of presentation projects since its release, including using Morph for animations. Here is another example where we used Morph as the animation effect. Our client wanted to show the above three statements. The real request was to emphasize each as they were addressed. Our first step was to convert the provided bullet list into a dynamic visual; the end result was the above slide.
For the “emphasize each” request, using the Morph transition as our animation, we created a dynamic “flip” animation effect. It also was something that did not look like “PowerPoint.” Below is a video of the final animation effect:
- After the slide layout was approved, we duplicated the slide 3X.
- On the first slide, we added the animated entrance effect for the 3 circles and text.
- On the second, third and fourth slides, we simply horizontally flipped each circle. No animation on these slides. The Morph transition created the nice twirl, or flip, animation.
- Done!

– Troy @ TLC
Probiotics Slide Makeover
This is a slide makeover from a recent presentation design project. For the project, we discussed the styling, end use, presenter style and content with our client. After developing a custom PowerPoint template, visual styling rules, and then a speaker support presentation based on the provided presenter script.

Not only did we learn a lot about Probiotics, but we developed slides like this that simplified 4 paragraphs of text into a clear visual message.
-Troy @ TLC
The Presentation Podcast Episode #11 Released Today!
A new episode from The Presentation Podcast with Troy, Nolan, and Sandy is available today! Listen to their discussion on “What is the Best Font Size” or add to your favorite podcasts at The Presentation Podcast.
![]()
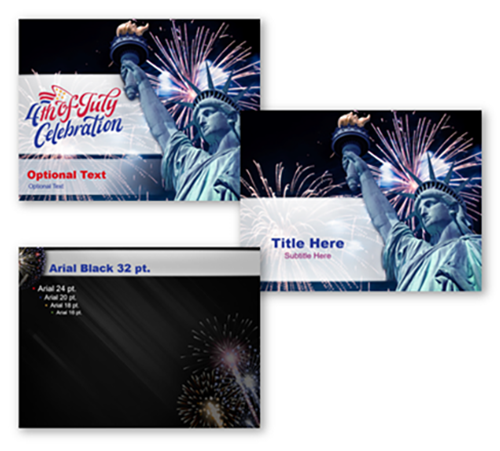
4th of July PowerPoint Template
In honor of our Nation’s Independence, we’ve put together a festive 4th of July PowerPoint template that you can download for your own use FREE. Download this PowerPoint 2016 Template designed by TLC Staff Designer Christie here (1mb).
Here is a great article about the 4th of July at History.com. Enjoy!
-Troy @ TLC
NXPowerLite PowerPoint Add-in
PowerPoint file size too big? Sometimes that’s okay if it has embedded videos, or just has a lot of slides. But if your 11 slide presentation has no videos and is 30+ MB, it is time for some file optimization. PowerPoint has built in tools to optimize images and multimedia – and they continue to improve. But for image optimization, I prefer to use one of the 3rd party add-in options, the NXPowerLite PowerPoint Add-in.
For TLC Creative Services, we have NXPowerlite installed on all computers and use as needed. As stated on their site, what this add-in does is, “Shrink Your Files.” I’ve put together a quick explanation of how we use this at TLC.
NXPowerLite
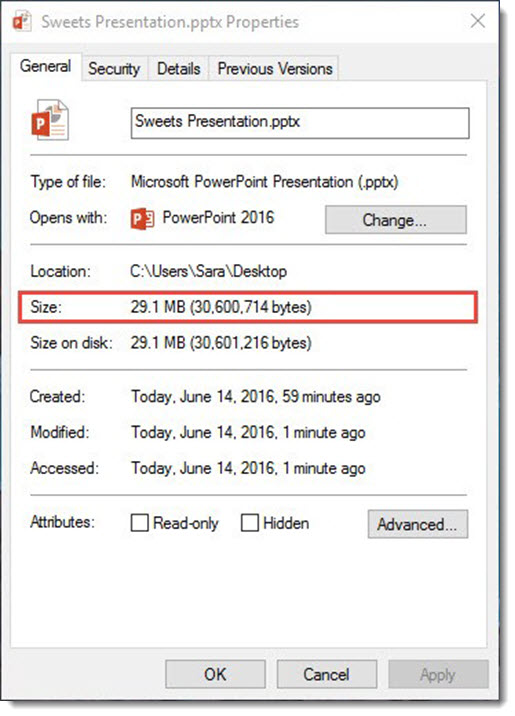
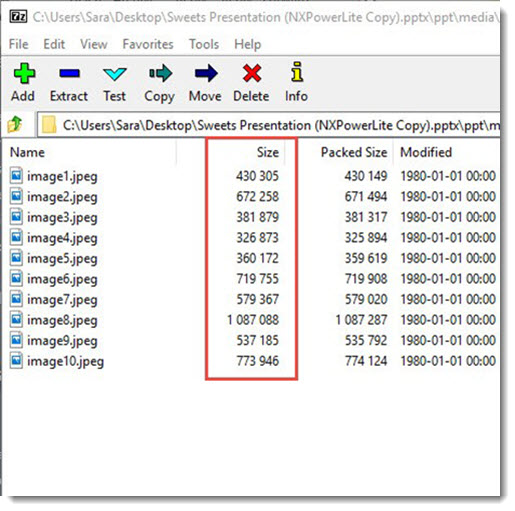
In this example, we’ve added a HiRes image to a PowerPoint Presentation. Our simple 10 slide presentation is a 29.1 MB file.
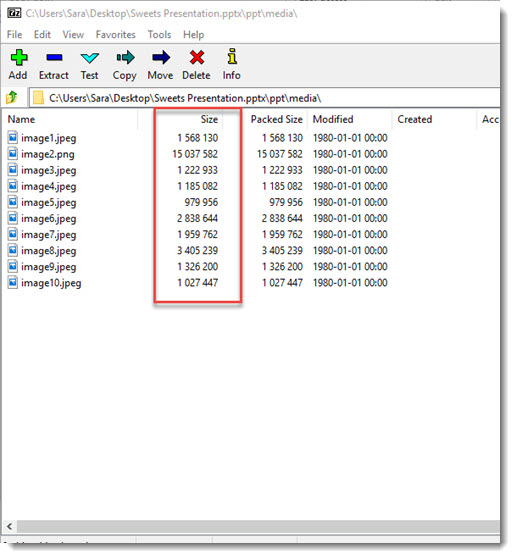
The images within the presentation are 15MB, because they are far larger than HD projection, most are “print” quality resolution. By using the NXPowerLite PowerPoint Add-in, we can optimize these images in order to reduce file size.
Step 1: Save your presentation.
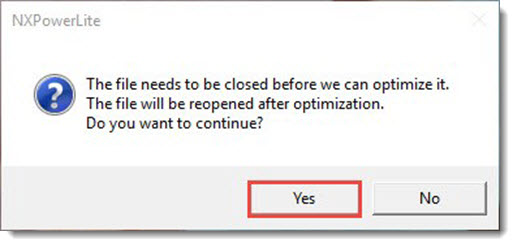
Step 2: Go to the ADD-INS tab > OPTIMIZE WITH NXPOWERLITE

Step 3: Select YES at this pop up dialog (unless you do not want to save over this file because you did not do Step 1 yet, then cancel, save the presentation and come back to this step when you can select YES).
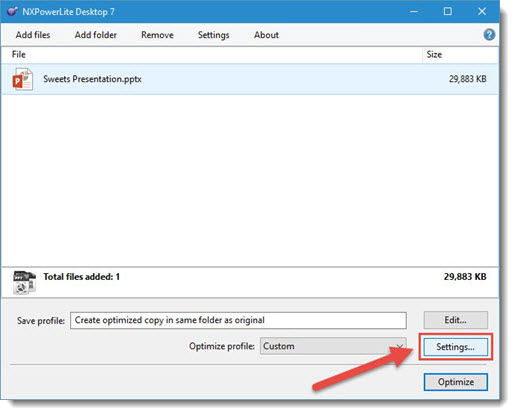
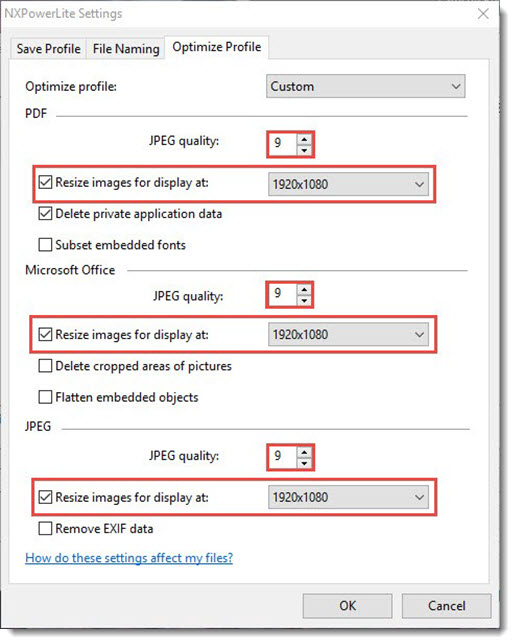
Step 4: Custom the NXPowerLite SETTINGS.
Step 5: This should be a one-time process as NXPowerlite will remember your custom settings.
- JPEG quality =9 on all three options
- Resize Images For Display At = 1920×1080 on all three options
- delete Cropped Areas in Pictures = NOT checked
- Flatten Embedded Objects = NOT checked
- Click OK to save these settings and close the Settings dialog box
File Naming
Before we Optimize the file click on the File Naming tab. Here you can customized the text prior to Optimizing the file.
1) File Naming Tab
2) You can add custom text that will be added to your Original file name
3) The custom name will be added AFTER your file name
4) The custom name will be added BEFORE your file name

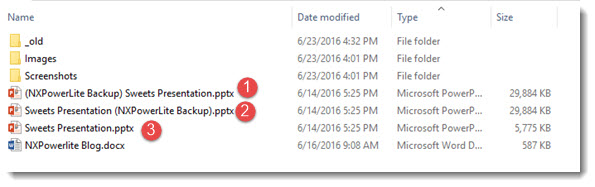
Here’s an example of the Outputted files
1) Backup of the original File name with the Custom Text BEFORE
2) Backup of the original File name with the Custom Text AFTER
3) Optimized file gets outputted with Original File Name
Back in the NXPowerLite dialogue, confirm the presentation is selected and click OPTIMIZE.

When NXPowerlite is finished, it displays the original and the optimized file size. In your project folder will be both the original (name now appended) and the new optimized version.
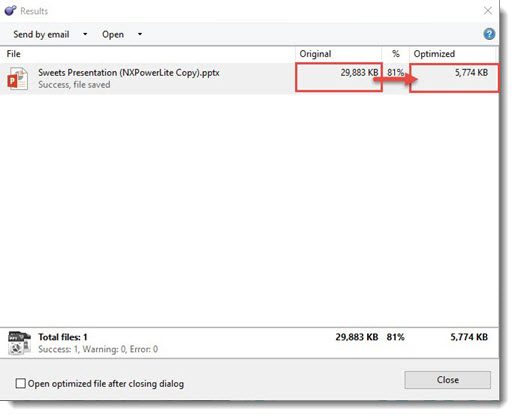
Looking at the new optimized file, all of the images have been adjusted to HD (1920×1080 display resolution) and are approximately 6 MB (with no visible quality loss for the slide show)!
From the entire TLC team, thank you to the NXPowerLite PowerPoint add-in for making our jobs a bit easier and quicker!
– Troy @ TLC
Motion Path Tool PowerPoint Add-in
Shyam Pillai is an incredibly talented and knowledgeable coder. Fortunately for everyone that uses PowerPoint, he has shared some of his expertise by releasing a number of incredible add-ins over the years. If you use Motion Paths in PowerPoint, this FREE add-in is a must have.
The Motion Path Tools add-in shows up in its own tab called “Tools.” When you have a Motion Path applied to an object, this add-in will copy the object and place the copy at the end position of the path. This is very helpful for lots of animation and layout needs – and can save lots of time!
The add-in is found on a new TOOLS tab (where the developer has most of his add-ins install too).

Here is a quick example slide with a motion path applied to the shape.
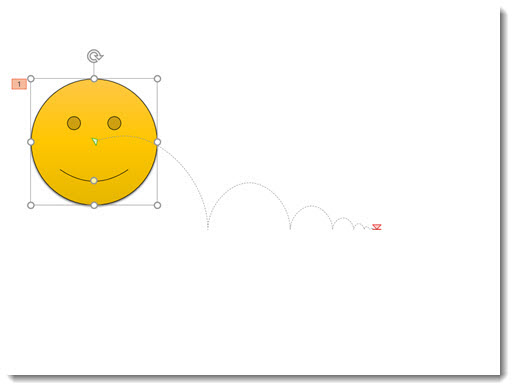
Starting with PowerPoint 2013, clicking on the shape while in the animation tab displays a ghosted version of the shape where the Motion Path ends – a very helpful improvement to PowerPoint!
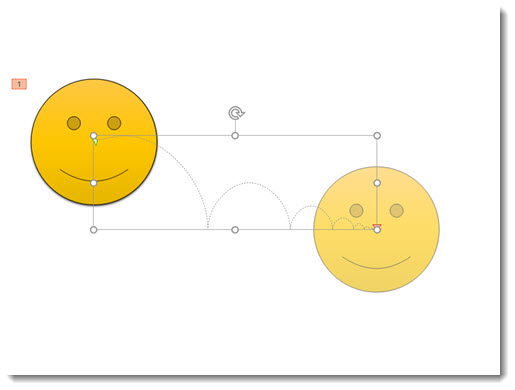
But in this example, what we really need is a copy of the shape in that end position.
- Select the shape
- Go to TOOLS > END POSITION
- In the Motion Path Tools dialog, select the path you want to copy (this is pretty nifty because if you have multiple paths on a slide, they will all be listed here).
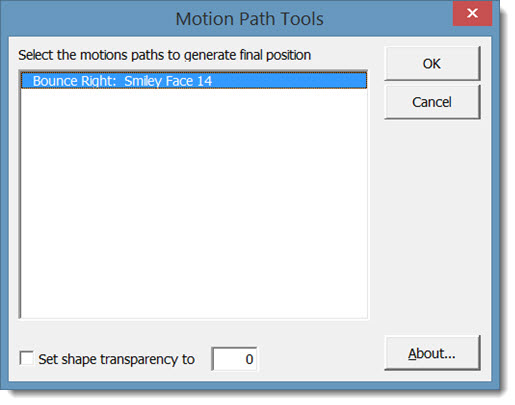
- Click OK and the add-in instantly copies the original shape (or photo or anything the motion path is applied to) and places the copy at the end point of the path!
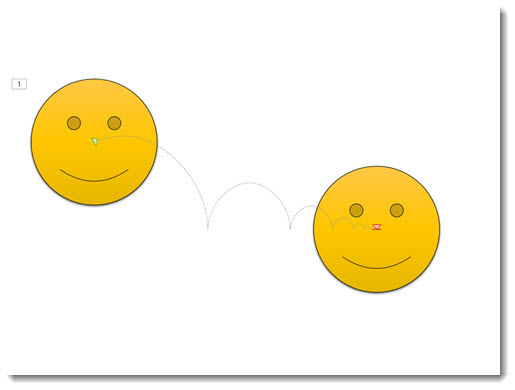
The most common design task is to copy that new shape, delete it from that slide, and paste it onto the next slide. Now the Motion Path animation happens, go to the next slide and the shape is seamlessly in the same place!
Get more details and download (this amazing add-in is FREE) here.
– Troy @ TLC
The Presentation Podcast Episode – #8 Released Today!
A new episode from The Presentation Podcast with Troy, Nolan, and Sandy is available today! Listen to their discussion on “Faster & Better Design with PowerPoint Add-ins” or add to your favorite podcasts at The Presentation Podcast.
![]()