Incredible Travel Humidifier!
Okay, so this has nothing to do with presentation design – but with being on the road 200+ days per year handling presentation projects I spend a lot of time in hotels. One common thing is they all are over air conditioned, do not have windows that open, and are incredibly dry. I recently purchased this portable humidifier and it does a great job of adding some moisture to a hotel room!
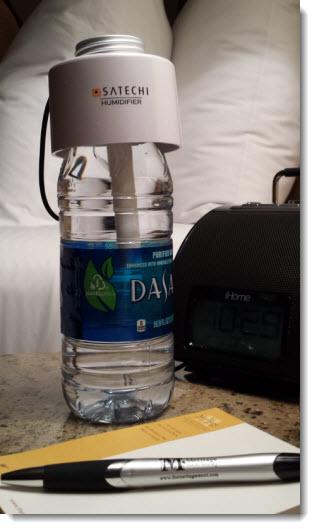
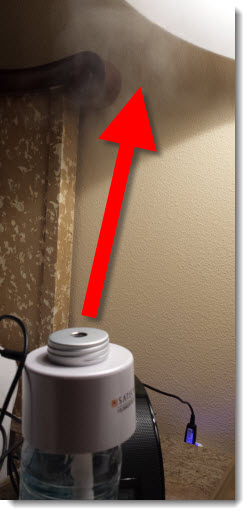
The design is inspiring, being a large cap that fits on top of any water bottle – and it is USB powered!
– Troy @ TLC
Add Twitter Feed To Slides
We were recently at a show to handle the presentations, and the presenter encouraged the audience to tweet about the conference daily events. During the break, we were asked to show the twitter feed. Advanced planning is great – this was not it.

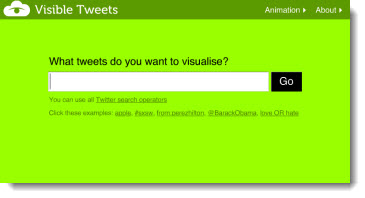
We used Visibletweets.com to provide a solution. Visibletweets.com is a Flash based website with no download (other than the Flash player if not installed). On the website, you are prompted to type in a hash hag, search a term, or use someone’s twitter id.
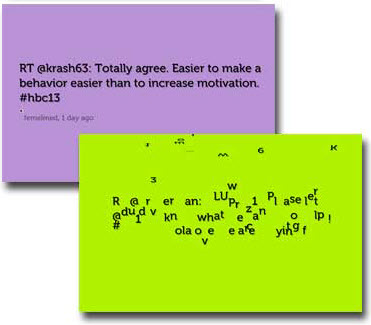
Then one tweet at a time fills the page, each animates to the next. There are 3 types of animation to choose from: Letter by Letter (which is our favorite), Rotation, and Tag Cloud.
If you use the option to run the show in the web browser full screen, the background automatically changes colors.
There are 3 options for using visibletweets.com during a presentation.
Option 1: Run the website from a backup computer (with internet access) and toggle it to the screen.
Option 2: Have a link to the website on a slide and use it to switch from presentation to web browser (going back to the presentation requires using ALT+Tab or closing the web browser – so not as seamless and elegant).
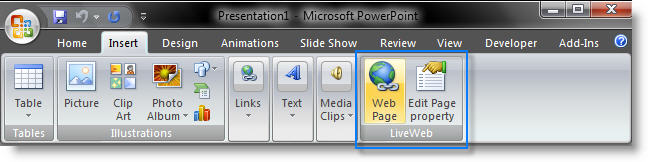
Option 3: Use Shyam’s LiveWeb add-in to display a webpage directly on your presentation slide (this is a FREE add-in that can be downloaded here).
– Troy @ TLC
Stop PowerPoint from Getting the Animation Jitters!
Long scrolling animations worked great back in PPT 2003. But with the new .xml format (.pptx) came a new render engine for animations and it caused these same animations to stutter and “jitter” as they played.
You can fix these with a registry edit (Note: the registry controls the computer and in general mistakes in here can be very bad).
First, download this test file and run (download here, 3.7MB). Take note of how smooth, or jittery, the text animation is.
Close PowerPoint.
To update a computers PowerPoint settings:
1. Start >> search bar “regedit”
2. Go to Hkey Current User>>Software>>Microsoft>>Office>>15.0>>PowerPoint>>Options
– Note: This is the path for PPT 2013. For PPT 2010, it will be “12.0” vs. 15.0.
3. In the right section, right-click and select NEW >> DWORD (32-BIT) VALUE
4. Name it “DisableSpriteClipping”
5. Find the new entry and right-click and select MODIFY
6. In the VALUE DATA box, enter “1” (BASE can be Hex or Dec) and click OK
Start PPT and run the test file again. Take note of how smooth, or jittery, the text animation is.
Many thanks to Steve Rindsberg of PPTools for making me aware of Microsoft’s Chris Maloney’s shared bit of coding that works wonders for anyone fearful of animation jitters!
– Troy @ TLC
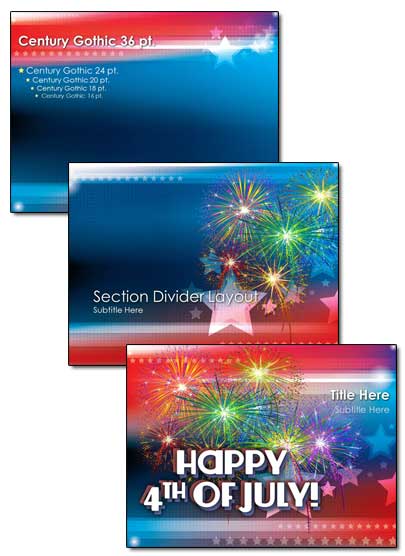
Happy 4th of July 2013!

Have a great 4th as we celebrate the start of the USA! Staff designer, Josh, created this great patriot slide for the occasion. The background and fireworks were developed in Photoshop and the 3D text in PowerPoint 2013.
Download slide here.
– Troy @ TLC
Animated Fireworks Slide

The free 4th of July PowerPoint template featured animated fireworks. You can download a slide with just the animated (including sound FX) fireworks here and copy them into an presentation!
[youtube src=”https://www.youtube.com/embed/fjo0axZ7J7M?rel=0″]
– Troy @ TLC
4th of July Themed Template – FREE!
Here is a great 4th of July themed template that Amber, one of the TLC presentation designers, created for everyone to use!
It is 4×3 and has all PPT 2007-13 presets formatted. In addition, the Title and Divider slide layouts are animated with sound FX!
[youtube src=”https://www.youtube.com/embed/2XOhkTYZll0?rel=0″]
Download (3 MB).
– Troy @ TLC
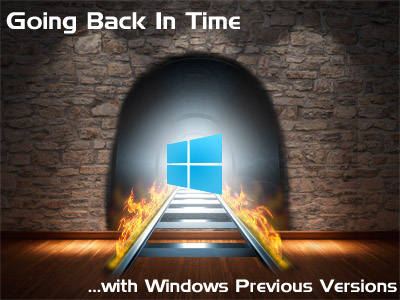
Get Back A File with Windows “Previous Version” Feature
Windows 7 and 8 have a built in feature to allow you to go back in time and recover files that have been deleted, become corrupt, overwritten, etc. – and it is great! Josh, a designer and IT pro on the TLC Creative Services staff recently showed me this feature – and saved the day by recovering a large project that had become corrupt. So Josh is the star of this post explaining how to use the “Previous Version” feature.
A little known feature in Windows 7 and beyond, Previous Versions is often overlooked and underutilized. Its simplicity of use, easily restoring, copying, or just viewing contents of previous versions of files changed or lost make this feature a “must have” in any power users toolkit. Luckily for us, it’s built right into the OS. Before we get into configuration and enabling previous versions (this should be enabled on the system drive by default), let’s have a look at how the feature works:
Open any folder, right click on the canvas area, folder, or file, and hit properties.
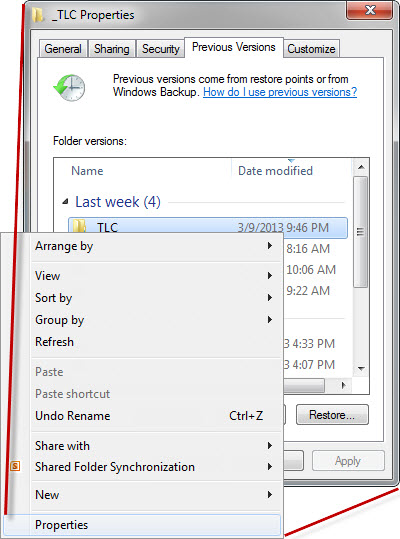
Clicking on the previous versions tab in a folder where you’ve deleted or modified some files will result in some form of the screenshot below, with previous versions of files or folders listed.
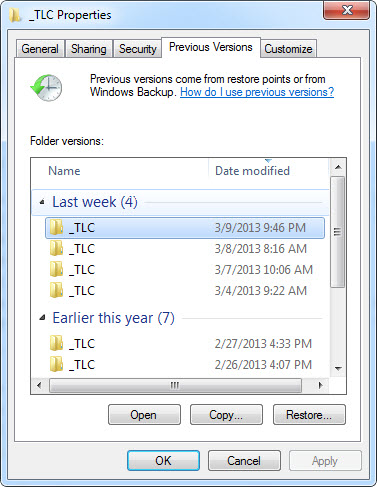
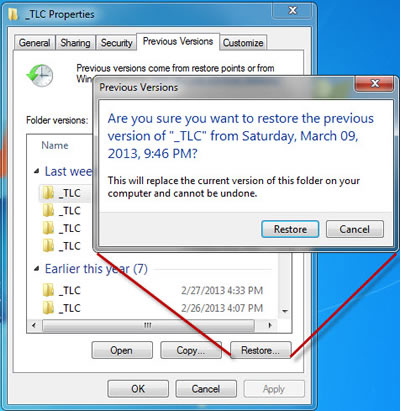
Restoring files is as easy as selecting the folder, and hitting restore.
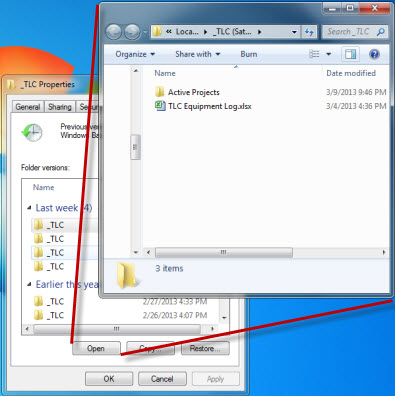
Alternately, you can open any folder by double clicking, and copy, or even open and edit single files, as opposed to having to restore the whole directory.
You can open any previous version of a folder or file by double-clicking on it, or selecting the “Open” button.
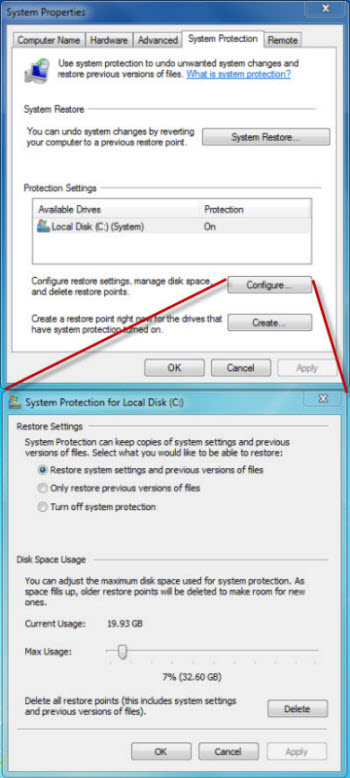
How to setup or confirm System Protection is Enabled
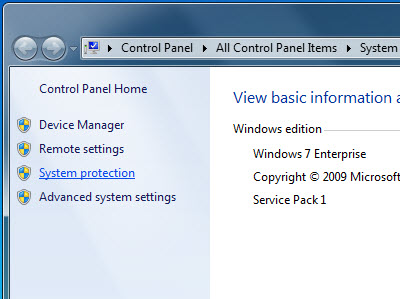
You can ensure Previous Versions is enabled through the “System Protection” window. This can be accessed by right-clicking on “My Computer” and selecting “Properties.” This will bring up the window below, wherein you will see a “System Protection” option on the left-hand pane.
When opening System Protection, you will be met with the window below. Take note of any non-system drives, and enable protection on them if desired. You will not be able to restore previous versions of files on drives that do not have protection enabled. Choose the desired space allotment via the “Configure” button. How many previous versions are available will directly depend on how much space you have allotted.
So there you have it, a few clicks and moments of configuration to put weeks or months of automatically generated backups at your fingertips.
– Josh @ TLC