New Podcast Release: Animation, it’s back in 2022!
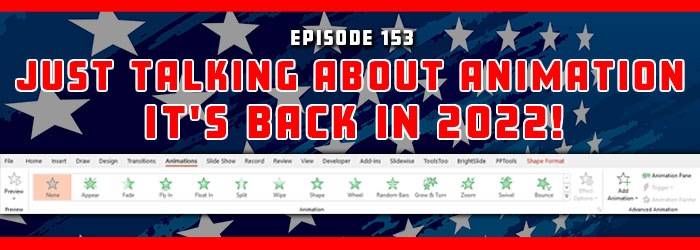
After over 2 years of virtual meetings with very little to no animation due to virtual limitations, I declare 2022 is the year animation has returned! Nolan, Sandy and Troy talk about presentation animation and more this returning episode.
Listen here.
4th of July in the United States!
FREE U.S. 4th of July themed PowerPoint template! Download here.
Clipchamp – Text-to-Speech
![]()
Clipchamp has an amazing a text-to-speech feature!
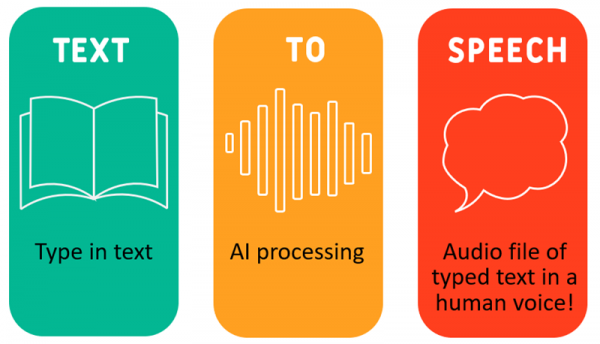
With text-to-speech, type in the text and Clipchamp’s AI engine will add the typed text as a human voice.
In Clipchamp, start a new video project, click “Record & Create” on the left, and click the “Text to speech” button.
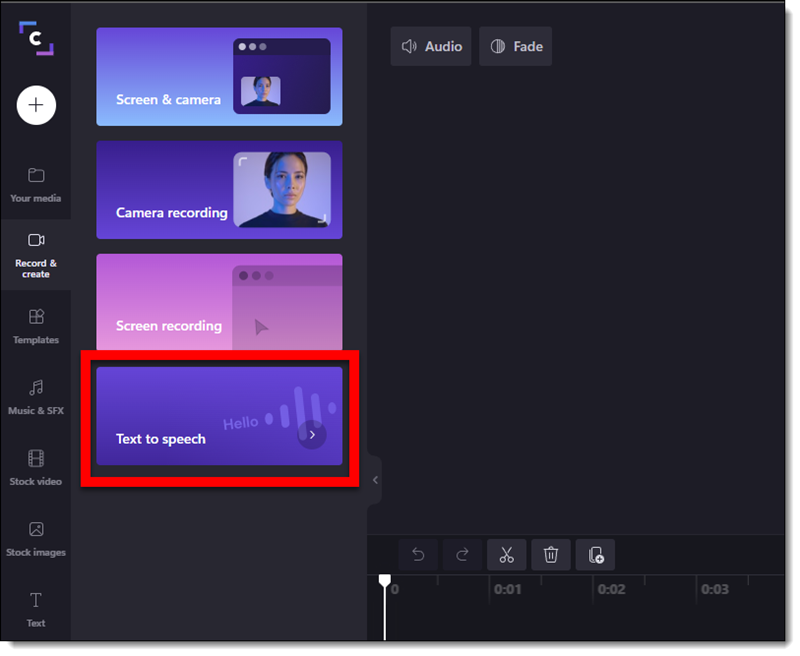
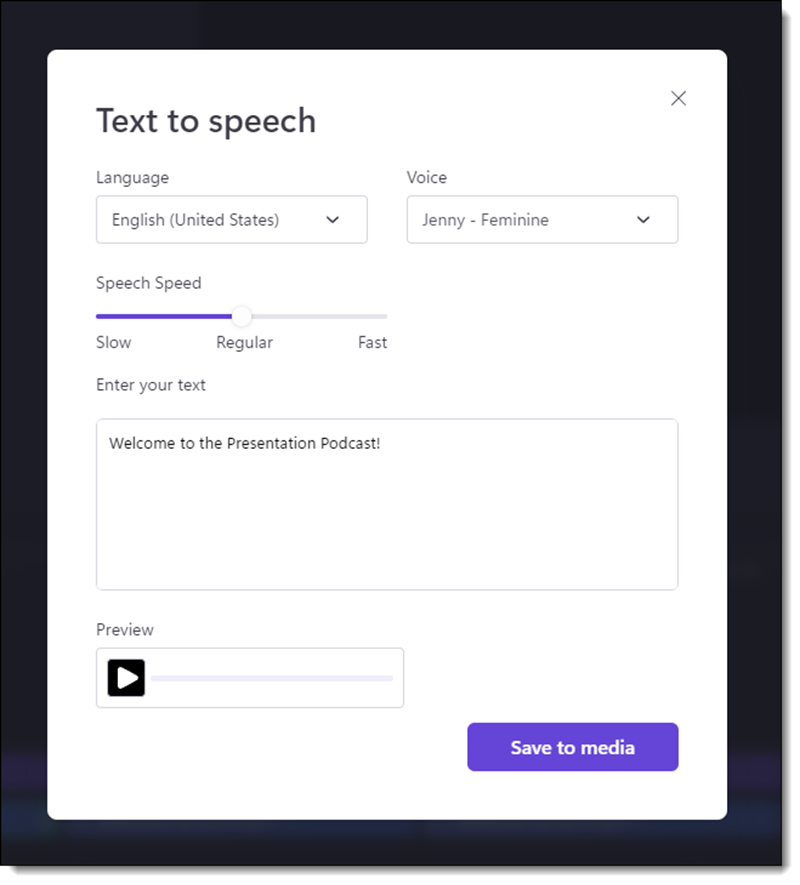
In the pop-up window, type or paste in the text that will be spoken.
- Select the LANGUAGE (wow!)
- Select the VOICE from the 20+ options.
- Select the SPEED the text is spoken (eg. for a narration, slower. For an announcement, faster).
- TIP: click the PREVIEW play button to hear the spoken text. Update any of the options (eg. different voice or speed) and click the preview again.
- Clicking “SAVE TO MEDIA” adds to the video timelines – and no further editing (just repeat the above process with a new speech to text if an edit is needed).
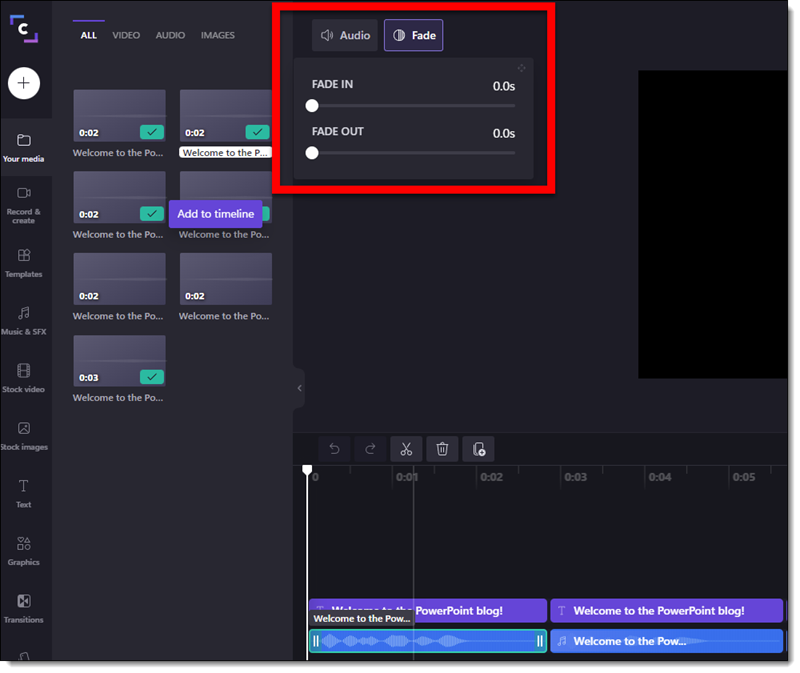
A new element is added to the timeline. There are some additional editing options to the video timeline text, such as Fade in/out.
EXPORT the video. This creates a video with no image, just the audio. Unfortunately, Clipchamp does not let you only export audio. Either insert the video file off slide, which adds the audio to the slide. Or use another app to convert the video file to a .mp3 audio file to insert onto the slide.
Our demo – we used a few of the preset text animations to create a demo video of the same phrase spoken by 5 of the different voices in the Clipchamp text-t0-speech library.
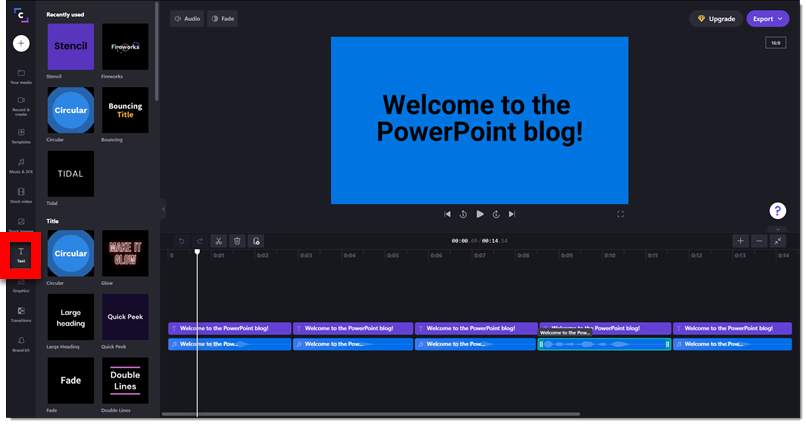
Here is what is sounds (and looks) like:
[videopack id=”16339″]https://thepowerpointblog.com/wp-content/uploads/2022/07/Clipchamp_text-speech_video.mp4[/videopack]
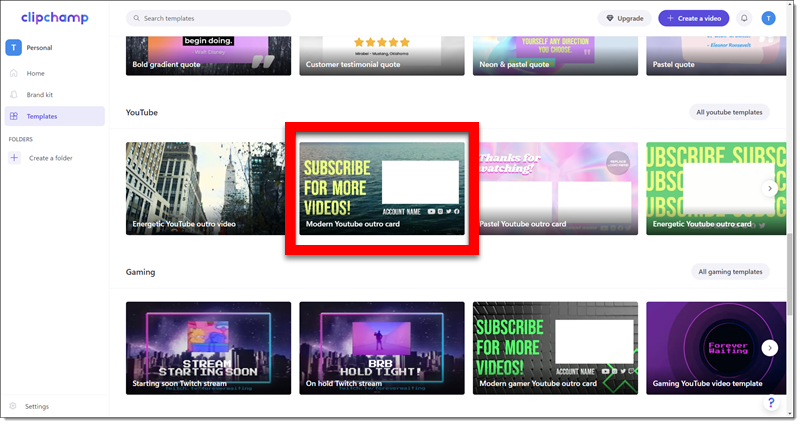
ClipChamp – Video Templates
Clipchamp is a great video-editing app similar to others, like Canva or Camtasia, that has simple to use video editing features. We wanted to experiment with some of the built in/preset options for adding text, text animations and text effects to a video. There are a number of preset templates, and we used one for this post to create a video with video, animated text and other effects.
Open Clipchamp, click “Create a video” and then “Templates” on the left. Roll over each template to see an animated demo. And finally, choose one of the preset templates for the video.
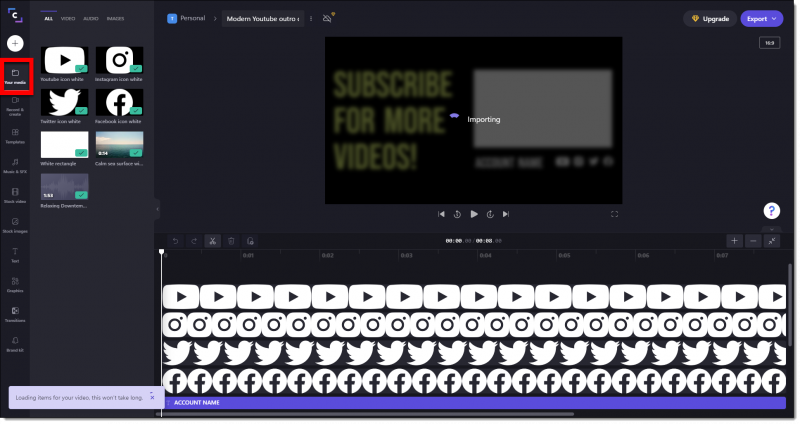
After selecting a templates, the media bin has default content added and the video timeline is populated using the default content with preset animations. The magic of these preset templates is how easy it is to replace the default content with your content (videos, images, etc.).
First, add the real content to the Media Bin. Then select each real media and drag it over the preset media on the timeline. The default (and animated) content is replaced, keeps all of the animations (transitions, motion, etc.) and builds an animated video quickly.
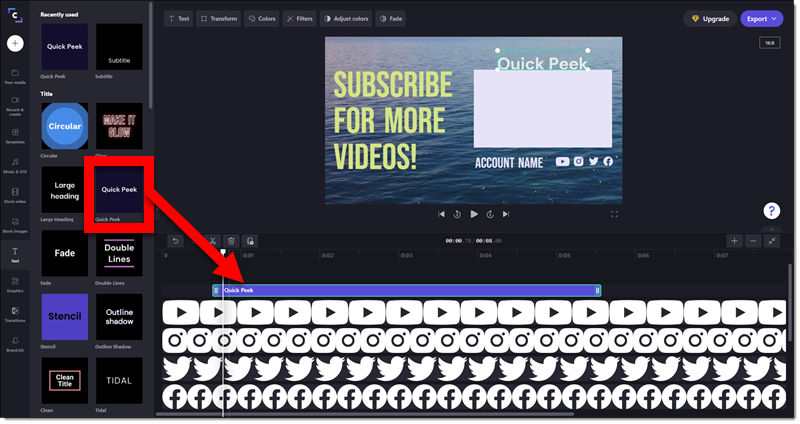
Text elements are a slightly different process. Double click text on the timeline, then highlight and change to the text needed for the video. For this example let’s add a new text element to the template. Go to the “Text” tab on the left. Rollover each to see an animated demo. We are adding the “quick peek” text by dragging it onto the timeline.
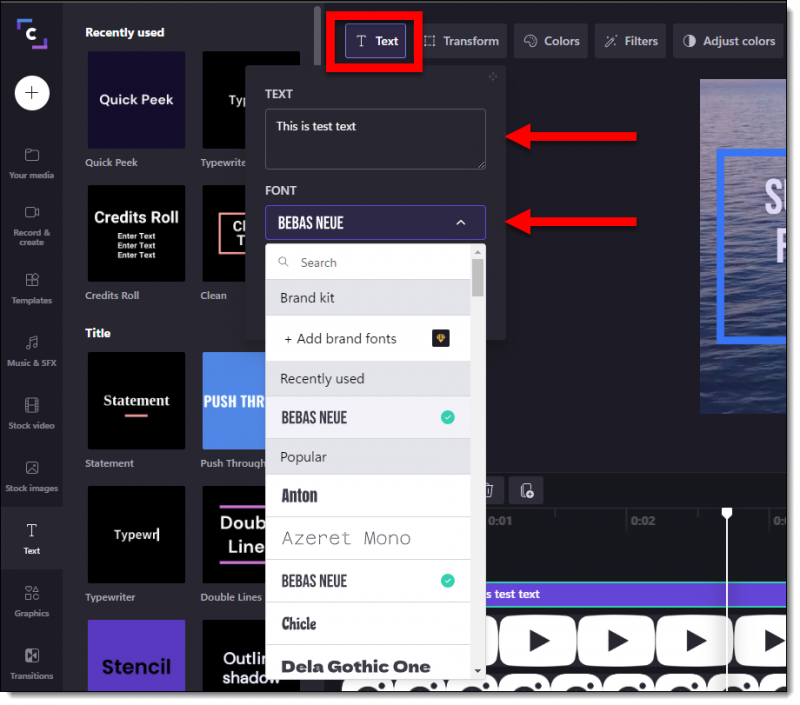
Select the text on the timeline. Then in the upper left, click the Text button. Update the default text to the needed text. Update the font if desired. Use the other buttons to update the color and styling.
Clipchamp has many animated text options. The “Rating” preset has animated stars. The “Credits Roll”, which was added after the preset video content, quickly added the rolling text seen at the end of the video (a background image using the “Graphics” tab and a “Swipe” effect between the ocean background and the black screen were also easy additions to the video).
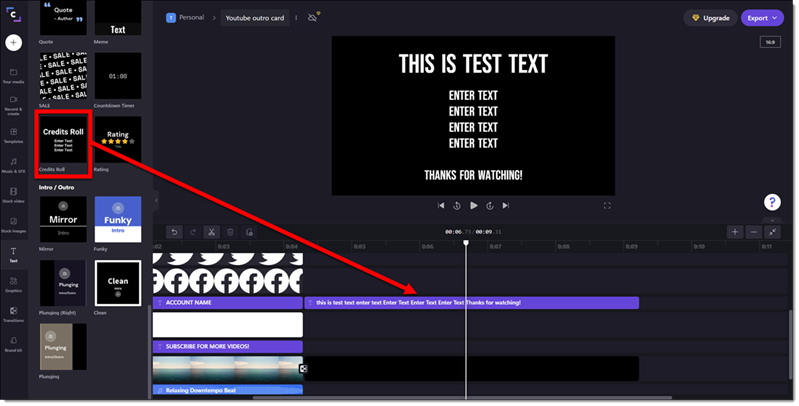
And the result was this video that is ready to be added to a slide, used for social media, or part of a larger video project!
[videopack id=”16359″]https://thepowerpointblog.com/wp-content/uploads/2022/06/TLC-Creative_Vide-Template_example_clipchamp.mp4[/videopack]
Clipchamp Mobile App
![]()
We have focused on Clipchamp’s video editing capabilities, using the desktop version. Knowing Clipchamp has a mobile app, we explored it (spoiler alter – we were disappointed by the capabilities…).
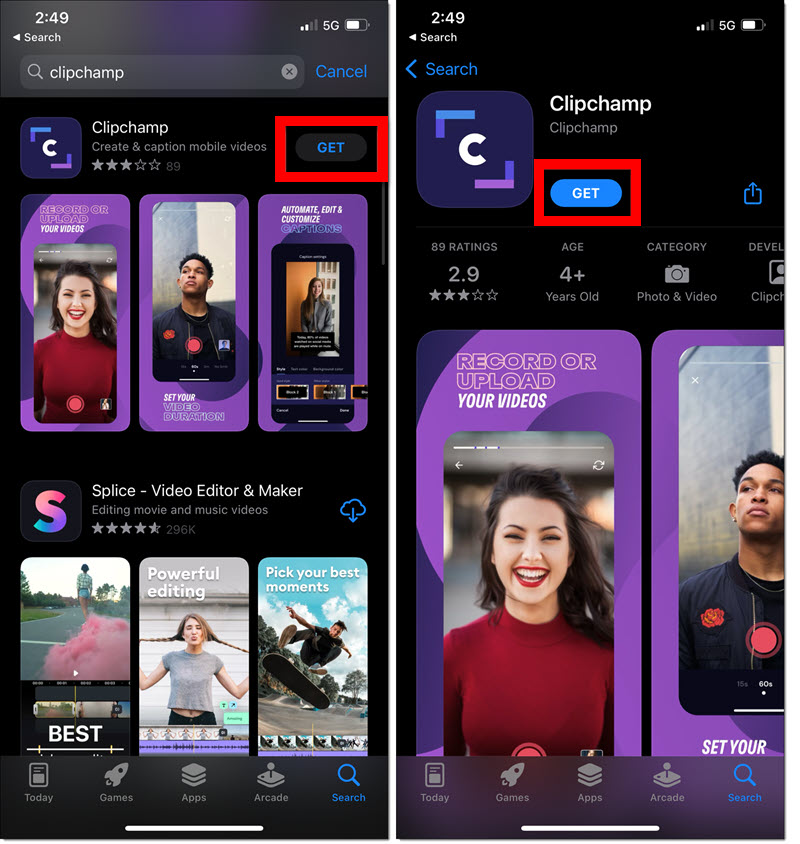
Installing the Clipchamp mobile app is fast and easy. On either IOS or Android, search for “Clipchamp” in the app store. Click GET to download and install.
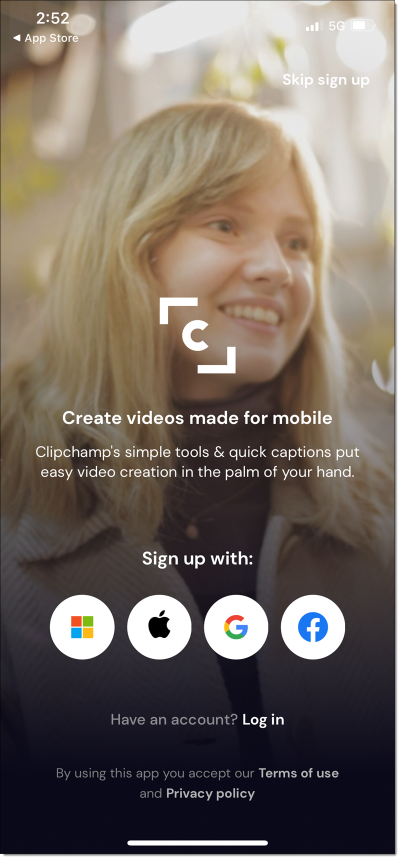
On the first run, click LOGIN and add same account information as the desktop install is setup with.
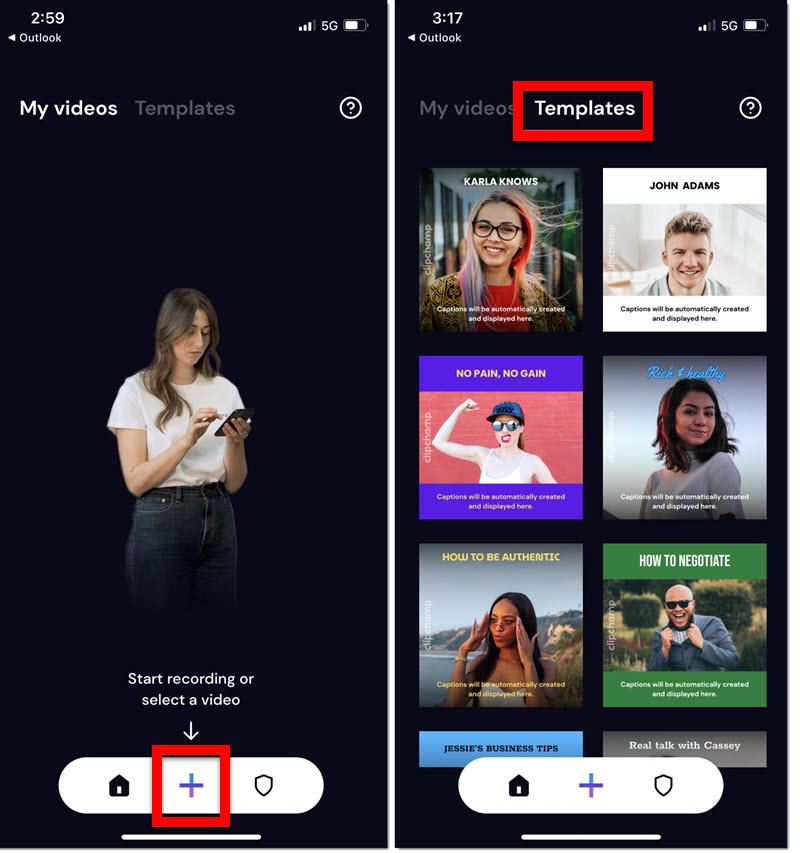
The iPhone’s app interface looks different from the online browser or desktop app. The mobile version does not have ability to work with multiple videos and in general has limited video editing capabilities, favoring preset templates. Currently it is very social media video focused.
To create a video, click the “+” button, or select a template option. The default is to record a new video. There is an option to upload an existing video.
Name the video, add text overlays, music, images from the camera roll or Clipchamp’s stock media.
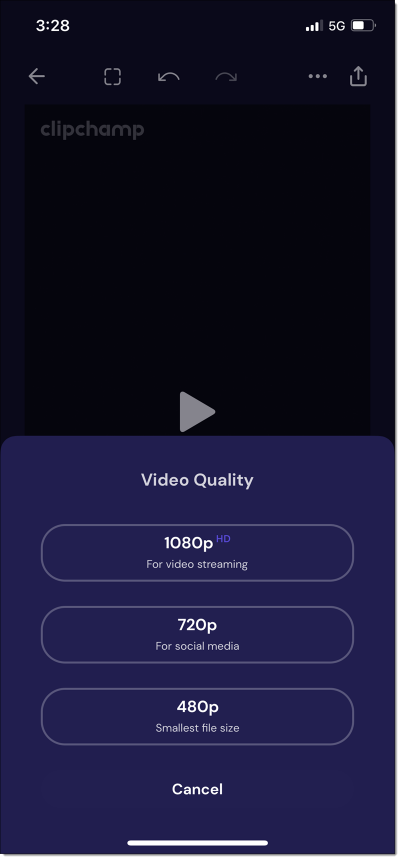
When done, export in selected video quality.
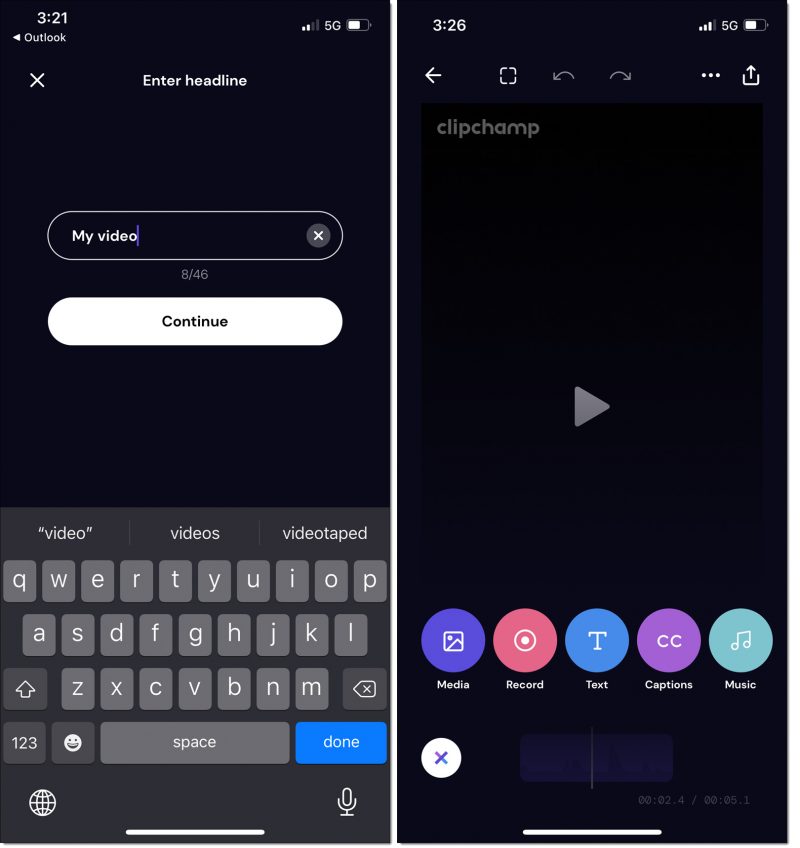
When done, export in selected video quality. Your video will download or you have the option to share it to social media.
The mobile app is good for creating a simple video quickly. But it currently has a very limited set of editing options over the desktop app for any real video editing needs.
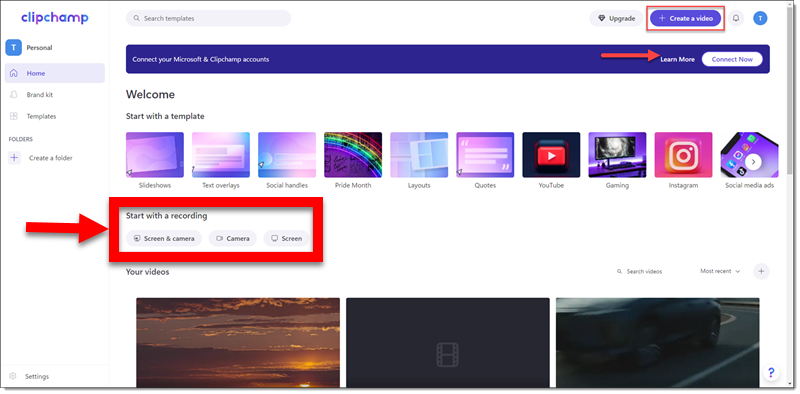
Clipchamp Screen Capture Videos
The Clipchamp video editing app also has a video screen capture feature. Capture on-screen content such as a software demo. The video can also record your live narration, or include you via live webcam.
![]()
For this post, let’s go with a software demo that we want to include as a video on a slide.
- Open Clipchamp
- Click “Create a video” on the top right.
- On the RECORD & CREATE tab=choose the type of content (screen & camera, camera only, screen only).
- OR, use the quick access “START WITH A RECODING” section on the main screen and choose the type of content (screen & camera, camera only, screen only).
- The pop-up in the lower left is the screen recording dock. The red button is how the screen capture is started. The Mic icon – if recording a narration – is where the record mic setup. The record duration starts when the record button is clicked.
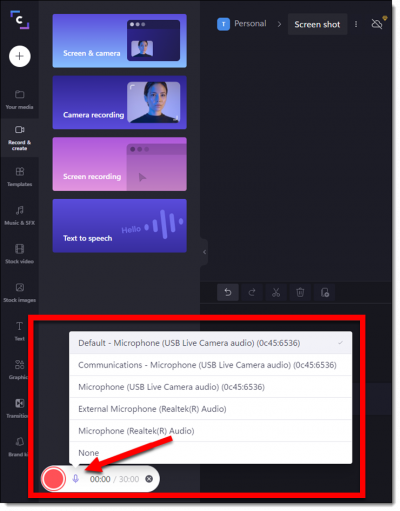
- RED means ready to record. PURPLE means the recording is in process.
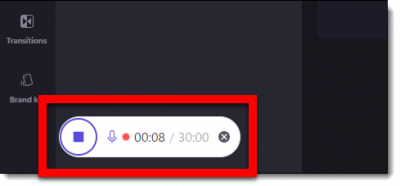
- TIP: one really nice option is the “retake recording” available on the screen-sharing notification bar.
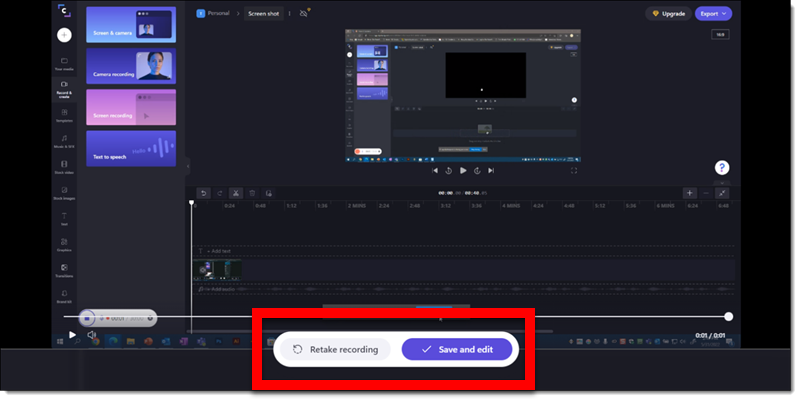
- After stopping the screen capture record, Clipchamp’s post editing options can be used to add music, accent graphics, text, transition effects and more.
- Export the video and add it to the presentation slide!

Clipchamp and Apple ProRes Videos
![]()
Apple ProRes is a video CoDec (a video codec is the process of COmpressing a video into a file format, as example .MP4, .AVI or .MOV, and then DEcompressing it when played). Apple ProRes is a super high quality codec, but unfortunately Windows OS does not recognize Apple ProRes, making it difficult to work with these super high quality, and generally professional video files on a Windows computer.![]()
An amazing thing we discovered at TLC Creative is Clipchamp recognizes ProRes videos – on a Windows computer! This means Clipchamp can be used, on a Windows computer, to convert a PreRes video to a standard .MP4 video that Windows, and PowerPoint can use.
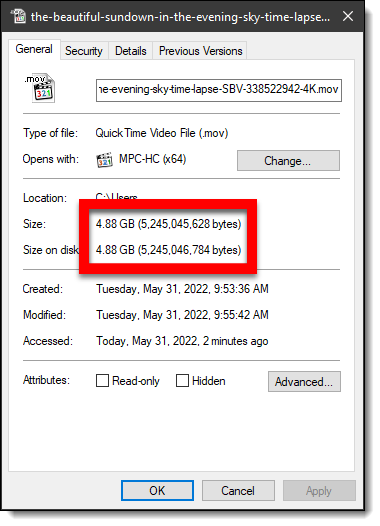
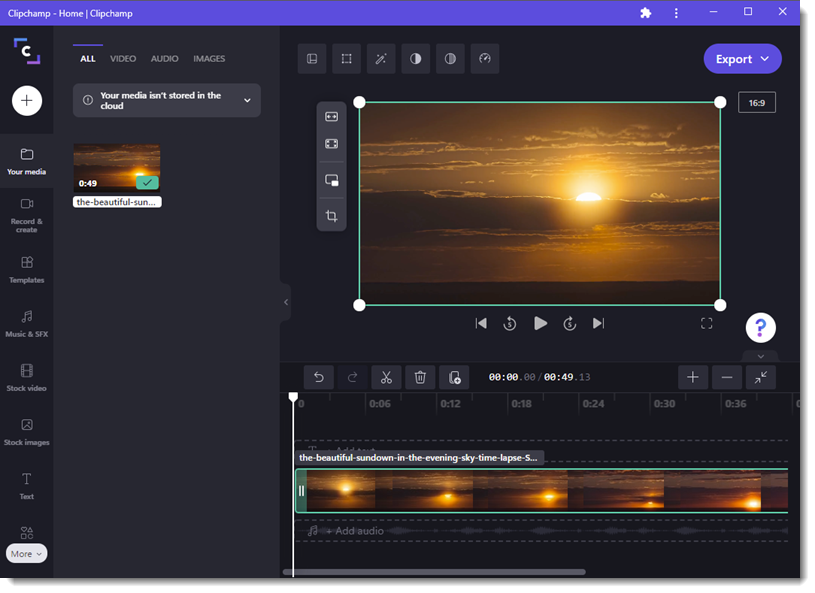
Here is my test video. It is a whopping 4.88GB (!) and .MOV file format in Apple ProRes.
- First – launch Clipchamp
- TIP: running Clipchamp as a local app is going to be MUCH faster to load the 5GB file vs. having it upload to the Clipchamp servers if running as a web-app.
- Open the ProRes encoded video in Clipchamp.
- Add to video timeline.
- Export the video.
TIP: Clipchamp only creates .MP4 video files, which work on all computers, all web browsers, and all applications.
And the final task is to add the new version of the video to your presentation!