
Oh What a (9th) Day!
Today is great! It is September 9th, which equals 09-09-09
(9th month, 9th day, 9th year of 2000) – very cool.
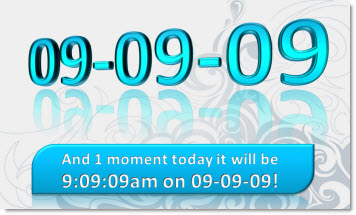
…yes, the image was created in PPT 2007.
– Troy @ TLC
It’s Labor Day in the U.S.
If you are in the U.S. – Happy Labor Day! It is a day of rest and honoring our labor and that of others around us.

Ironically I am in the office designing presentations for 3 clients which makes this like any other day – a day of labor… But excited to have projects with diverse clients that make life fun.
I did not open a 3D graphics program for the ‘Labor Day’ text, but PPT 2007. Uses a custom font that is embedded, so everyone should see the slide as created. Download the slide here (400k).
– Troy @ TLC
Powerpoint in the “Western World”
The BBC’s online News Magazine recently had an interesting story on PowerPoint. But the large, dominant text of the subhead (more visible than the actual story title “The Problem with PowerPoint”) is what really caught my attention.


– Troy @ TLC
A Real Pie-Chart
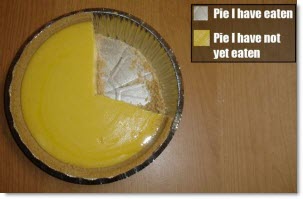
Had this great image emailed to me the other day (perhaps you received the same email with lots of funny “pie-charts”). Sometimes you get exactly what it is called, a “pie” chart.
– Troy @ TLC
Very Cool PPT 2010 Demo Presentation
I have been experimenting with PPT 2010 most of last month and can say this is the most excited I have been about PowerPoint in years!
On Microsoft’s PowerPoint Team Blog a new video highlighting some of the great effects was posted last week – here it is:
[youtube src=”https://www.youtube.com/embed/UrBd_V7gXQ4?rel=0″]
– Troy @ TLC
Cutout Text Effect
There are lots of great Photoshop quality effects that can be easily created in PowerPoint. Here is how I create a cutout effect for text.
1. Here is our sample text. Just black text.
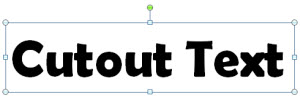
2. I change the text color to white.
3. Then apply one of the preset INNER SHADOWs.
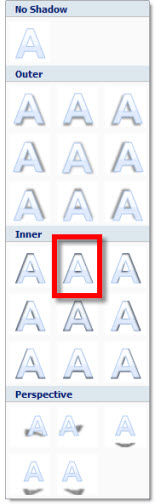
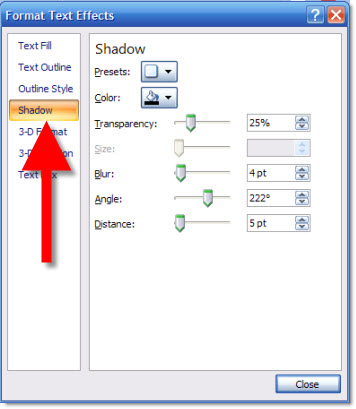
4. I modify the preset settings to be darker (transparency), less blur, more distance.
5. Here is my text now with the cutout effect.
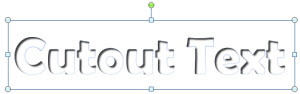
6. Finally, here is the same text set on top of a textured background where it really shows the cutout effect.


– Troy @ TLC
Use Nvidia Control Panel to Set Mirrored or Extended Desktop
PowerPoint presentations given to a live audience usually involve the computer being attached to a projector. And sometimes the technical issues of getting the computer and projector to cooperate are the downfall of the presenter…
Here is what I hear a lot:
– I have a great laptop!
– I hooked up the projector (via VGA or DVI cable).
– I clicked the Function + F4 keys.
– Nothing happened, my presentation would not show up!
It happens and there are technical complexities, but I run anywhere from 1 to 12 computers outputting to projectors for any given meeting. Here is my approach to assuring the presentation shows up on the projector (note: the following tutorial is based on the Nvidia Control Panel as most of show computers currently run their graphics cards).

1. First, I do not use the Function+F4 key. This is just a shortcut to the control panel that does not show me any of the real settings.
2. I open the graphic card control panel. My preferred method is to right-click the desktop and select “NVIDIA CONTROL PANEL”
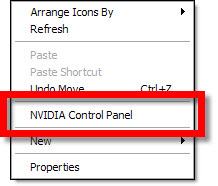
3. This opens the Nvidia Control Panel. From here you can see and adjust every aspect of how images are put onto any monitor, or projector, connected to the computer/laptop.
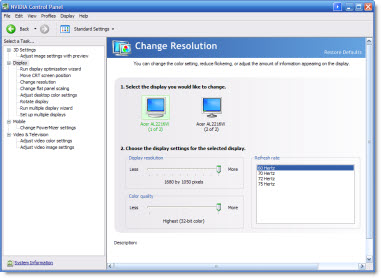
4. I first go to CHANGE RESOLUTION. I can quickly see on the right if the computer ‘sees’ the 2nd monitor/projector by the two display icons.
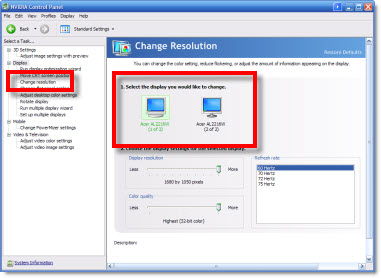
5. If 2 icons are seen I go to #6. If only 1 icon is seen (the laptop monitor) I then have a few steps:
A. Check cable is plugged into computer.
B. Check cable is plugged into projector (or switcher).
C. Verify projector is powered on and set to correct input.
D. If using a docking station for the laptop (as I do), check docking station has power by checking power supply has light, is plugged into dock and dock has power lights (video out from all docks is not passive and will not work if dock does not have active power).
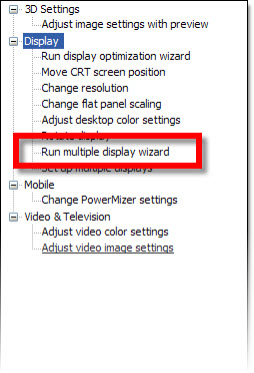
E. Run the RUN MULTIPLE DISPLAY WIZARD to force the graphics cards to identify and recognize the external monitor.
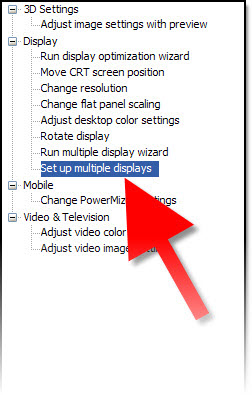
6. To setup a projector I go to the SETUP MULTIPLE DISPLAYS option.
7. On the right I can tell the computer how I want to use the projector.
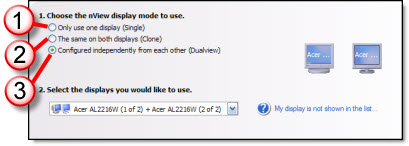
1. Do not connect to projector
2. Mirror output to projector (most common setting)
3. Extend desktop to projector
8. Click APPLY.
9. Then go back to CHANGE RESOLUTION. Now the focus is on the resolution setting on lower part of the right side. This number has to be set to match the projector’s resolution.
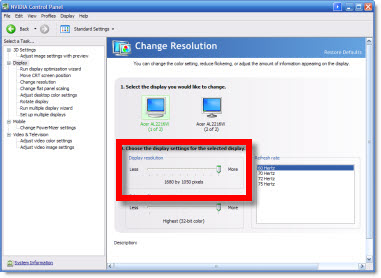
– If the resolution is set to high, the projector may be unable to use it (and will display nothing).
– If the resolution is set to a widescreen format (as many laptop monitors are) and the projector is not widescreen it will either compress the image or add black letterbox bars (neither is a good option), so the resolution will need to be set to a 4×3 aspect ratio (eg. 1024×768 is the most common).
10. Click APPLY, exit the control panel and get on with the presentation – yeah!
– Troy @ TLC