powerpoint

Snap to Grid and Nudge

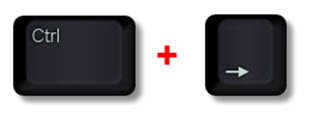
Why do shapes sometimes jump further than you want when moving them with the arrow key? What is the PowerPoint Grid? How are they connected?

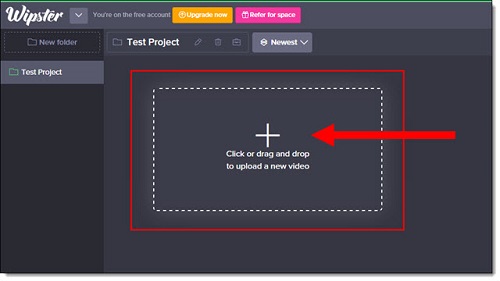
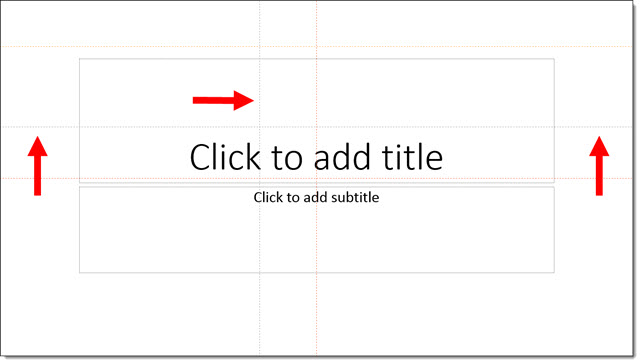
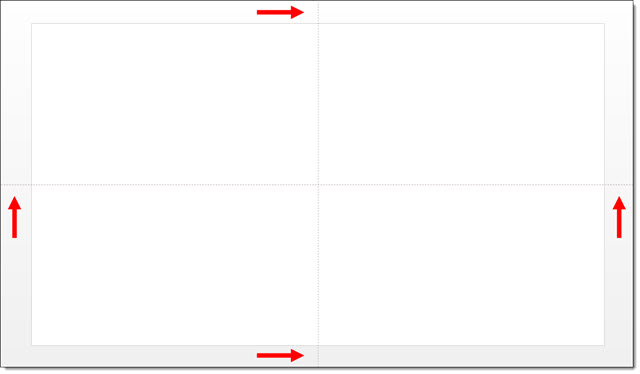
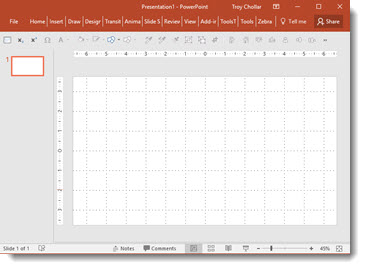
Let’s start with the PowerPoint Grid. Using a PowerPoint Grid can be a great tool for slide layout and design. To turn it on/off go to VIEW > SHOW > GRIDLINES check box. Once it’s checked, you’ll see a dotted line grid like this:

PowerPoint Grid-1

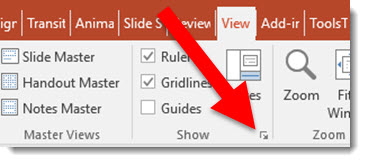
There are some options, such as the grid spacing, and another way to turn on/off. Open the GRID AND GUIDES dialog by going to VIEW > SHOW > click the Options box:

Nudge-3

The GRID AND GUIDES dialog has several options for guides, snapping, and grids:

Nudge-4

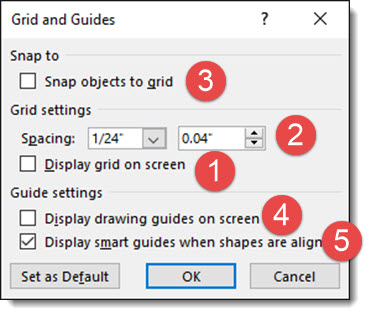
1- DISPLAY GRID ON SCREEN is the same as the above VIEW > SHOW > GRIDLINES. Both turn on/off the gridlines.

2- The spacing, or size of the grid, can be changed here. (Note: The grid spacing is used for the document, so you cannot have a different PowerPoint Grid mixed into a single presentation file.)

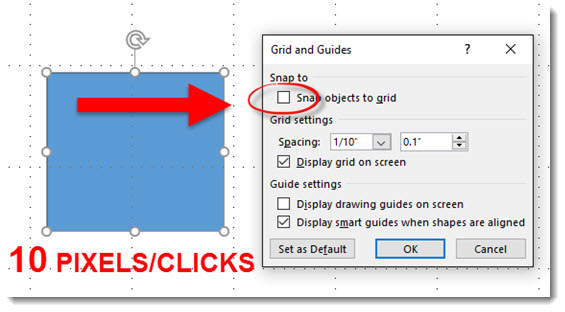
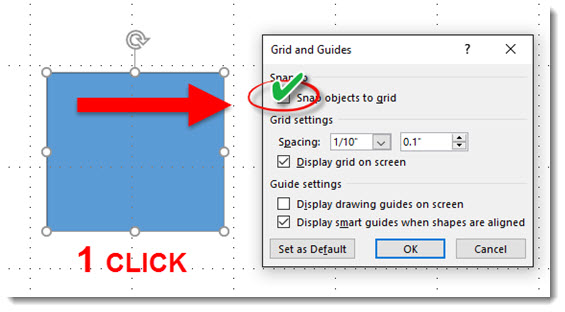
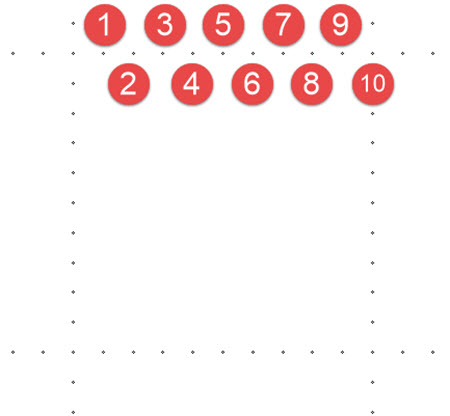
3- SNAP OBJECTS TO GRID is what enables objects (shapes, photos, lines, etc.) to “jump” to a location when you are moving them. They are “jumping” to the next gridline. (Note 1: The grid does not need to be visible/on for this to be active. Note 2: I personally do not like objects jumping to locations, so Snap to Grid is turned off on my design computer.)

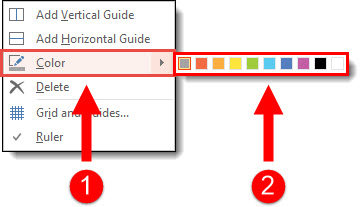
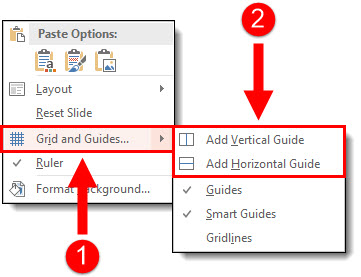
4- DISPLAY DRAWING GUIDES ON SCREEN can also be accessed a few ways, including as a button on my custom QAT (Note: I use guides in my design process much more than grids).

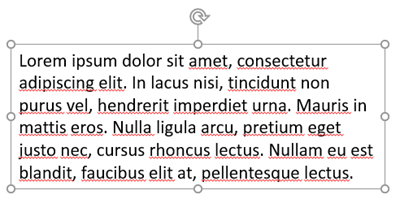
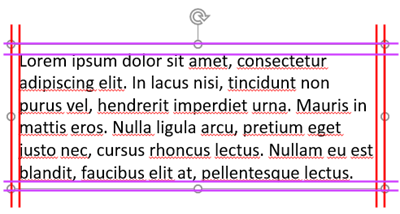
5- DISPLAY SMART GUIDES WHEN SHAPES ARE ALIGNED is a love-it or hate-it feature (I am in between and turn this on/off as the design needs). It is like SNAP TO GRID, but instead objects snap into alignment with other objects.

 
Back to our original question, why do objects “jump” further than you want when moving with a mouse? The answer is NUDGING, or moving an object with the arrow key, is directly connected to SNAP OBJECTS TO GRID. If my goal is to move the blue box to the right and touch the next grid line, the number of arrow nudges is going to depend on whether the Snap to Grid is on or off.
.
.
Example 1 – Snap to Grid = OFF
– With Snap to Grid turned off, I have complete control moving an object, each arrow nudge is 1 pixel. In this example, I would need to arrow/nudge 10 times to move the blue box to touch the next grid line (the blue box is 10 pixels away from the grid line).
Nudge-5
.
 
Example 2 – Snap to Grid = ON
– With Snap to Grid turned on, I have less control moving an object, each arrow nudge jumps to the next grid point. In this example, the next grid point is the next grid line, so 1 arrow/nudge jumps the blue box to touch the next grid line, which may be good or bad (or frustrating).
Nudge-6
 .
 
Here is a close up of the grid points. With this 1/10″ grid, there are 10 points in any direction, and an object will nudge at the most 10 clicks to move across the grid (but the grid in this example is actually 300 pixels wide/tall).
Nudge-7
 
 .
 
TIP: There is a great hidden feature to override SNAP TO GRID, actually temporarily switch its ON/OFF so nudging does the opposite, use CONTROL key + Arrow key (in any direction)
Nudge-8
 .

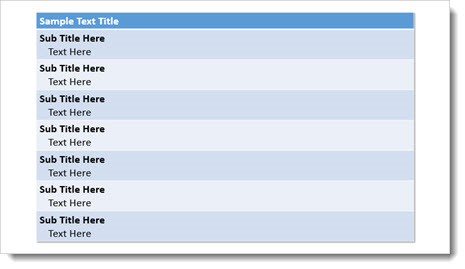
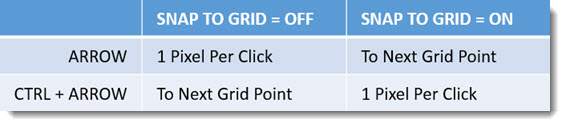
Summary (thanks MS Blair for sending out this simplified grid! [which I modified]):

Nudge-9

-Troy @ TLC


By |2016-08-10T08:19:44-07:00April 27th, 2016|Tutorial|

Wipster.com – Online Tool for Video Review

Videos projects, or PowerPoint decks exported to video, are sometimes difficult to send to a client due to large file size. They are also difficult for the client to provide exact feedback. Wipster is one online tool that provides a solution to both difficulties.

Wipster_10

Wipster is an online tool that makes getting video to a client, and giving them a way to give you feedback, very easy – and secure. Upload a video to your Wipster account, send a secure link to your client and they can view online, and have a set of tools to make comments and feedback for you to review. Feedback is pinned to a specific frame of the video so you know exactly what is being referenced.

Here is a quick demo of using Wipster to get feedback, or approval, of a video:

1. Upload the video with a drag and drop system (or click upload to get an upload screen).

1_Wipster

2. Review uploaded video or a new version (there is a versioning control built in).  Links can be sent to videos, information can be added and they can be moved to a specific folder or deleted. All the vital information is also available: version number, the upload date, the number of reviewers, and the number of comments.

2_Wipster

3. To share the video, select the Share video

3_Wipster

4. Pick the review options, including feedback notes and an approval button. The video can be password protected, downloads disabled, and commenting turned on/off.

4_Wipster

5. When reviewing, adding comments is super easy and intuitive. Click and drag a window around the exact area, on an exact frame, to provide feedback on. Then, type feedback into the comment dialog box. All reviewers are notified of new comments and they can reply to them.

5_Wipster

6. To view all comments as an action To Do List, click on the button in the upper right hand corner.

6_Wipster

7. A list of all existing comments will expand on the right side of the screen. As you complete each item, check the box next to the Reply…

7_Wipster

If an updated version is created, rather than setting up a new Wipster review, just upload the new version to the original video. Everyone is notified of the new version, the feedback process can simply continue until everything is approved and you get the electronic approval to finalize and turn on the download link so the client can have the video for use.

8_Wipster

There is a free account option, and approximately $15 month for unlimited video proofs. Wipster just announced a new feature last week that integrates directly into Adobe Premiere called “Wipster Review Panel for Adobe Premiere” which may change the way we implement client feedback on video projects.

-Troy @ TLC

By |2016-08-10T08:21:35-07:00April 20th, 2016|Resource/Misc|

How Do You Proof a Presentation…?

Developing a great presentation involves a lot of communication between designer and presenter. There are lots of options for supplying a proof to a client and receiving feedback and direction on content – some proofing rounds and processes are good, some hinder.

proof approved

On The Presentation Podcast, a recent episode was all about design studios sending proofs of presentations from clients, listen to it here.

Here is a quick overview of the 4 most common options for providing a proof:

  • PDFs are easy to create directly from PowerPoint, are easy to email, are mobile device friendly and have a great built-in commenting function. But they are static, so transitions, animation and video are not seen.
  • Video is also easy to export directly from PowerPoint and show all animations, transitions, custom fonts, etc. The downside is that the files can be large and there is not an easy way to provide feedback/comments.
  • Sending an editable PowerPoint file is the easiest option. The biggest concern is version control (who is working and minor items like custom fonts, client changes not being caught [for design, file size, etc.]) and ensuring what was designed is what is being seen.
  • Co-authoring and collaboration, which can be the built-in Office 2016 feature or an external program, have improved to the point of being a valid solution. But I find the most common issue is scheduling – designer and client having same time available to “meet” can be difficult.

The next few posts are going to demo some of the online proofing tools TLC Creative has been using.

-Troy @ TLC


By |2016-08-10T08:23:07-07:00April 18th, 2016|Resource/Misc|

Crop to Aspect Ratio & Shape in PowerPoint

When PowerPoint added image crop capabilities, the need to rely on Photoshop (or other external image editing programs) was amazingly reduced. The Image Crop tool has some great advanced options that are not well known, or used nearly enough. So, here is a demo of two great tools hidden in PowerPoint’s Image Crop tool.

Here is our sample slide and original image, a tall rectangle:

IMAGE CROP Page_1

If the goal is to use a perfect square image, it is only 3 clicks away:

  1. Select the image
  2. Go to FORMAT > CROP > ASPECT RATIO
  3. Select 1:1 and the image is cropped to a perfect square (1:1 aspect ratio) – without the image being distorted
  4. The bonus click would be moving the image within the crop to adjust what is visible

IMAGE CROP Page_6

  • 3 clicks and our test slide image now looks like this:

IMAGE CROP Page_2

The same can be used for the common 4×3 and 16×9 aspect ratios and several other options!

Another great, but not well known, option of the Image Crop tool is changing the shape of any image. All of the shapes dialog, used to add a PowerPoint shape (rectangle, circle, trapezoid, etc.) are available to images too.

  1. Select the image
  2. Go to FORMAT > CROP > CROP TO SHAPE
  3. Select any available PowerPoint shape

image crop 10

  • 3 clicks and the image can be an oval or trapezoid:

IMAGE CROP Page_4

IMAGE CROP Page_5

-Troy @ TLC

By |2016-08-10T08:23:47-07:00April 15th, 2016|Tutorial|

Applying Line and Paragraph Spacing

Quick Shortcut to Apply Line and Paragraph Spacing

The F4 key reapplies the last action. It’s a great timesaver for those repetitive actions – an especially helpful task in customizing the line and paragraph spacing in a text box where not every paragraph gets the same spacing. Here is my sample slide with several text boxes and several paragraph spacing opportunities to improve the legibility.

line spacing f4_image01

If the formatting goal is to add some additional paragraph space between the bullets on each text box, the process unfortunately involves selecting the bulleted text in one text box, opening the paragraph spacing dialog, adjusting, closing dialog and then repeating the process in the next text box.

As a shortcut, adjust the Line and Paragraph spacing, then select the next text box and position cursor on the next bullet line. Use F4 to repeat the step automatically! F4 applies the last action made, so in this case you can go from the above sample slide to the one below in less than 30 seconds vs. several minutes selecting text boxes and opening/adjusting the Line and Paragraph dialog 6 times.

line spacing f4_image02

The F4 repeat works on virtually any command while editing slides. Another great use is formatting text in Tables – in this sample F4 was used to quickly add the text indenting for each 2nd line.

line spacing f4_image04

Also, Ctrl Y is another key command that does the same thing. So F4 or CTRL+Y repeat the last command. Test it out and see how it can save you time.

-Troy @ TLC

By |2016-08-10T08:24:12-07:00April 13th, 2016|Tutorial|

Crop to Shape in PowerPoint

Images within PowerPoint can be formatted to have many different effects.  In addition, a formatted image can also be cropped to any shape without affecting any existing formatting using the Crop to Shape tool.

1. Begin with an image that has been formatted within PPT.

Crop to shape-Photo_1

2. Select the image, and then click the drop down arrow below the Crop button under the Picture Tools Format tab.

Crop to shape-Photo_2

3. Hover over Crop to Shape to show the many different shapes available to crop the image to.

Crop to shape-Photo_3

4. Select the shape you wish to crop the image to.

Crop to shape-Photo_4

5. The image is now cropped to the new shape and all original formatting is still in place.  Here are some examples of the image cropped to different shapes:

Crop to shape-Photo_5Crop to shape-Photo_6

Crop to shape-Photo_7Crop to shape-Photo_8


-Troy @ TLC

By |2016-08-10T08:24:56-07:00April 11th, 2016|Tutorial|

PowerPoint Guides: Master vs. Slide

In PowerPoint, guides help with formatting, positioning and slide-to-slide consistency.  The PowerPoint guides have evolved over the past few versions. Here is a quick overview of the three different types of guides:

Master Slide Guides (Orange by default): Editable only on the master slide and display on all layouts and slides using that master slide.

PPT Guides_1

Master Layout Guides (Yellow by default): Apply to individual master layouts only and are only editable on that particular master layout. Here an additional guide is added to the TITLE layout, so only TITLE layout slides will see this new guide.

PPT Guides_2

Slide Guides (Gray by default): These are guides added and editable on slides (in edit view, not master view or slide show). In this example, 2 new guides have been added to the slide.

PPT Guides_3

Existing guides can be adjusted by clicking and dragging them .  The easiest way to remove a guide is to drag it off the slide.

PPT Guides_4

In addition, you can change the color of guides. To change the color of a guide:

  1. Right click the guide you want to change the color of (be sure it is in an area off the slide or on an empty area of the slide)
  2. Hover over Color
  3. Select a color option

PPT Guides_5

To add PowerPoint guides to a slide or layout:

  1. Right click off slide or on an empty area of the slide
  2. Go to Grid and Guides
  3. Choose Add Vertical or Add Horizontal

PPT Guides_6

– Troy @ TLC

By |2016-08-10T08:25:22-07:00April 8th, 2016|Tutorial|

PowerPoint Text Box Cell Padding (Margins)

One great feature of PowerPoint is knowing that every text box is basically a mini Word document which means adjusting the cell padding can be done quickly and easily.

Cell padding-1

By default, all text is inset a small amount in each text box. Here is an example from the Microsoft PowerPoint 2016 default template. There is .1″ all the way around.

Cell padding-2

The cell padding, or inset, is easily customized. Select a text box, right-click and select Format Shape.

Cell padding-3

In the Formatting text pane, click the Text Options.

Cell padding-4

Click the text box icon.

Cell padding-5

Adjust the Left/Right/Top/Bottom margins exactly as needed.

Cell padding-6

Here is the same text box with a 0″ margin all the way around so the text is right next to the placeholder now.

Cell padding-7

And here is a callout bar with the text set to start 1″ in from the left edge.

Cell padding-8

Just some formatting ideas for your next presentation. Otherwise, you are stuck wondering why the text in a shape is not in the position it should be.


– Troy@TLC


By |2016-08-10T08:25:42-07:00April 6th, 2016|Tutorial|

2-Up PDF Printout of PowerPoint Slides

Printing slides is a common need. But the Microsoft presets are not optimal. For example, let’s look at “2-up” printouts directly from PowerPoint and then we’ll look at my preferred option which is using Adobe Acrobat to create the 2-up PDF printout.

Using Microsoft’s PowerPoint preset:

1. Go to File > Export > Create PDF/XPS Document

2-up PDF printout Export_Image1

2. In the PUBLISH OPTIONS section, change the drop down menu to HANDOUTS. Slides per page = 2. Keep HORIZONTAL setting. A print preview of the pages will be on the right.

2-up PDF printout PPT_Image2

Select OK and your PDF will be created.

2-up PDF printout PPT_Image3


But, these can be larger images of each slide if we do not use the PowerPoint preset.


To create 2-up printout using Adobe Acrobat (Note: This is a multi-step process, but the result is great):

1. Go to File > Export > Create PDF/XPS Document. This time don’t worry about the options, just create PDF with 1 slide per page (the default print setup).

2upBlog_1upPDF_Image4

2. Now we are going to print the PDF again. From the PDF of the slides, Go to File >Print

2-up PDF printout PDF_Image5

3. Select ADOBE PDF as your printer.

4. In the Page Sizing and Handling select MULTIPLE.

5. In Pages Per Sheet select Custom.

6. Set to 1 by 2, the small print preview should look like the below example.

7. PRINT.

2upBlog_PrintPDFoptions_Image6

As you can see, side-by-side, the Adobe Acrobat 2-up PDF printout on the left has larger slide images than the PowerPoint 2-up printout, the Adobe Acrobat 2-up takes up the page significantly more than PowerPoint does.

2upBlog_2upPDF_Image72upBlog_2upPPT_Image3

Just a simple option to provide better printouts. It also works for 3-4-6-8-up printouts!

-Troy @ TLC

By |2016-08-10T08:27:31-07:00April 4th, 2016|Tutorial|
Go to Top