resource

JRuler Onscreen Ruler

In PowerPoint, Photoshop, Word and many other applications you can turn on a ruler to confirm size, alignment, etc. Enter the very cool JRuler application!


Here we can see the PPTBlog banner is 740px wide.

– JRuler is a free download (download here).

– It does not need to be installed (just launch the .exe any time)

– It can be stretched to any length (maximum is your screen resolution)

– It floats on top of all applications and windows

– Hint: right-click on it for a number of additional tools and options. Open the JRuler.htm file included in the download for full details

– Troy @ TLC

By |2016-11-17T12:54:07-07:00June 23rd, 2008|Software/Add-Ins|

NOW AVAILABLE SnagIt v9

One of my favorite applications, SnagIt, has just this week released the completely redesigned version 9.


There is a new Microsoft like ribbon navigation (works great) and some new image management tools. Get all the details, pricing and download options here. Download.com also has a good review of it here.

– Troy @ TLC

By |2016-11-17T12:56:24-07:00June 13th, 2008|Software/Add-Ins|

Need A Map for a Presentation ?

One of the best deals available is the map collection from an educational supplier. eSchoolMaps has a huge collection of U.S. and global maps that are supplied in several formats.

The .emf version is not only compatible with PowerPoint, but already on slides which can be inserted into any presentation! And all can be modified with custom fills, resizing, etc. But best of all, the entire collection is just $40! Look at it here.

Here is a US map I modified for a recent project:

– Troy @ TLC

By |2016-11-17T12:56:45-07:00June 11th, 2008|Software/Add-Ins|

Good PPT Article All Should Read

Last week a great article on PowerPoint presentations came out on bMighty by Nilofer Merchant (most likely posted many other places as well).

The article is “Strategy Matters: Eight Great PowerPoint Myths” which you can read here. It has a good message – don’t use animation for animation, don’t use too much content on a slide, and the presentation is to support the speaker who is to convey the message to the audience (not read the slides or let the presentation tell the story).

My only caution is that the author is not overly objective about the proper use of animation (myth #5) and draws the line on its use by throwing it out… maybe she has seen to many bad presentations.

– Troy @ TLC

By |2016-11-17T13:01:45-07:00May 23rd, 2008|PowerPoint, Resource/Misc|

Vector Magic (Update)

A few weeks back I posted a tutorial on the Vector Magic website/application (converts raster artwork to editable vector graphics). There are lots of visitors to ThePowerPointBlog, and I am sure many went and checked it out – but don’t blame me…

Vector Magic has gone from free to a pay system… Still an incredible application which can easily compete with, and in many aspects out perform Illustrator C3’s vectorize feature. Everyone just has to pay now.

– Troy @ TLC

By |2016-11-17T13:29:38-07:00March 24th, 2008|Resource/Misc|

Vector Magic website


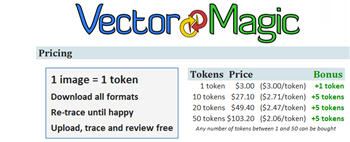
So I recently discovered a truly amazing online tool – Vector Magic! This web 2.0 app will convert virtually any image to a true vector graphic. It is the result of research by a team at Stanford and I have been really impressed with it!

1. Go to www.vectormagic.com

2. If it is your first time, watch the quick tutorial video

3. Click the BROWSE button and find a image on your computer you want to convert to vector format

4. With the image selected click UPLOAD

5. VectorMagic analyzes the image and makes a recommended setting about the type of image selected. You can change the selection now or later (after seeing render results)

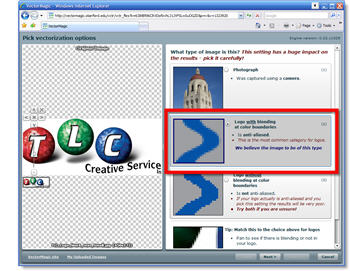
6. Next is the quality setting, which defaults to MEDIUM. Here you can change the setting now or later after seeing the render results.

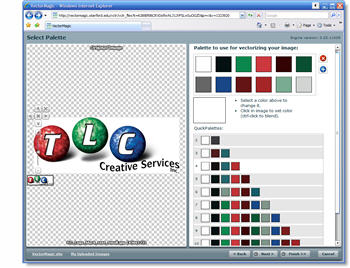
7. The fewer colors the smaller the image and VectorMagic wants to make small images, so the default is to use a color palette of 12 colors.

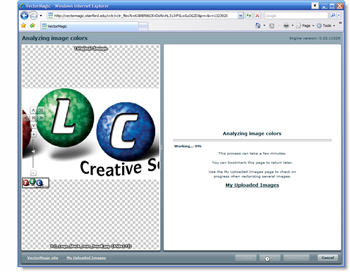
8. The image is then analyzed for colors (this is part of the incredible programming!)

9. Based on it analysis you have color options from 1 to 12 colors – select the one that looks to work with your original artwork. Because the TLC Creative logo has lots of subtle colors I selected the full 12 color palette.

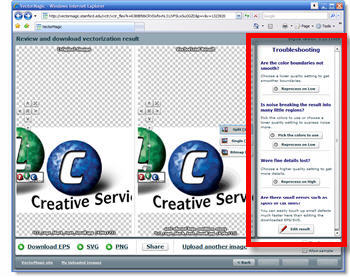
10. VectorMagic then renders your image and displays a Before and After image.

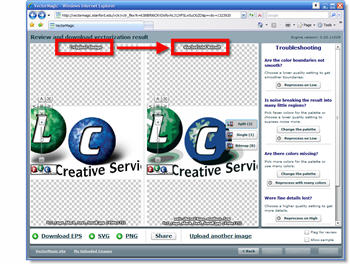
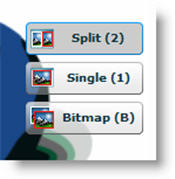
11. Again, another great feature (especially for a web-based application) are the 3 preview options. When in single image it shows the vector version and when you click it shows the raster version. There is also a Google Earth style zoom tool on the left.

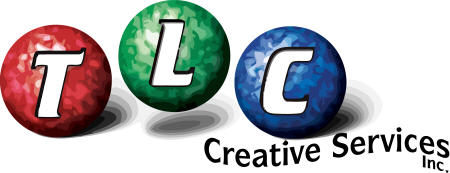
12. Here is the resulting vector image of the TLC Creative logo. I would say this is on par with some very expensive plug-ins I run for Illustrator.

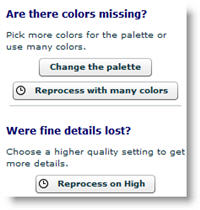
13. On the right side are TROUBLE SHOOTING options which allow you to change any of the earlier selections.

For my image, the results are impressive but not really usable. So I changed the color palette to use MANY COLORS, which means not be limited to 12.

14. VectorMagic rendered my image again and this time the results are really incredible!

15. I went to the Trouble Shooting section one more time and rendered the TLC Creative logo on HIGH QUALITY vs. the medium setting – WOW!

16. When you have the image you want, there are 3 save options: .eps, .svg, .png

.EPS and .SVG can be converted in a vector application such as Adobe Illustrator or CorelDraw to a .wmf (windows meta file), which is a vector format that PowerPoint recognizes. And .png is not a vector format, but is a format that PowerPoint recognizes.

– Troy @ TLC

By |2016-11-17T13:24:51-07:00February 22nd, 2008|Resource/Misc, Tutorial|

Make a “Fake” Website

One of the common requests is to show a website on a slide, or create a mock-up of a website. With this request I first open one of my favorite applications SnagIt.

Then open a blank broswer and use snagit to create a .jpg which can be inserted into the slide. Here is one I like, which I added a drop shadow to for some extra pizzazz.

Then I can capture the needed website or add images to mockup. Here is my slide, note there are 2 images; the browser image and then website image (which I positioned and cropped to fit inside the browser). I can also add the URL with a PPT text box, which makes this clear and easy to read:

– Troy @ TLC

By |2016-11-17T13:27:31-07:00February 13th, 2008|PowerPoint, Resource/Misc, Tutorial|

Discount Code for iStockPhoto

So the more I utilize iStockPhoto (my latest was purchasing some fantastic vector art to integrate into a template) the more I am putting my budget toward it vs. maintaining subscriptions to other services.

Of course things get even better when I discover a discount! Here are the details:
a. 20% off any $50+ purchase
b. Offer code: XARACOM
c. Note: only can be used 1x per account

– Troy @ TLC

By |2016-11-17T13:29:14-07:00February 11th, 2008|Resource/Misc|

Perspector 4.0 Released

Perspector is a unique PowerPoint add-in that allows you to either new 3D images, text and diagrams or modify existing 2D PPT autoshapes into 3D.

The folks at Perspector have recently released version 4.0 and added some great features. Here are a few examples:

Click here to go to the Perspector website.

– Troy @ TLC

By |2016-11-17T13:32:23-07:00February 7th, 2008|PowerPoint, Software/Add-Ins|

iClipArt.com Subscription for Free!

Okay, so I just discovered a deal that includes a 1 year subscription to iCLIPART.com, which was yesterday’s post.

With 2 rebates you can purchase the entire ClipArt 3.5 Million image collection from Buy.com for nothing (and shipping is included!). The boxed set includes a 1 year subscription to iClipArt.com, so now you have it all!!

Click here to go to the Buy.com page.

– Troy @ TLC

By |2016-11-17T13:35:06-07:00January 26th, 2008|Software/Add-Ins|
Go to Top