tutorial

Clear Text Styles

So you are working in PPT 2007 and enjoying the great design tools like the ability to stylize any text (because all text is WordArt now).

I start with this:

Then we stylize it to look like this:

But later we decide we want it back to standard text – like this:

How do you do that….

Select the text >> go to the Draw-Format tab >> click the drop down to show the full menu of the preset styles >> at the very bottom is the ‘clear wordart’ option (remember, ALL text is now wordart)

Done!

-Troy @ TLC

By |2016-09-16T10:09:41-07:00June 25th, 2009|Tutorial|

How To Verify Audio is Embedded in PPT 2007

With PPT 2003 if you right click the speaker icon and go to EDIT SOUND OBJECT you get this dialog.

In PPT 2007, click the speaker icon and the ribbon goes to the SOUND TOOLS ribbon. It gives you a lot of information.

Of note the MAX SOUND FILE SIZE (KB) is now not a hidden dialog (be sure this is set to 50,000). But where is the embedded/contained information?

You need to click the more info button in the lower right corner to bring up the legacy dialog to see information about it your audio file is linked or embedded (contained).

– Troy @ TLC

By |2016-09-16T10:29:09-07:00April 24th, 2009|Tutorial|

Where are the File Properties in PPT 2007?

The ribbon interface was designed to be intuitive and make things easy to find. But there are exceptions to everything, like not having an ‘Insert Slide’ on the Insert tab and finding the file properties for the presentation.

In PPT 2003 you go to FILE >> PROPERTIES and this dialog appears:

To find this information in PPT 2007 it is not as obvious, although it does have a nice layout when found. To open the file properties in PPT 2007:
1 – go to the OFFICE BUTTON
2 – go to PREPARE
3 – select PROPERTIES

The properties information appears inline just above your slides.

– Troy @ TLC

By |2016-11-17T12:00:08-08:00April 6th, 2009|Tutorial|

Another – BETTER- Way to Nudge/Move a Chart in PPT 2007

I received an email from my friend Ute, a PowerPoint MVP from Germany who directed me to one of her video tutorials with the clue that “strg” means CTRL.

You can watch the tutorial here (it is in German).

Here is my sample chart. Note the full selection line around it when clicked.

But if you CTRL CLICK on the chart you get a different selection, 4 dots.

With the CTRL CLICK selection the arrow keys allow you to move the chart!

Thanks Ute!

– Troy @ TLC

By |2016-09-16T10:38:17-07:00April 4th, 2009|Tutorial|

Before Ungrouping Chart – Make a Hidden Backup

For many projects I find myself ungrouping charts for custom animation or any number of other reasons. But what often happens is there is need to adjust the chart… oops it is now 50+ individual text boxes and autoshapes.

My solution is before I break apart a chart is to create a duplicate it.

Then shrink the duplicate to a miniature size.

I then move the miniature version off the slide so it is not seen during a slide show (or I have also ‘hidden’ it under another graphic).

Now I can ungroup the chart on the slide and do whatever the special needs are – and still have a backup option should the data need to be adjusted.

– Troy @ TLC

By |2025-03-28T09:39:40-07:00November 3rd, 2008|Tutorial|

Insert Movie Player With Controls (PPT 2007)

To insert an instance of Windows Media Player in PPT 2007 there are a few things that need to adjusted in the application first:

1. Office Button >> PowerPoint Options >> Popular Tab
2. Check SHOW DEVELOPER TAB IN RIBBON
3. Okay

Now your PPT 2007 ribbon has a new tab available – the Developer Tab

To insert Windows Media Player from PPT 2007:
– Go to the developer tab
– Click hammer icon

– Scroll to bottom of list and select windows media player

Drag a marque to the size and position you would like the media player (it can be adjusted after inserted) and slide will look like this:

– Troy @ TLC

By |2016-11-17T12:24:27-08:00October 27th, 2008|Tutorial|

Insert Movie Player With Controls (PPT 2003)

You can insert a full instance of Windows Media Player on a slide so you have all of the playback controls for a movie. So you have a slide like this:

In PowerPoint 2003:
– Insert >> Object
– From the bottom of the list choose WINDOWS MEDIA PLAYER

The media player is now inserted on the slide.

– Troy @ TLC

By |2016-11-17T12:25:00-08:00October 24th, 2008|Tutorial|

The INSERT Key

When was the last time you purposefully used the Insert key on your keyboard??

Have you ever purposefully used it…

This key can also be disabled, and the easiest way is through Microsoft Word.

In Word 2003:
TOOLS >> CUSTOMIZE >> OPTIONS >> CATEGORIES (on left) >> OVERTYPE >> CURRENT KEYS area >> select INSERT and REMOVE

In Word 2007:
Office Button >> Options >> Advanced >> Editing Options >> Use Overtype Mode (it looks like this is not turned off as the default –yeah!)

– Troy @ TLC

By |2016-11-17T12:26:00-08:00October 20th, 2008|Tutorial|

Entrance Animation (Lens – Part 3)

The animation for this entrance is very straight forward. There are 3 elements:

And there are just 3 animations, each an entrance animation.

1. Lens = Ascend, Fast

2. Reflection = Wipe – From Top, With Previous (but mannually adjusted to begin 9/10th of a second after the lens (set to 0.9), and Fast

3. Lens Flair = Fade, With Previous, Medium

That’s it. All of the effort was really done outside PPT, in Photoshop. Once the elements where one the slide it was pretty easy to apply the few needed animations.

Click here to download a presentation (saved as a .ppt) to see this animated entrance in more detail.

– Troy @ TLC

By |2016-11-17T12:27:23-08:00October 10th, 2008|Tutorial|

Entrance Animation (Lens – Part 2)

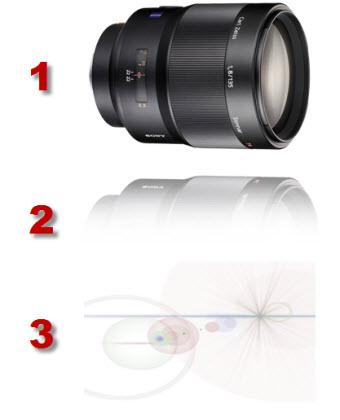
The first step is preparing the .jpg image. Because the template is not a white background, the white background around the lens needs to be removed.

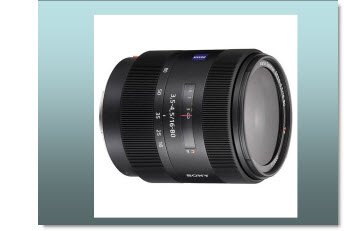
Option 1 is to use PowerPoint’s “Set Transparent Color Tool”

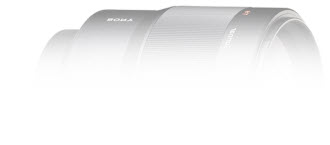
This tool will ‘work’ because the background to be removed is a solid color, not used in the actual graphic. While this is a quick solution, it has a difficult time providing the quality I like.

You can see the small bits of the background that where left behind.

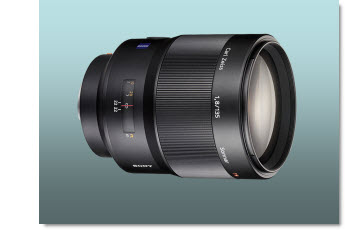
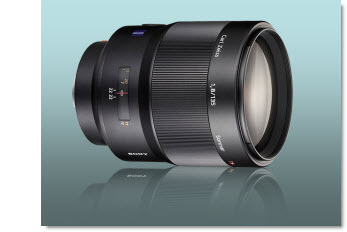
My solution has been to prepare images in Photoshop. With the lens image I dropped out the background by outlining the image with a ****, deleting the background and then saving the image in .png format with transparency. This image was then imported into PowerPoint.

The next step, also in Photoshop, was to duplicate the image, vertically flip it, reduce the opacity to 15%, and feather out/delete 2/3 of it to create a reflection.

The image was saved out as a .png image and imported into PowerPoint and positioned below the lens image.

The final step, again done in Photoshop, was to create a dynamic lens flair image to add a dynamic and rich feel to the overall image.

Note: this is a transparent image, but shown here on black so it can be viewed easier.

Up next – animating it all!

– Troy @ TLC

By |2016-11-17T12:27:57-08:00October 8th, 2008|Tutorial|
Go to Top