tutorial

Insert Slide in PPT 2007

QUESTION:
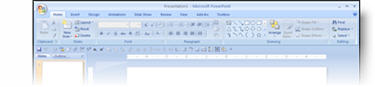
What is missing from the INSERT TAB in PowerPoint 2007?

ANSWER:
The INSERT SLIDE BUTTON.

WHERE DID IT GO?
The User Interface team must have thought this was a common and valuable tool, so they placed it on the “Home”/Draw tab.

Although this works, it really does not make sense, as the insert tab is, well, to insert things.

SOLUTION:
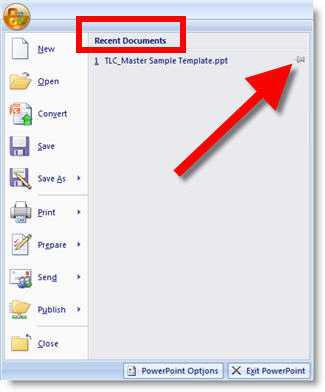
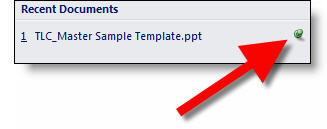
Steve over at PPTools created a little, FREE, add-in that does this:

Now the home/draw tab AND the insert tab have the insert slide button!

You can read how to install and download the tiny add-in here.

– Troy @ TLC

By |2016-11-17T12:36:09-07:00September 19th, 2008|Tutorial|

Template Background Design

When creating a custom PowerPoint template the first step is developing the custom artwork for backgrounds. I am going to break down a template recently designed. In PhotoShop I pull in all of the visual assets and stylize an appropriate to the theme canvas for the PowerPoint slides. Here is the content slide design for the “Blue Lens” template.

There are a lot of layers to create the desired effect. Here is the PhotoShop layers for this template (shows both the Content and Title slide background layers). Fortunately this was a fairly light template in terms of layered elements so we can show them all in one easy screenshot.


This is a pet peeve, but I really hate receiving Photoshop files with none of layers named – it’s is a huge waste of my time to go hunting for a needed layer by turning on and off layers. So, as seen, I always label all layers in PhotoShop so modifications are easy because the layers can be quickly identified.

I save out each of the backgrounds as a .jpg with a compression level of 10. From there it is all PowerPoint!

– Troy @ TLC

By |2016-11-17T12:42:56-07:00September 1st, 2008|Portfolio, Tutorial|

Erase Personal Information From Presentation


“The creation date, time and author show up on the document properties of the PowerPoint presentation.” (for the curious, you can read the full story here).

Have you ever been concerned with too much information being included in your presentation? Maybe even information that is not on a slide, but buried in a link or the file properties… I have for years tried to keep my clients out of trouble by removing often removing their personal information, or sometimes the TLC Creative Services information from the file properties.

My tool for doing this – the Shyam’s Toolbox add-in.

Just go to TOOLBOX >> OBJECTS >> ERASE PERSONAL INFORMATION FROM PRESENTATION

No the file properties are clear – no time stamp, no amount record of hours worked, etc.

It is just one of the many tools in the add-in package, which runs approximately $50 – but it can be worth it as the above story points out!

– Troy @ TLC

By |2016-11-17T12:45:55-07:00August 6th, 2008|Tutorial|

PPT2007 Effects Respect .PNG Transparency

A great thing about all of the wonderful visual effects of PPT 2007 is that they respect the transparency/alpha area of a .png image. As example here is a quick sample image. In photoshop I dropped out the background around the little computer guy and saved out the image as .png with transparency.

For this example I added the background image behind part of the computer guy to show the transpency area.

Then I selected the computer guy image and applied a nice PPT 2007drop shadow.

Note the drop shadow contours to the computer guy image, not the rectangle shape of the placed image!

– Troy @ TLC

By |2016-11-17T12:52:28-07:00July 2nd, 2008|Tutorial|

More Edit Room In PPT2007

If you find the Ribbon taking up to much space, space that would be better used viewing your slides as you edit, there is a great option. Here is the standard Ribbon view.

Right-click to the right of the tabs along the top and there is a “Minimize Ribbon” option.

The result is the ribbon disappears and frees up a lot of editing area.

When you click on any of tabs the ribbon appears. Click away and it disappears again!

– Troy @ TLC

By |2016-11-17T12:52:48-07:00June 30th, 2008|PowerPoint, Tutorial|

Always Open A Recent Document (PPT 2007)

Most people have a handful of presentations that they access routinely. PowerPoint has had the ‘Recent Documents’ feature to make it easier to reopen those presentations – and it is a helpful tool many times. But PowerPoint 2007 has made that feature even more powerful and usable.

Here is the PPT 2007 Start Menu and mine shows 1 Recent Document (okay the list was full, but I cleared it for this tutorial).

The important addition to PPT 2007 is the small thumbtack icon on the right. It is the same icon that has existed since PPT XP on the Master Slides to preserve masters. The one on the Recent Documents does the exact same thing – it preserves that presentation to always be in the Recent Documents list!

By clicking the thumbtack it goes from grey to green – and now you can always open that presentation with ease! (note: works as long as the presentation stays in its original location)

– Troy @ TLC

By |2016-11-17T12:53:08-07:00June 27th, 2008|PowerPoint, Tutorial|

Preserve Master Slides (2)

As follow up to the previous post. If you have several master slides that do not have the thumbnail icon such as this:

You can select them all, right click any of the selected, choose ‘Preserve Master’:

All of the selected master slides have the thumbtack icon applied simulataneously:

– Troy @ TLC

By |2016-11-17T13:02:09-07:00May 21st, 2008|PowerPoint, Tutorial|

Preserve Master Slides

Multiple master slides are fantastic! But every now and then you have a presentation with multiple masters and go to use one that you know is a part of the file and it’s not to be found – ahhh! Well you can prevent this from happening by first assuring that all master slides are set to be preserved – which is another way of saying ‘do not delete, even if not used’.

Here is my sample presentation with 3 master slides:

Notice that master slides 1 and 3 have a little thumbtack icon:

This indicates the master slide is preserved and will not be deleted unless you specifically remove it (that is good!). There are 2 easy ways you can preserve a master slide and add the thumbtack icon to it.

1. Use the ‘Preserve Master’button on the master slide toolbar:

2. Right click the master slide and from the pop up menu choose ‘Preserve Master’.

– Troy @ TLC

By |2016-11-17T13:02:37-07:00May 19th, 2008|PowerPoint, Tutorial|

Line Spacing PPT 2003 vs 2007

The new line spacing tools were a bit confusing until I figured out how to correlate the new layout to the more familiar PPT 2003 tools.

To access line spacing tools in PPT 2003 – go to FORMAT >> LINE SPACING.

To access line spacing tools in PPT 2007 – go to the HOME tab >> PARAGRAPH section >> LINE SPACING button.

In PPT 2003 there are 3 options: Line Spacing – Before – After. In PPT 2007 there are a number of tools combined into one interface (which is good).

All 3 of the PPT 2003 options are in the lower section. Using the BEFORE and AFTER tools are intuitive and work the same in both versions. But LINE SPACING offers a number of options:

For me the key was figuring out that MULTIPLE is the same as PPT 2003’s LINE SPACING tool.

To use, select MULTIPLE. The “at” number is the same as the number in PPT 2003’s tool.

The confusing part is the default number in this box is 3, which is much larger than the typical .5 to 2 range. Adjust to something like .9 and you should see results you are expecting.

– Troy @ TLC

By |2016-11-17T13:03:28-07:00May 15th, 2008|PowerPoint, Tutorial|

Animated Object Goes Opaque (2)

Another emphasis animation that just does not work with images that have transparent, or semi-transparent areas is the VERTICAL HIGHLIGHT. Here is our sample image, which as a nice drop shadow and no background so it will work on any color background.

We then apply the VERTICAL EMPHASIS animation:

But when animated the nice transparent background becomes opacue/solid:

An alternative is to create the same effect with some advanced animation. First is to apply a GROW/SHRINK animation:

In the animation setting on the EFFECTS tab we need to:

1. Size needs to be greater than 100, how much will depend on your slide
2. Turn on SMOOTH START
3. Turn on SMOOTH END
4. Turn on AUTO REVERSE

The key to this effect is to use the drop-down and change the animation from BOTH to VERTICAL only:

– Troy @ TLC

By |2016-11-17T13:07:12-07:00April 30th, 2008|PowerPoint, Tutorial|
Go to Top