Monthly Archives: July 2020

PPT Photo Album + Brightslide Match Size

I hinted at this great design trick in the previous post. Let me walk through process in more detail. The goal is to quickly (within minutes of receiving a folder of images) build a slideshow of full frame images, that are cropped and centered, can run as a photo loop.

Step 1: Use a native PowerPoint add-in (that has been hidden in the app for literally years and years). Go to INSERT > PHOTO ALBUM drop down > NEW PHOTO ALBUM

Step 2: Select FILE/DISK > navigate to folder of images > select your images > CREATE

This will create a NEW document with a title page as page 1. Delete page 1.

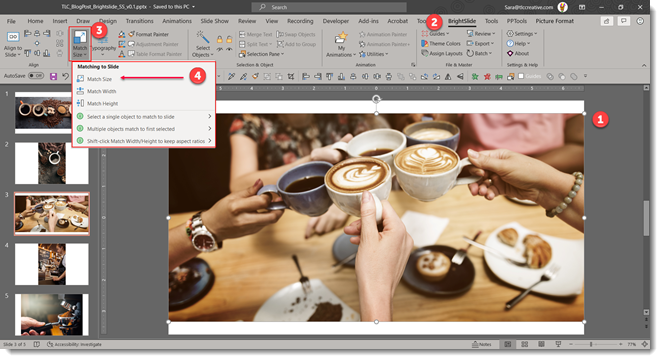
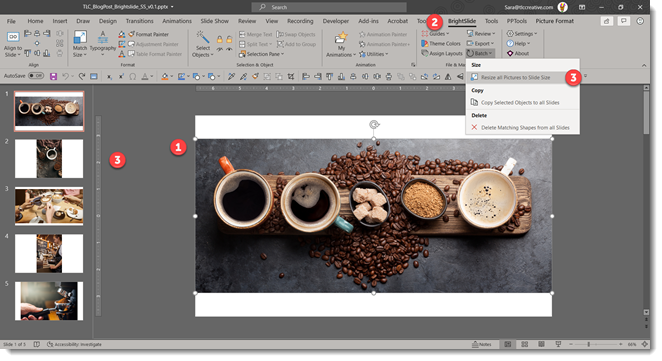
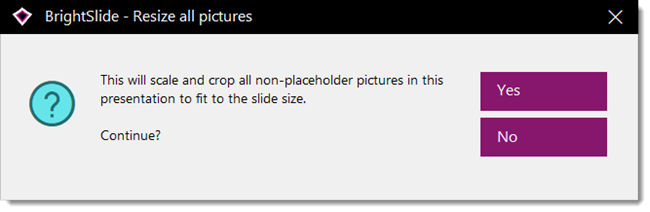
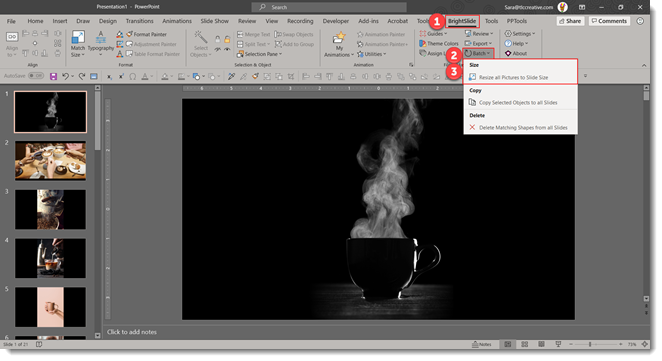
Then go to the BrightSlide tab > BATCH > and resize all images. 

Step 3: Select all slide > apply a slide transition of your choice (FADE is a safe and professional default option) > set slides to auto advance after 8 seconds (or speed your feel is best for your meeting)

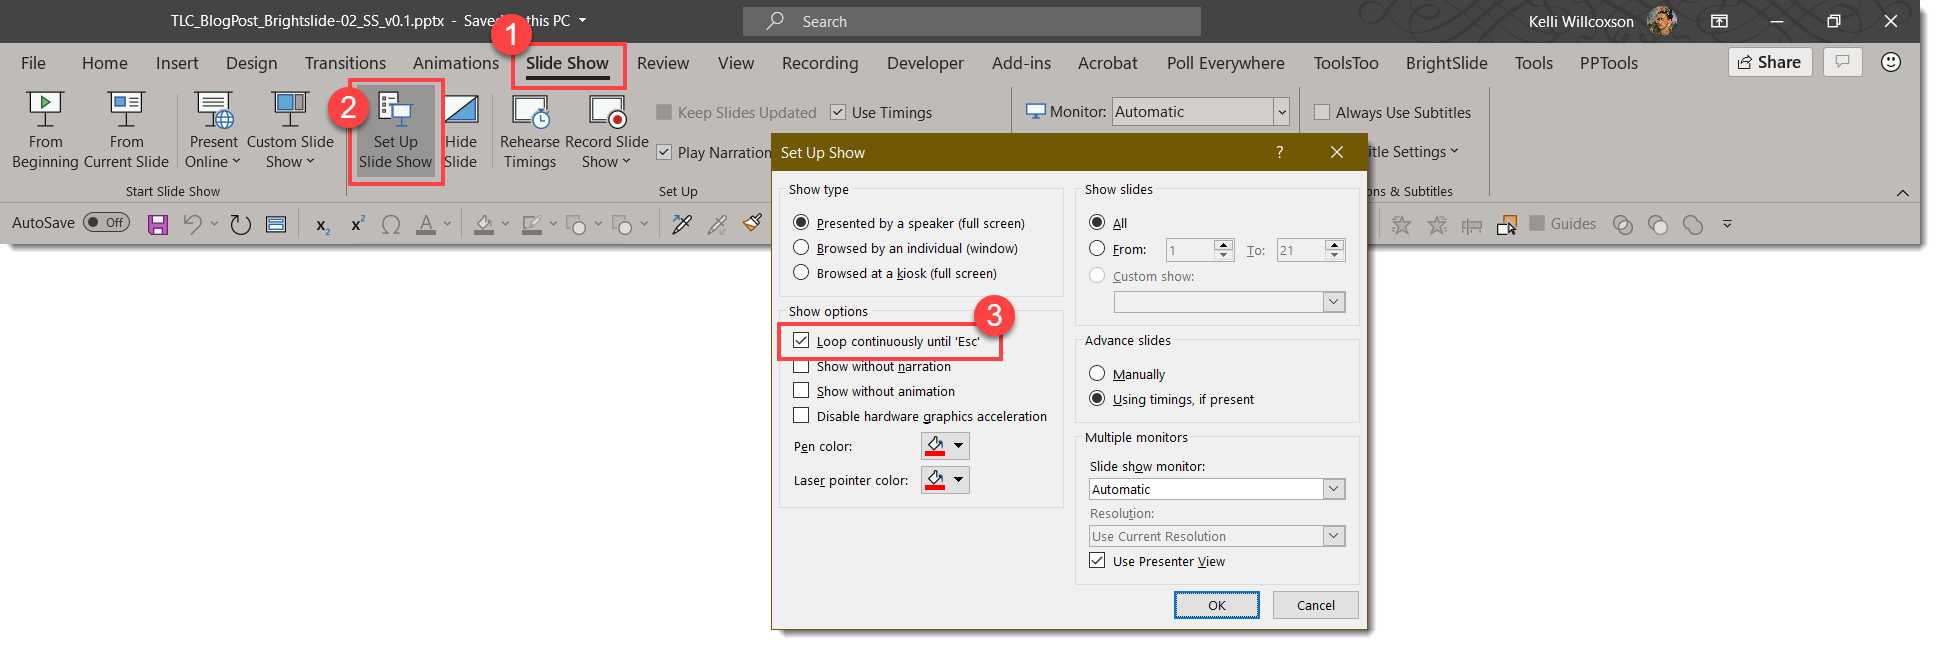
Step 4: Go to SLIDE SHOW > SET UP SLIDE SHOW > select LOOP UNTIL ESCAPE. 

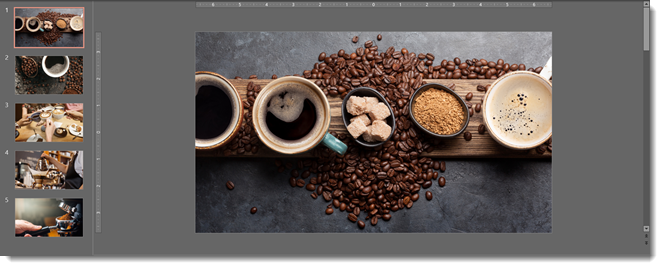
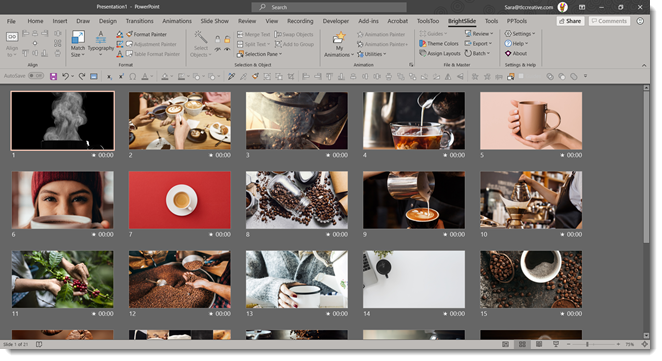
Done! A looping photo slide show built in just a few minutes!

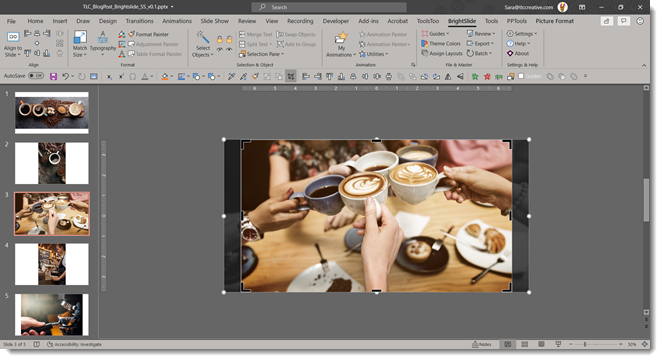
A few more details on the BrightSlide resize image feature. First, it is wonderful! Second, it was added into Brightslide within days of detailing what I thought would be a great add-in tool for many presentation designers (thank you Jamie Garroch and BrightCarbon development team!). What this add-in is doing is scaling each image to fill the slide, adding a crop so the image remains the size of the slide, and centering the image within the crop.

As a final step, which is optional, I run NXPowerlite to resave the images to their crop at an optimized 1920×1080 for an easy to manage file size (because generally I am receiving the images from a professional photographer, and while the images look great, they are huge file sizes!). 

The BrightSlide add-in for PowerPoint can be downloaded for free at: https://www.brightcarbon.com/brightslide/

Troy @ TLC

By |2020-06-30T22:24:20-07:00July 8th, 2020|Tutorial|

Podcast 105 announce

A new episode of The Presentation Podcast is available today! Join Troy, Sandy and Nolan as they test PowerPoint Live Presentations, talk about their experience and things to be aware of when you use it). 

Listen on Apple Podcasts, Stitcher, Google Play, Spotify and Soundcloud – or search The Presentation Podcast for “Presentation Live is Here!” or go direct to the episode page here: https://thepresentationpodcast.com/podcast/105

By |2020-07-06T10:01:59-07:00July 7th, 2020|Resource/Misc|

BrightSlide Image To Fit Slide

The BrightSlide PowerPoint add-in has so many great features it is impossible to say what the “favorite” feature it. But I will list this as one of my top 3! BrightSlide’s ‘Match Size’ tool is brilliant.

Through a series of emails with the BrightSlide lead developer I detailed the process I would go through on virtually every large presentation event to create a custom photo loop for the meeting walk-in, generally being given a folder of images with minutes until doors open! The result was an addition to the Match Size options (thank you BrightSlide!).

The scenario is, an image does not scale to fill the full slide. The fastest solution is now to select the image, go to the BrightSlide tab, and click the Match Size button. There are actually 3 options in the drop-down: Match Size, Match Width, Match Height. But the top level, Match size, button is all that is needed. 

Select the image, click Match Size and the image is not distorted or stretched, but it is cropped to fill the slide. AND it is centered within the crop! Position within the crop can be adjusted by selecting the image and the crop tool to adjust what is the live/visible image.

If resizing all photos in a slide deck, such receiving a folder of images, importing them into a slide deck using PowerPoint Photo Album feature, then use BrightSlides BATCH tool to apply the resize and crop to every image in the deck instantly! 

Using the Batch tool brings up this dialogue, where you want to select yes.

The end result is nearly instantly created beautiful full bleed images that fit the slidet!

The BrightSlide add-in for PowerPoint can be downloaded for free at: https://www.brightcarbon.com/brightslide/

Troy @ TLC

By |2020-06-18T13:17:32-07:00July 6th, 2020|Software/Add-Ins, Tutorial|

Poll Everywhere’s LiveSlides is being Retired

Poll Everywhere is an audience response system (ARS) that we have used at TLC Creative for many years. LiveSlides is from the same company and it’s core mission was to “embed any website seamlessly in PowerPoint and Keynote slides,” which does very well.

I think it was mostly used for adding YouTube videos, social media feeds (which was a great option), interactive maps, and polling. It offers an impressive list of integrations where it can get content from all of these sites into PowerPoint slides:

Alas, Poll Everywhere has announced LiveSlides is being retired.

But for those of us that are Poll Everywhere users, it is not a bad announcement! The macOS version of Poll Everywhere already includes all of the LiveSlides features. The Windows version has some of the integrations and I am hopeful it will be built out to include them all as well.

More info at the Poll Everywhere website.

Troy @ TLC

By |2020-06-18T14:44:53-07:00July 3rd, 2020|Resource/Misc|

PowerPoint Live: Personalized Subtitles for Every Viewer

As talked about in the  previous post, PowerPoint has two different options for displaying live transcription. One from PowerPoint, which displays a single selected language on the presentation screen, and another as part of the Presentation Live feature which adds the transcription to the viewers device, leaving the presenters slides clear of additional content.  This will likely never fully replace live spoken translators, but for remote meetings and audience joining in from virtually anywhere, it’s a fantastic alternative.

[KGVID]https://thepowerpointblog.com/wp-content/uploads/2020/06/unnamed-file.mp4[/KGVID]

One amazing feature I only referenced in the earlier posts, is that every audience member has the ability to switch the transcription to the language of their choice. It is a very intuitive interface, just click the language button in the lower left (on a mobile device in portrait orientation) and choose from the list of 60+ languages.

[KGVID]https://thepowerpointblog.com/wp-content/uploads/2020/06/PresentationLive-3.mp4[/KGVID]

One nice feature, that is a bit more hidden, is that if the audience member speaks the same language as the presenter, they may not want to have the transcription scrolling up as it repeats what the presenter is saying. Click the same language button and in the upper right is a toggle to turn the live transcription on or off.

Troy @ TLC

By |2020-06-30T22:44:32-07:00July 1st, 2020|PowerPoint, Resource/Misc|
Go to Top