Yes, you can create a stop motion-style animation in PowerPoint – without using any transitions or animations at all! Sounds wild, right? This method is all about clever slide sequencing, all to create a looping visual effect that’s perfect for showcasing a fun process diagram because this is obviously what everyone thinks of when they use PowerPoint (a little slide sarcasm there for you)!
Let’s walk through how to build a seamless stop motion loop in PowerPoint using nothing but static slides and timed auto-advances.
What is Stop Motion in PowerPoint?
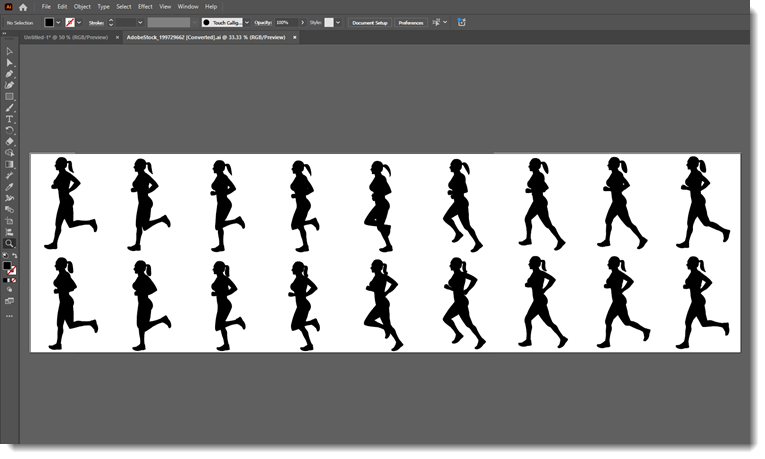
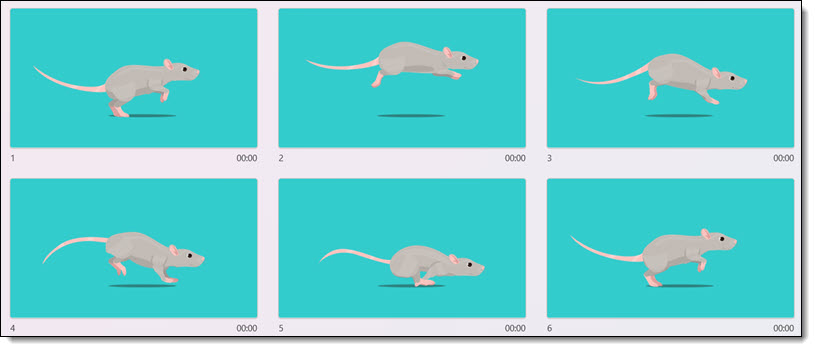
In this case, it’s simple: a series of slightly different slides that play in quick succession, creating the illusion of motion, just like classic frame-by-frame stop motion films or page-by-page flipbooks.
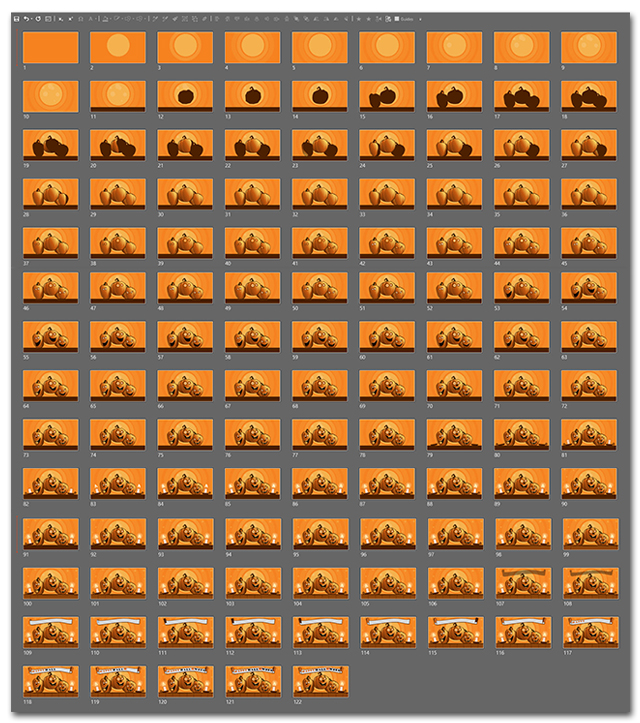
Let’s use a process diagram built it across several slides to create a stop motion effect when played. And this is the best part – there are no animations and no transitions — just the slides doing all the work!
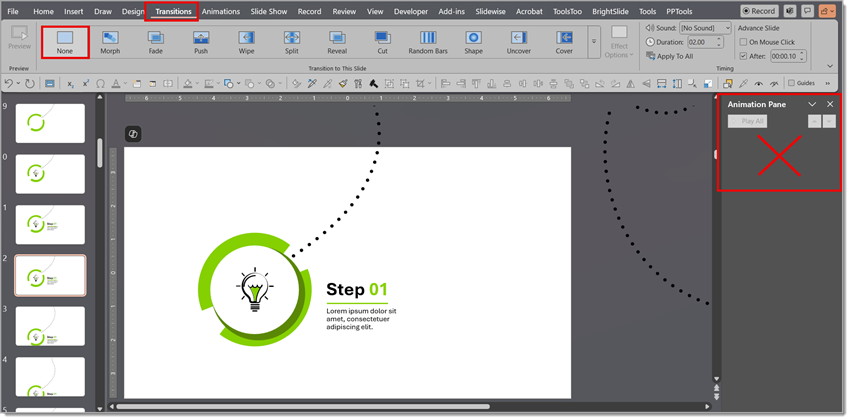
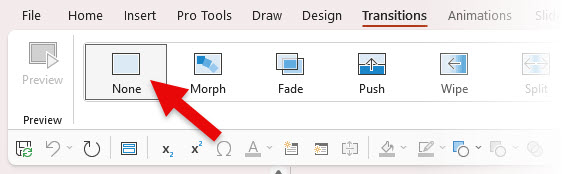
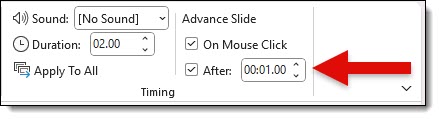
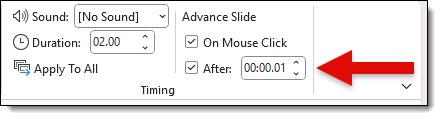
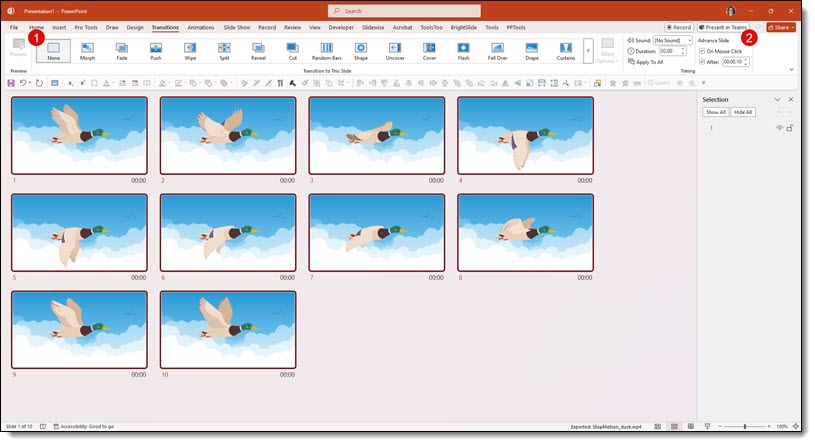
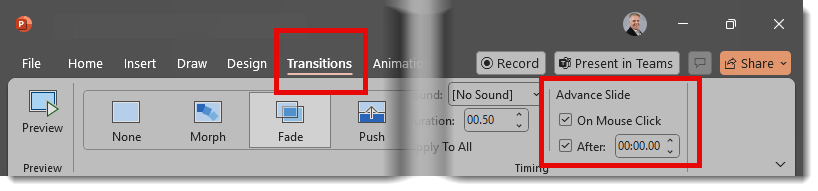
First, set your slide transition (and each slide transition in the animation sequence) to auto advance by clicking the AFTER checkbox and set the timing at 00:00 (e.g., no pause between slides advancing).
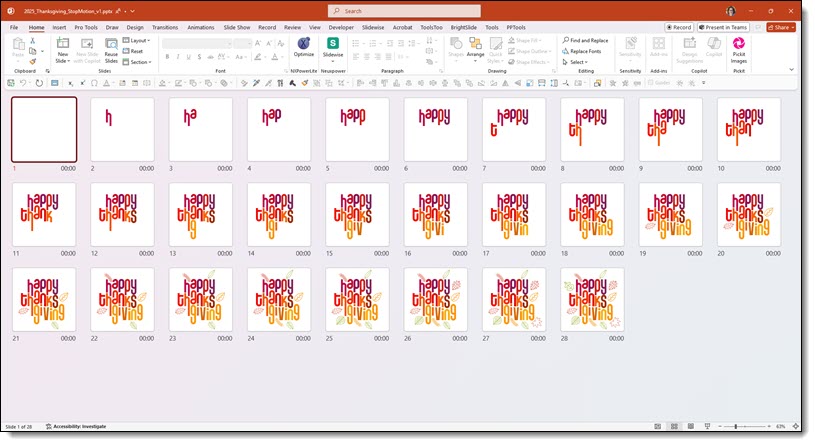
Building Each Shape Element Per Slide (The Frame-by-Frame Method)
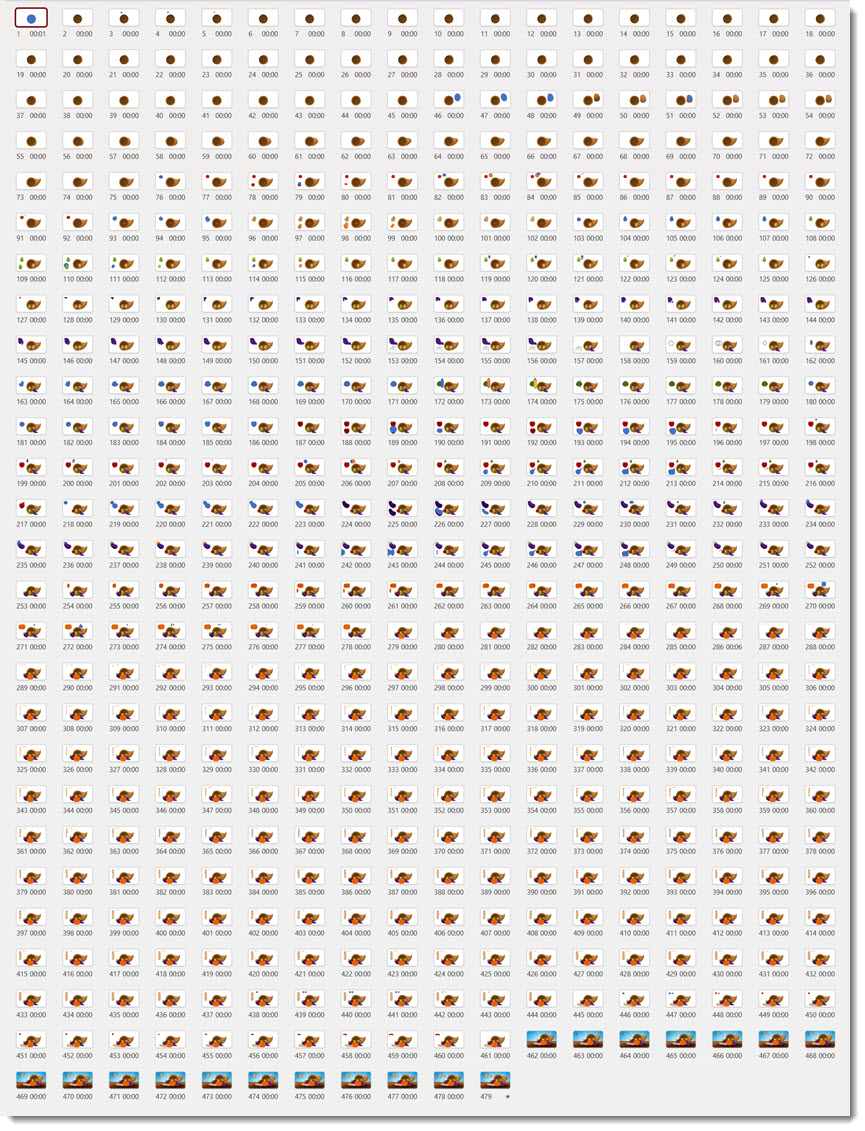
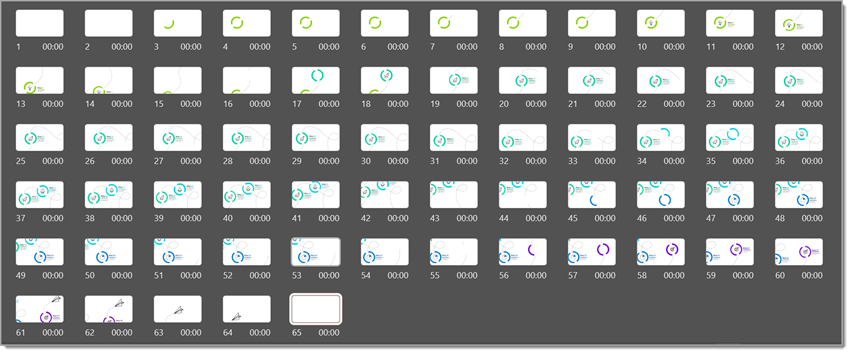
To create a stop motion effect, think of each slide as a frame, or page, in a flipbook. Instead of using PowerPoint animation to make a shape appear, we duplicate the entire slide and then add a new element or piece of an element, or adjust existing elements by slightly repositioning, resizing, or changing the angle. For example, in our process diagram, we duplicate our slide and add a lightbulb icon, which will pop up inside the circle shape when played in slide show mode.
Keep repeating the process, adding elements, moving them, resizing…just remember to check your progress often in slide show mode.

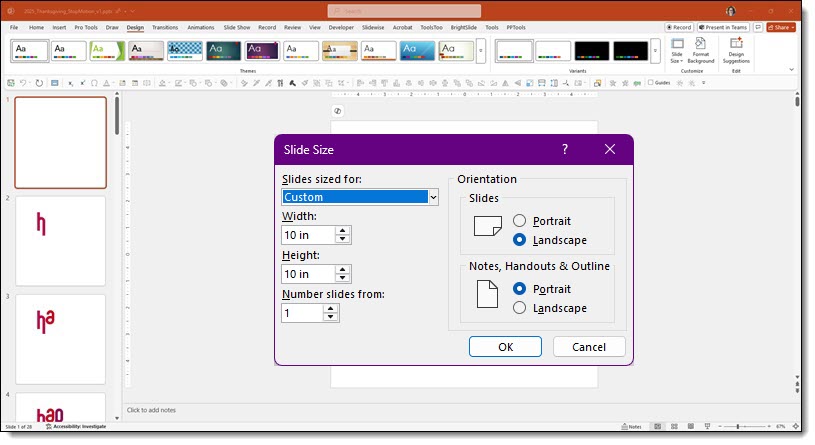
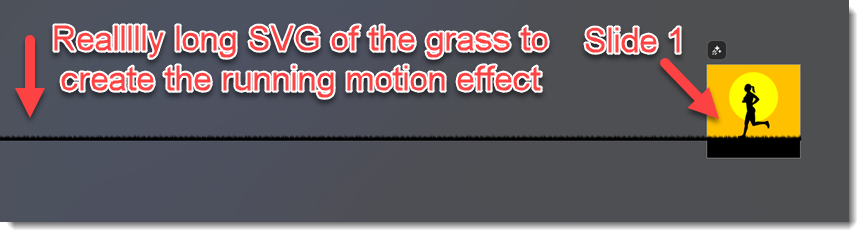
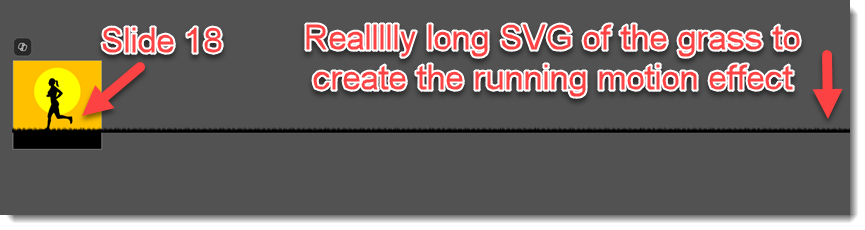
Create a Perfect Loop – Start and End with Blank Slides
If you’re exporting your stop motion animation as a GIF (which plays in a continuous loop), there’s a simple but essential trick to avoid a jumpy or stuttered loop.
- Add a blank slide — e.g., no text, diagram, or shapes, just a solid background (ideally matching your design’s background color).
- Insert that blank slide as the first and last slides in the sequence.

Why Blank Slides Work
When you export to GIF, PowerPoint will loop from the last slide directly back to the first. Without a blank slide in between (or an identical/matching first and last slide), viewers will see the last slide content and then the sudden jump back to the first slide content, which breaks the illusion of a smooth, continuous loop.
By sandwiching your animation with blank frames, the eyes get a quick pause before the loop starts again. This creates a break in the motion that tricks the viewer into perceiving the animation as seamless.
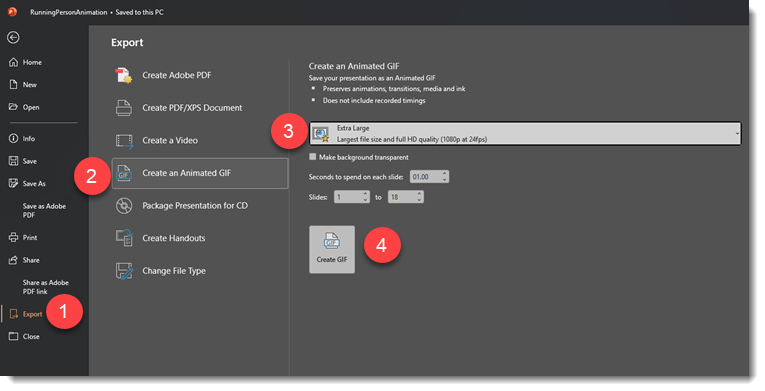
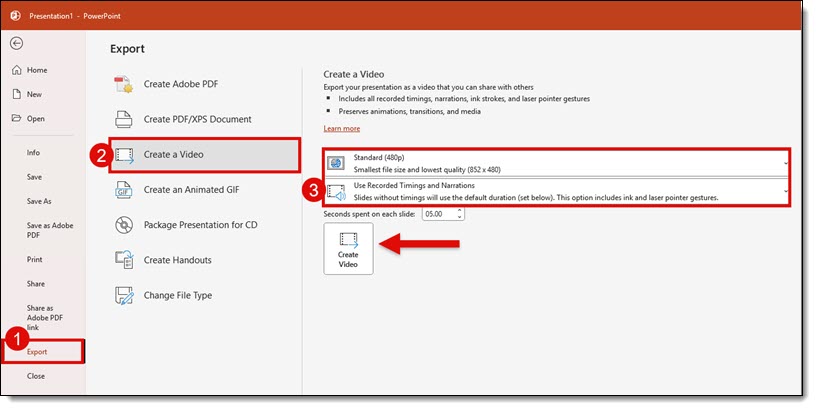
Export as a GIF
Tip: to effectively preview in slide show, go to the Slide Show tab > Set Up Slide Show > click Loop continuously until ‘Esc’. Be sure to watch your animation through to the end and wait for it to loop back to the beginning.
Once your review shows a great animation effect with a seamless loop, it is time to create the animated GIF.
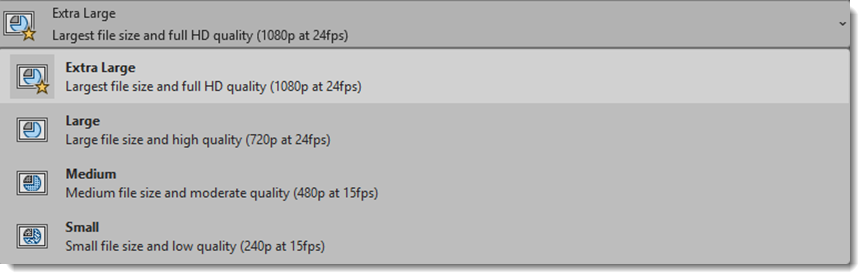
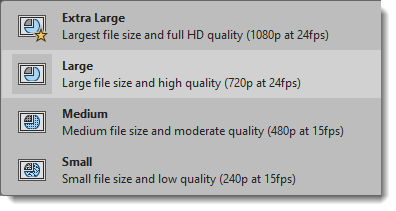
Go to File > Export > Create an Animated GIF > Large 720p

TIP: GIF is a large file size format. PowerPoint has four resolution/quality GIF output options. We generally use 720p for social media for a balance of file size and quality. For using an animated GIF in a presentation where file size may not be the same concern, we will often export to the full 1080p if the GIF will be a full slide element.
Final Thoughts
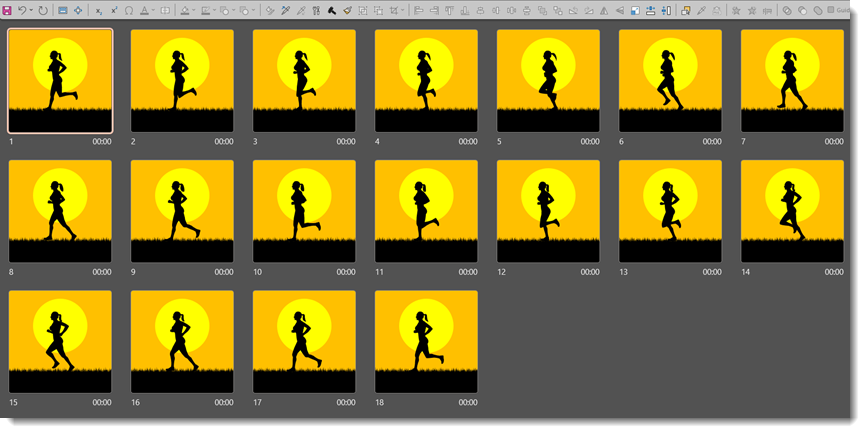
You don’t need complex animations and other software tools to bring your slides, social media content, or blog posts to life. With just static slides and thoughtful design, you can create engaging, looping stop motion effects that can make the content stand out! Here is our process diagram as an exported GIF:

Animated GIFs can be perfect for:
- And practically anything that needs to loop
So next time you want motion, don’t animate, just duplicate smartly!
-Christie on the TLC Creative Presentation Design Team