How To Move An Object Seamlessly With Multiple Motion Paths
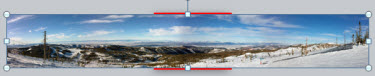
Motion path animations are a great feature, but using them beyond the basic can be confusing. For example, here is the slide from yesterday’s timeline sample:
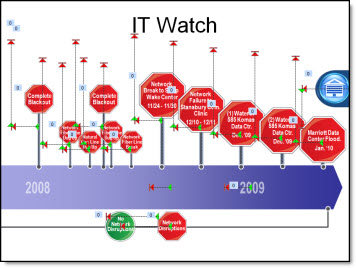
The animation effect was great and the design of it relied on a lot of motion paths. This is a quick step-by-step example of moving an object to two positions with motion paths.
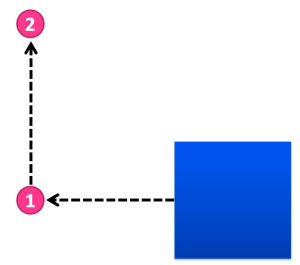
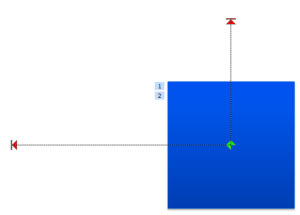
1. The blue box is the object to move. First to area “1” and then to area “2.”
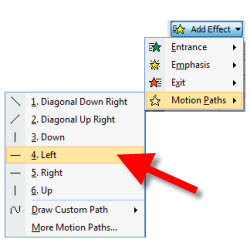
2. Moving to area “1” is easy. Select the box and add a Motion Path to the left.
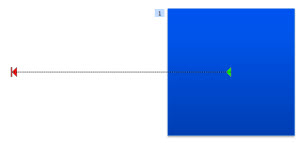
3. To move to area “2” is a bit more involved. First, add a Motion Path up. Note: It is added to the existing position. During slide show the box will move to the left, then jump back to the original location and move up – not the seamless effect wanted.
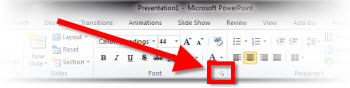
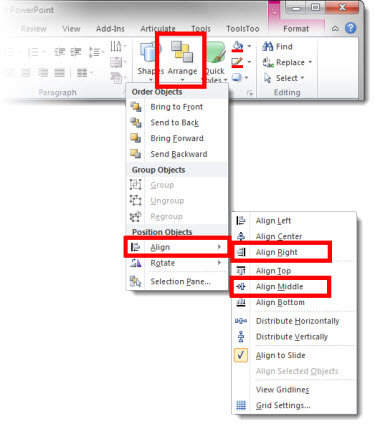
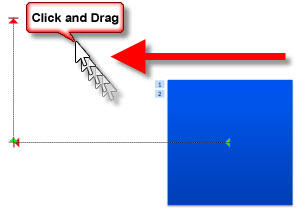
4. Select the “up” motion path. Note: You must be in the Animation tab to view motion paths and select them. Then, click and drag it over so it’s green start is exactly aligned with the first motion paths red end.
5. Done. Now, the box will seamlessly move to area “1” and then up to area “2.”

Download presentation with this sample animation (17K). Note: if your browser changes downloaded file to”.zip” rename to “.pptx”.
– Troy @ TLC