Tutorial

Use VBA to Set Really-Really Long Animations

As a follow up to the previous post, Steve Rindsberg of PPTools has some how-to info for those that are willing to delve into VBA coding.

Sub VertTheDominantParaLegal()

With ActivePresentation.Slides(1).Timeline

With .MainSequence.Item(1)

.Timing.Duration = 108000

End with

End with

End Sub

Note 1: Steve’s info was specific to PPT 2007, so not certain how it works in PPT 2003 or 2010.

Note 2: I do zero VBA coding, so I am no help with how to use this code or trouble shooting it (I leave that to the code pro’s like Steve).

– Troy @ TLC
By |2016-08-16T09:48:53-07:00October 21st, 2011|Tutorial|

How Long Can An Animation Be?

So how long of an animation can be added to something in PowerPoint? Not what is practical, but what is possible.

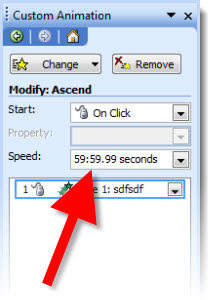
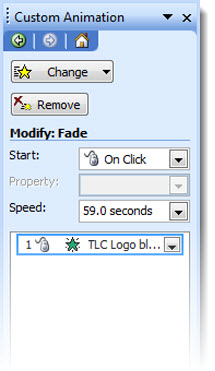
The answer is 59 minutes, 59 seconds and 99 thousands of a second. But how you set this up depends on the version of PowerPoint you are using.

PPT 2003 and 2007:
1. Add any animation (Entrance, Exit, Emphasis, Motion Path) to element.

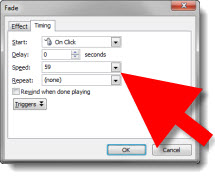
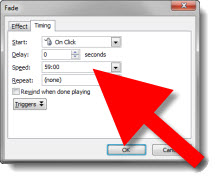
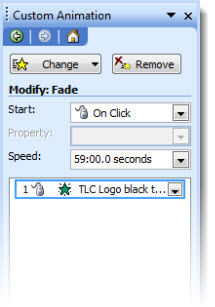
2. Open the animation settings dialog and input 59.

3. “59” defaults to 59 seconds.

4. Open the animation settings dialog and input 59:00.

5. Now the animation will occur over the next 59 minutes.

PPT 2010:
With PPT 2010 there were many tweaks to the animation UI, not all for the better…

1. Add any animation (Entrance, Exit, Emphasis, Motion Path) to element.

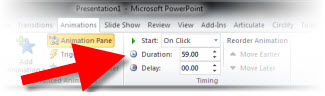
2. Open the animation settings dialog and input 59.

3. “59” defaults to 59 seconds.

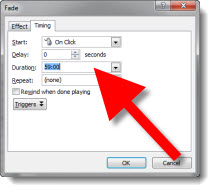
4. Open the animation settings dialog and input 59:00. Click “Okay” and the time is highlighted waiting for a valid value to be entered (no hint that 59:00 is not valid or what is valid, you just get no action when you click the Okay button).

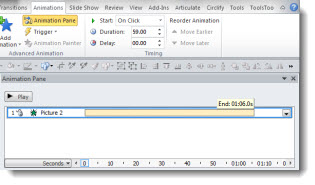
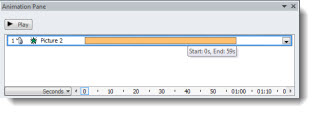
5. Open the animation pane and select the same element. It is a bit tedious, but click and drag the timeline as long as you want the animation to occur. Note: You can drag the timeline as far past 1 hour as desired.

6. Even though you extended the timeline to 1 hour, 1 minute or 5 hours, it will snap back to its maximum 59:59:99.

– Troy @ TLC
By |2016-08-16T09:49:13-07:00October 19th, 2011|Tutorial|

How Do I Get an Embedded Audio File From a Presentation?

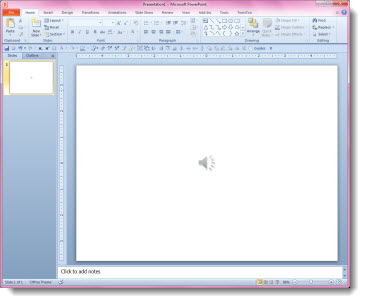
Another question I receive a lot goes directly with the previous post (about finding video files): “Where are audio/music files that are embedded inside the .pptx file?”

Here is one process for getting to the actual audio/music files that are embedded in a PPT 2010 file.

1. Locate the presentation file in Windows Explorer and make a duplicate of it (we are going to “break” it).

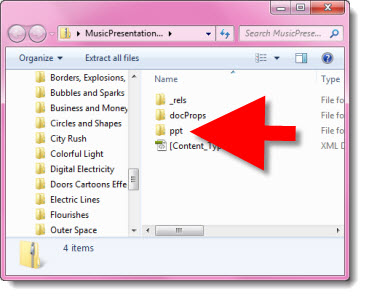
2. Change the file name from .pptx to .zip

3. When you change the file extension you will get this warning dialog – click “Yes.”

4. Double click to open the new .zip file.

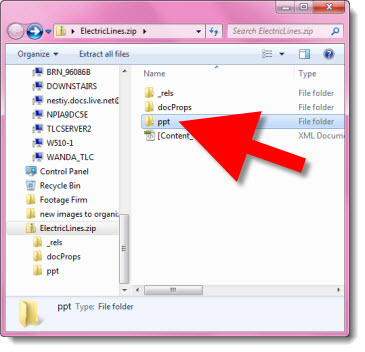
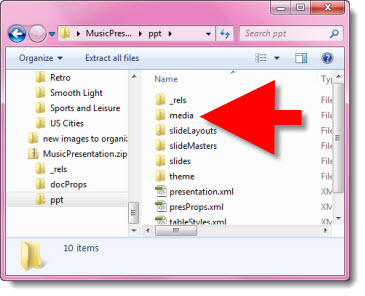
5. Go into the “PPT” folder.

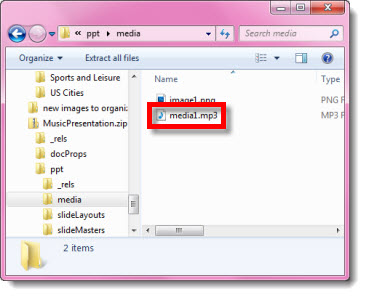
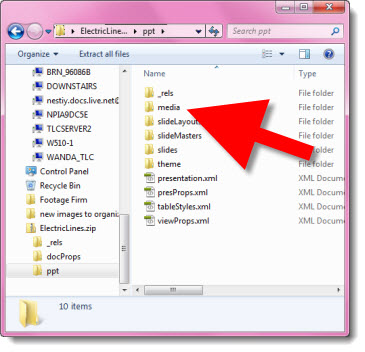
6. Go into the “Media” folder.

7. Copy any of the video files (.mp3, .wav, etc.) from here to a folder on your computer.

8. Done!

– Troy @ TLC
By |2016-08-16T09:53:27-07:00September 28th, 2011|Tutorial|

How Do I Get An Embedded Video Out of a Presentation?

PowerPoint 2010 has increased the multimedia capabilities in many great ways. One question I receive a lot is where is the video (it is embedded inside the .pptx file) and how can it be accessed as a stand alone file?

Here is one process for getting to the actual video files that are embedded in a PPT 2010 file.

1. Locate the presentation file in Windows Explorer and make a duplicate of it (we are going to “break” it).

2. Change the file name from .pptx to .zip

3. When you change the file extension you will get this warning dialog – click “Yes.”

4. Double click to open the new .zip file.

5. Go into the “PPT” folder.

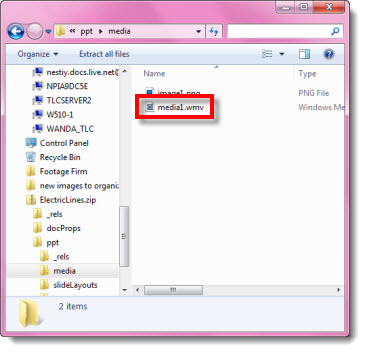
6. Go into the “Media” folder.

7. Copy any of the video files (.wmv, .avi. .mov, etc.) from here to a folder on your computer.

8. Done!

– Troy @ TLC
By |2016-08-16T09:54:03-07:00September 26th, 2011|Tutorial|

PPT 2003 Corruptions Errors After April 2011 Updates?

I know the developers at Microsoft have a big job. I know they create updates to help all users. I also know they do a lot of testing before anything is released (almost too much testing as it slows down their release cycle by months and years…). I know the focus is on the newer PowerPoint format, but I still have PPT 2003 (and PPT 2010) installed on all computers here.

A small small security update on Tuesday, April 12, 2011 has brought countless users to a stop as it looks at okay content as a potential threat – offers no options to override its action – and only allows presentations to be opened in a useless state – arghhh!

Here is the fix:

1. Close all applications.

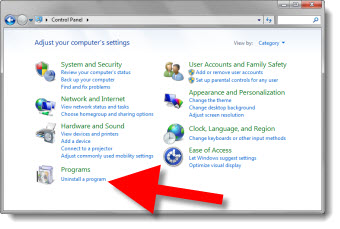
2. Open the control panel (START >> CONTROL PANEL)

3. Select UNINSTALL A PROGRAM

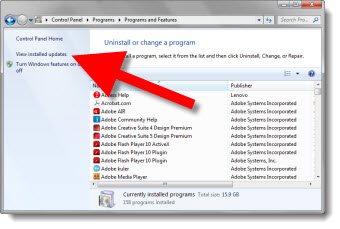
4. Select VIEW INSTALLED UPDATES

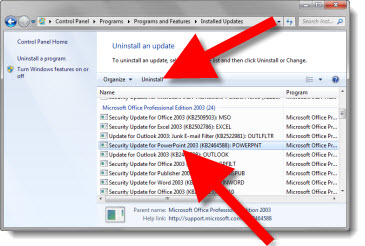
5. Scroll down list and select SECURITY UPDATE FOR POWERPOINT 2003 (KB2464588) POWERPOINT

6. Select UNINSTALL

7. Follow any prompts to confirm. When done, open any PPT 2003 presentation as normal with no need to restart computer.

– Troy @ TLC
By |2016-08-16T10:19:20-07:00April 18th, 2011|Tutorial|

Full Screen Online Presentations

If you are presenting through an online application, a good tip for Internet Explorer is knowing how to go to the Full Screen view.

Here is my sample presentation in an Internet Explorer window. It has all of the unneeded toolbars, URL and controls:

If I click the F11 key, Internet Explorer expands to the full screen and hides the toolbars:

Just move the mouse to the top of the screen to have the toolbars pop back. With the toolbar visible, click the Restore icon in the upper right to exit full screen view.

– Troy @ TLC
By |2016-08-16T10:21:36-07:00April 8th, 2011|Tutorial|

Use Windows P for Setting Dual Monitors

If you use a laptop for presentation, you are probably hunting for the FN+F8 key combination or other manufacturer shortcut to change the display mode. If you use a desktop for presentations you are most likely delving into the graphics card functions to find the display options.

But if you have Windows 7 (laptop or desktop), skip all the hunting and just click the Windows key + P.

Win+P brings up a dialog that makes it easy to switch to Mirrored or Extended Desktop for presentations.

– Troy @ TLC

By |2016-08-16T10:22:28-07:00April 4th, 2011|Tutorial|

Use Windows 7 Presentation Setting Before Every Presentation

If you present with PowerPoint and use Windows 7, you need to be familiar with the PRESENTATION SETTINGS option. To access, open the MOBILITY CENTER (see 03/22/11 post) by clicking the Windows + X keys. Then click projector icon.

In the PRESENTATION SETTINGS dialog in the “WHEN I AM GIVING A PRESENTATION” section be sure:

1. The TURN OFF THE SCREEN SAVER option is active.
2. The SET VOLUME option is active (I set volume to 90%). This option overrides the mute control.
3. I size the event theme graphic to the monitor resolution and set that image as the desktop background when presenting. For that “just in case” situation, so if all fails the audience sees something related to the event (I have seen kids, puppies, girlfriends, vacation pictures, etc. show up on screen – all not good options).

Note: At the top the I AM CURRENTLY GIVING A PRESENTATION option is also turned on and off through the Mobility Center.
– Troy @ TLC

By |2016-08-16T10:23:25-07:00March 24th, 2011|Resource/Misc, Tutorial|

Use Windows 7 Mobility Center Before Every Presentation

Windows 7 is great – running on virtually every computer here. There are a number of hidden features that are very important to presenters. The WINDOWS MOBILITY CENTER is one of them.

To open the Mobility Center, hold down the Windows key and the X key

I use this as a quick check for:
1. Confirm computer volume
2. Confirm plugged into to power (not on battery)
3. Confirm Maximum Performance power setting (vs. battery saving low power option)
4. Wireless network turned off
5. Computer sees an external display/projector
6. Presentation Settings are active (covered in next post)

Everything seen here can be accessed separately, but this is an easy 1-stop view of them all.

– Troy @ TLC
By |2016-08-16T10:23:46-07:00March 22nd, 2011|Resource/Misc, Tutorial|

Open PhotoShop File as Flat Composite

Unfortunately, in general, Microsoft does not work well with layered Photoshop (.psd) files. This includes Windows Explorer previewing them or PowerPoint being able to insert them. I do a lot of work in Photoshop, so I have a lot of Photoshop files for each presentation project. Sometimes, it is a time trap waiting for Photoshop to open the files just to identify if it is a needed file for the presentation. This is especially true when I receive 1-2-30GB files from a graphic department. It takes even a fast computer some time to process a 30GB file with upwards of 50 layers.

Here is a quick way to open, view and identify what those large files are.

1. In Photoshop, go to FILE>>OPEN and select the .psd file

2. If the OPEN button is clicked, the full file opens, including all of the layers

3. But if the SHIFT and ALT keys are held down, then the OPEN button the file opens as a flattened composite image

The advantage is the file, any size, opens instantly. The disadvantage is if layers are turned off they are not visible. I generally create a small .jpg with the same file name for easy reference in Windows explorer.

– Troy @ TLC
By |2016-08-16T10:24:25-07:00March 16th, 2011|Tutorial|
Go to Top