Tutorial

New TLC Webpage on Webcasts

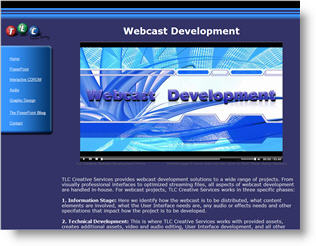
In preparation for this weeks audioeducator.com web conference I put together a quick webcast on TLC Creative Services webcast development services.

Note: I recorded the audio in a hotel room while traveling last week, so this is not the final version.

Just wanted to get something out there for the many attendees (to the audioeducator conference) to see. Thought I would share it with everyone here and later I will have a small series on using PowerPoint as a layout tool for webcast development.

Click here to open the TLC Creative webcast page.
Click here for the audioeducator info page on my conference.

– Troy @ TLC

By |2016-11-17T14:50:46-08:00November 5th, 2007|Portfolio, Tutorial|

Download More

I often, as I am sure you do, have to download lots of files for a project (PowerPoint, Photoshop, images, PDFs, etc.). Unless all are on an FTP site I can access with an FTP application your browser limits you to 2 simultaneous downloads. Great if I was on a bandwidth limited dial-up modem, but I have a 15mb/s connection and want to download more.

The good news is this limitation can be overcome, but you have to do a bit of digging and adding values. I have all of my computers set to allow up to 10 simultaneous downloads. Here’s how:

1. Go to START >> RUN >> REGEDIT
2. Click on HKEY_CURRENT_USER
3. Click USER
4. Click SOFTWARE
5. Click MICROSOFT
6. Click WINDOWS
7. Click CURRENTVERSION
8. Click INTERNET SETTINGS

Now that you have burrowed deep into the OS, you need to add to new values (the ones that say let me download up to 10 files simultaneously).
9. Right-click anywhere in the right pane
10. Select NEW
11. Select DWORD VALUE

These next steps you will repeat twice, once for each needed value.
12. Double-click the newly created NEW VALUE #1 icon
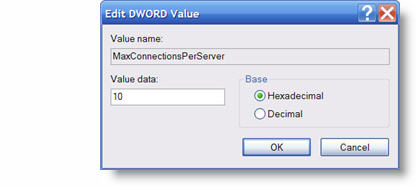
13. In the Value Name area type “MaxConnectionsPerServer”
14. In the Value Date area type “10”
15. In the Base area click DECIMAL
16. Click okay
Do it again.
17. Repeat #12-16, but in the Value Name area type “MaxConnectionsPer1_OServer”

You are now free to download up to 10 files simultaneously (provided you have enough bandwidth with your internet connection)!

– Troy @ TLC

By |2016-11-17T16:31:34-08:00October 15th, 2007|Tutorial|

Make Your Desktop Presentation Worthy

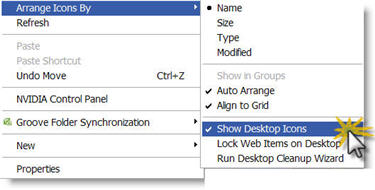
This is one of the nifty features of Windows (XP) that no one seems to know about. Before a presentation, I use the “show/hide desktop icons” feature to hide every single item on my desktop. That way if I need to exit a presentation for any reason, the only thing projected is a my desktop wallpaper. After the presentation, I restore all in just one click.

1. Right-click desktop
2. Go to Arrange Icons By
3. Select Show Desktop Icons
4. Let the screen refresh (may take a few moments) and you are left with a completely clutter free view!

– Troy @ TLC

By |2016-11-17T16:31:04-08:00October 12th, 2007|Tutorial|

Rotate Pictures in Windows Explorer

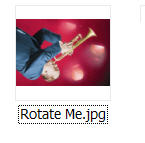
If you have bunch of images to insert into a presentation, but some are rotated (ie. taken in vertical layout with a digital camera) they can easily be rotated BEFORE inserting into the presentation.

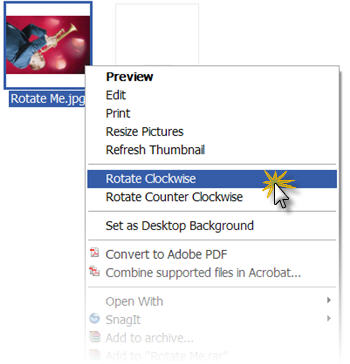
1. Open Windows Explorer
2. Set View to thumbnail or filmstrip
3. Select image(s) to rotate
4. Right-click and choose the rotation (clockwise or counter clockwise) needed

– Troy @ TLC

By |2016-11-17T16:29:23-08:00October 5th, 2007|Tutorial|

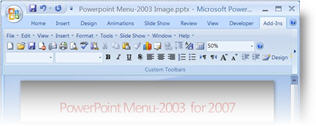
Put PPT 2003 buttons and menus back in PPT 2007

Okay, the time has finally arrived. I am doing a major project in PowerPoint 2007! It is not that I have a problem with PPT 2007, I just have not had a client request. So up until now I have actually used PPT 2007 more when it was in Beta that after its release. Well, like many I am finding it somewhat tedious to learn where everything is in the new interface. I am also working under some tight timelines, so I do not have the luxury of learning at a leisurely pace. So for me a short term solution has been to add back some of the familiar PPT 2003 tool buttons.

This is a limited interface – it does not give you all of your customized layout from PPT 2003 (I wish!), but it does give a familiar look and feel to things. This is a free add-in that can be downloaded from here.

– Troy @ TLC

By |2016-11-17T16:23:35-08:00September 3rd, 2007|Software/Add-Ins, Tutorial|

Organize and Enhance Movies in Presentation (3)

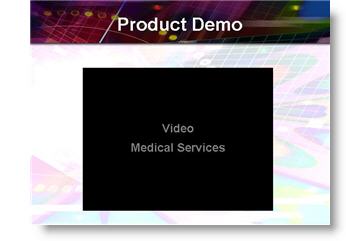
To add a professional touch to the aesthetics I create a feathered edge rectangle in Photoshop and save it as a .png with a transparent background.

I make sure it is sized just slightly larger than the movie image/placeholder and then send it BEHIND them. This provides a great aesthetic to the slide by adding some depth to the movie and making it float a bit off the background.

– Troy @ TLC

By |2016-11-17T16:23:15-08:00August 31st, 2007|Portfolio, Tutorial|

Organize and Enhance Movies in Presentation (2)

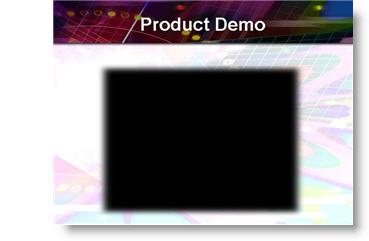
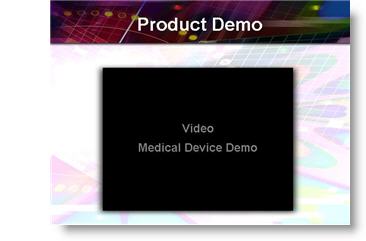
How does the person reviewing a printout of the slides know which movie is to be played, or even if it is a movie? When a movie is inserted on a slide it adds an image of the first frame of the movie. Sometimes this provides enough information to identify it. Other times it is something abstract or even black.

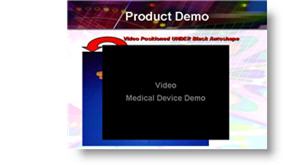
For all of my projects I take advantage of the fact that a movie will always play on top of all other content. I create a rectangle autoshape that is the same size as the movie image and place it ON TOP of the movie. I then add descriptive text.

Now anyone reviewing the slides in PowerPoint or from a printout knows exactly what is going to happen on this slide. Another benefit of this is that is does hide that first frame image of the movie that PowerPoint created – we’ve all seen the awkward image of the person with their mouth open – eyes closed – and out of focus, it’s a good thing to hide it!


Again, the movie is UNDER the autoshape, but during show mode it will “pop” to the front and hide the autoshape.

– Troy @ TLC

By |2016-11-17T16:22:56-08:00August 29th, 2007|Tutorial|

Organize and Enhance Movies in Presentation (1)

Do you think of the aesthetics of the slide when adding a movie? Are you satisfied with the fact that the slide is now “high-tech” because it has a movie? Well, that must be the thinking of lots of presentations I receive, as there is often no thought of the overall slide layout and aesthetics.

(1) If there is no other content on the slide, center it.

(2) Respect the template background elements and position the movie within these boundaries (ie. don’t have it overlap the title bar or other framing elements of the background design).

Sounds simple but I see dozens of presentations where movie placement is an after thought.

– Troy @ TLC

By |2016-11-17T16:22:33-08:00August 27th, 2007|Tutorial|

Designer Look for Tables

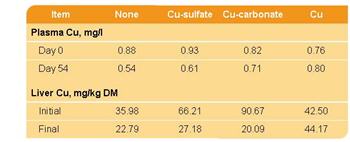
Tables contain lots of data – but often they do not blend with a presentations overall color scheme or design cues. Here is one example from a recent project that incorporated both the color scheme and design elements.

Color Scheme:
I filled the header bar with same color used for the bullets, bold text, and slide title area. The body of the table is filled with the presentation secondary color that was used throughout on several elements.

Design Cues:
The upper-left and lower-right feature rounded corners. Circles and rounded corners where a major design element throughout the presentation.


Up Next: How the rounded corners where created.

– Troy @ TLC

By |2016-11-17T16:09:13-08:00June 26th, 2007|Portfolio, Tutorial|

PPT Overlays To Graphics (4)

The final element was to create a placeholder for the financial information. I added another custom fill autoshape, this time a rectangle. After sized it was ‘sent to back’ and the appropriate text was added.

If you would like to download this slide, click here.

– Troy @ TLC

By |2016-11-17T16:07:33-08:00June 18th, 2007|Portfolio, Tutorial|
Go to Top