Tutorial

PPT Overlays To Graphics (3)

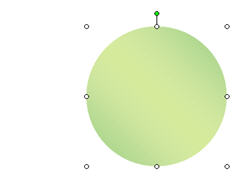
Because the globe is an animated .gif, not a Flash or movie file we are able to overlay elements (Flash and all movie formats always play on top of all PowerPoint content). The green semi-transparent circle overlay is the first layer. The next layer was each division logo – in this case I have added the TLC Creative logo.

The Problem here is that the logo is a bit flat and the black text is lost. Again, the solution was using a PPT autoshape. This time I created a glow, which was simply a white circle with a custom fill from center. Here is one done in blue (so it can be seen on this white background).
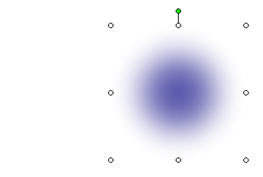
The result is a nice highlight spot that not only makes the logo text legible, but adds a 3D element to the overall globe.

– Troy @ TLC

By |2016-11-17T16:06:35-08:00June 16th, 2007|Tutorial|

PPT Overlays To Graphics (2)

Because the globe is a circle, the solution to making it tie in with the template color scheme was to use a semi-transparent autoshape. I added a circle, sized it to the globe, then gave it a subtle 2-color fill.

This altered the “blue” globe to a “green” globe – without affecting the animated .gif

– Troy @ TLC

By |2016-11-17T16:05:20-08:00June 10th, 2007|Tutorial|

PPT Overlays To Graphics (1)

This was a nice effect I worked on for a recent presentation. The goal was to use an animated globe to visually bring in a “global” element while discussing a corporations global sales.

The problem was the blue earth did not tie in with the template color scheme.

– Troy @ TLC

By |2016-11-17T16:04:59-08:00June 8th, 2007|Tutorial|

PPT Autoshape BG (6)

Here is the finalized background with the title area drop shadow.

Click here to download PowerPoint file.

For virtually all presentations I develop the custom background art and elements in Photoshop. But with creative use of the available tools in PowerPoint, some great effects can be achieved!

– Troy @ TLC

By |2016-11-17T16:03:09-08:00May 31st, 2007|Portfolio, Templates/Assets, Tutorial|

PPT Autoshape BG (5)

Depth creates shadows. So adding a drop shadow is an easy way to add depth to this background. Using a very thin gradient autoshape is all that was needed.

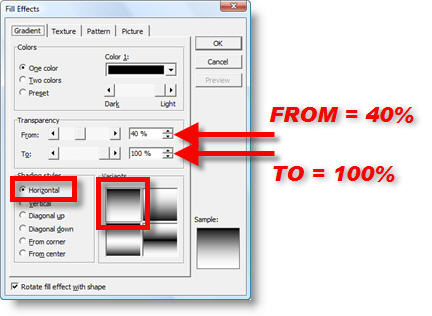
Here are the FILL EFFECTS settings to create the drop shadow (note I am using black, but not starting with a solid color, 40%, to create a “dark grey” that mixes with the other colors).

– Troy @ TLC

By |2016-11-17T16:02:23-08:00May 29th, 2007|Tutorial|

PPT Autoshape BG (4)

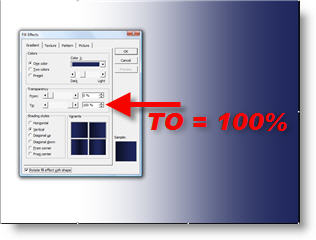
Using another gradient autoshape I created the title text area.

By having the more transparent area over the already darker right corner another sense of depth is created.

– Troy @ TLC

By |2016-11-17T16:02:47-08:00May 29th, 2007|Tutorial|

PPT Autoshape BG (3)

Next is an easy step, because I just use the previous gradient again. Here are the steps:
1. Select gradient
2. Duplicate
3. Go to DRAW >> ROTATE OR FLIP >> ROTATE RIGHT 90′
4. Position at bottom of slide
5. Stretch left/right to width of slide

With another layer a nice effect has been achieved leaving a lighter area in the top left, which creates a subtle visual motion with the darker streak (from the first autoshape)on the opposite axis:

– Troy @ TLC

By |2016-11-17T16:01:51-08:00May 27th, 2007|Tutorial|

PPT Autoshape BG (2)

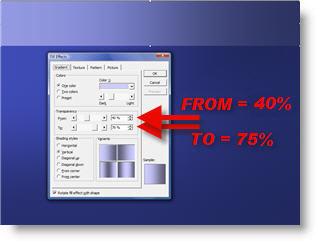
To create visual depth I layered some semi-transparent gradients to create lighter and darker areas (that were not overly linear). The second autoshape is a gradient, that begins with the darker blue and goes to transparent.

Here is this element placed over the right side of the slide. Layered on top of the first full size autoshape the upper right now has a larger dark area than the rest of the slide.

– Troy @ TLC

By |2016-11-17T16:01:28-08:00May 25th, 2007|Tutorial|

PPT Autoshape BG (1)

My goal was to use a blue from the corporate color scheme and develop a visual with a sense of depth and subtle motion.

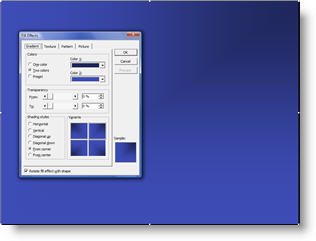
The first element is a full screen autoshape. The base color is a blue from the corporate color scheme. The secondary color is a darker version of the same blue.

Using the FILL EFFECTS options the darker blue radiates from the top right corner. Next we begin layering autoshapes.

– Troy @ TLC

By |2016-11-17T16:00:47-08:00May 23rd, 2007|Tutorial|

Creating a Background w/ PPT Elements

On a recent project the specs were to develop a visually dynamic presentation, but maintain an extremely small files size (goal = under 2MB for 75-100 slides – with images!).

The first place was to begin with the template backgrounds. Because native autoshapes are vector based, they have the smallest files size – especially when needed as full screen images.

Here is the content slide developed using just autoshapes:

Over the next few posts we’ll build the background one autoshape at a time.

– Troy @ TLC

By |2016-11-17T16:00:19-08:00May 21st, 2007|Portfolio, Templates/Assets, Tutorial|
Go to Top