
A Presentation to Explain the Presentation
This is a portfolio piece, but not a design example. We work in PowerPoint a lot. And our live event projects often use presentations that are not the standard 16×9 setup. Our job as the design studio is to help the presenters understand the event staging and how their presentation will work.
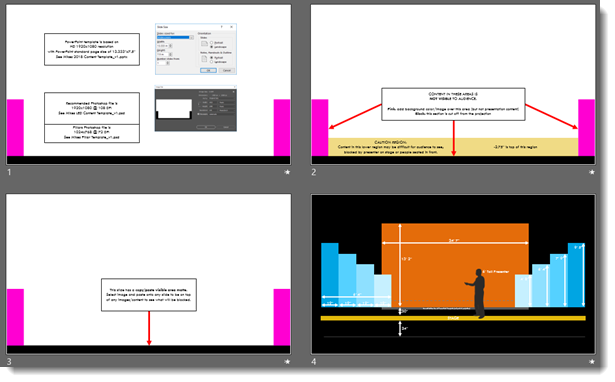
This is a few slides from a presentation to the presenters on how their presentation will work in the meeting space – yes, a presentation about the presentation. It is part staging, part technical information, and part about being aware of how slide content needs to be laid out to work with the staging and be best for the audience.

Just a peek behind the design and some of our client communication efforts.
Troy @ TLC
January is Portfolio Samples!

New Year and new stuff to showcase! I am taking over the January blog posts with design portfolio samples throughout the month.
Troy @ TLC
The Presentation Podcast Episode #69 Released Today!
A new episode of The Presentation Podcast with Troy, Nolan, and Sandy is available today! Check out the latest episode, #69 – The Presentation Design Brief
Every new presentation design project begins with gathering details – the Presentation Design Brief. Troy, Sandra and Nolan talk about what format these each use for their Design Briefs, along with what information is captured for presentation makeover projects.
Scrambled PowerPoint Templates Happen
Received a client file earlier this month and had to troubleshoot some of the scrambled template setup to effectively work with the presentation. Note: this is the end of 2018 and the Master Slide name let’s me know this template was originally developed in 2011, 7 years ago, and still in use!
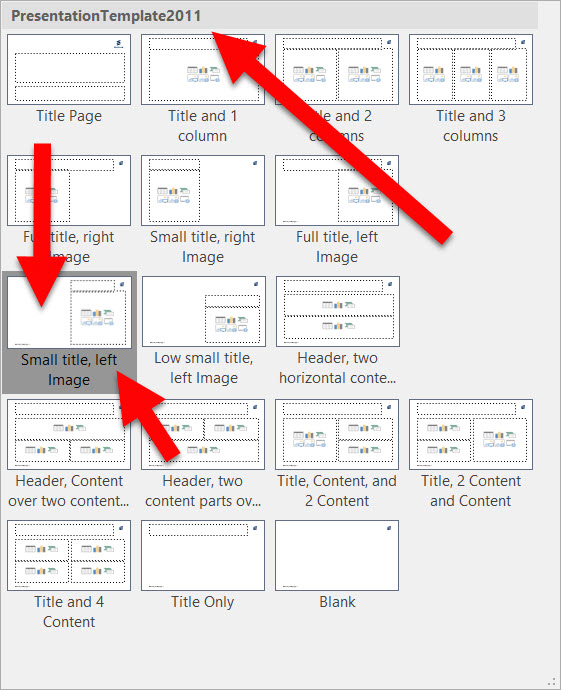
A humorous change to the template – at least I am assuming this was not as designed, is the layouts labelled “LEFT IMAGE” and “RIGHT IMAGE” now somehow have the image placeholders on the opposite side. So the SMALL TITLE, LEFT IMAGE has the image placeholder either deleted, or on the right…
A real PowerPoint template is a very powerful tool in helping a corporate team develop slides quickly, and stay within corporate brand standards. This template is an example, and reminder, that a good template – and in looking at the behind the scenes settings I can see this was developed as a mostly full featured template – can become a bad template over time/use. This is also a reminder that PowerPoint’s flexibility of allowing anyone to make template level updates, is also a detriment to file longevity as small changes, many unintentional, compound into a template that was once robust and now problematic to work with.
I highly recommend annual refreshes of corporate templates. This can be for feature, visual updates (ie. color scheme, font, logo, etc.), or even if there is no changes to the template, it assures a full feature, as-designed template is in circulation.
Troy @ TLC
The Video Connector Guide
Designing presentations and being a presenter require a base level of A/V knowledge to be a professional. One area of knowledge is knowing how your computer, with your amazing presentation, is going to connect to the video system so everyone can see the presentation. TLC Creative has put together a primer (ie. simple list) of all common video connectors used today, cable and port it connects to:
1. VGA


- Analog (legacy, outdated and not recommended)
- Has screwdown connectors, but many laptops do not have the threaded holes, eliminating this advantage
2. HDMI (most common)
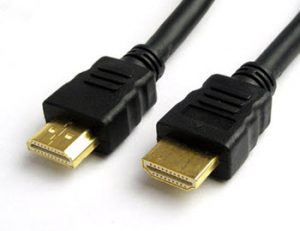

- Consumer level (we do not use)
- Also, can send audio through the same cable (sometimes good, sometimes not what is wanted and need to go into the computer audio setup and change)
- Connector does not have a snap/screw connection (ie. it can be knocked loose)
3. DVI (legacy, but still great)
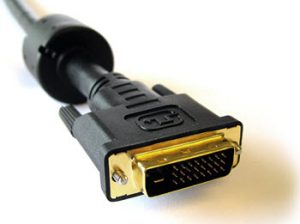

- A huge plus for DVI is it has screwdown connectors!
4. Full Size Displayport (our favorite connector)
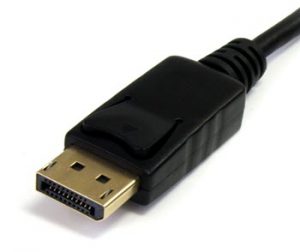
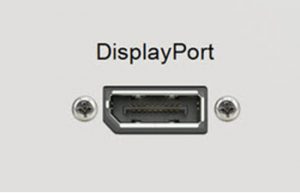
- Same as DVI (digital)
- Windows computers use larger pin plug
- Full size DisplayPort is the TLC Creative preferred video connector. It snaps/locks into place on the computer and can handle all video needs
5. Mini-displayport (also thunderbolt) (new, very common, and easy to become disconnected)
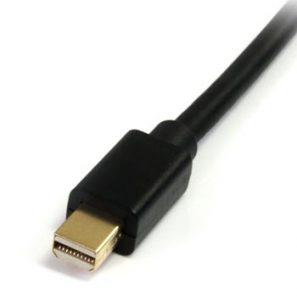
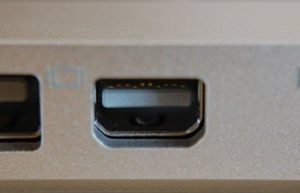
- Mac computers use smaller pin plug
- Plug on Mac snaps into place, but does not lock
- Mini displayport is same as Mac-Thunderbolt
6. USB-C (aka, thunderbolt 3)
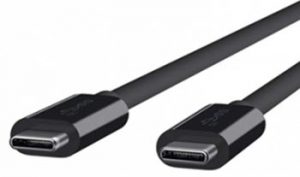

- USB-C is the newest video connector.
- It is the only video connectors on newer MacBook Pro’s
- Note: not all USB-C connectors have the same video capabilities (all work great on the Mac OS, but can be the more limited option on Windows computers)
- The most common use of USB-C as a video connector is using an adaptor to convert to HDMI
Troy @ TLC
The Presentation Podcast Episode #67 Released Today!
A new episode of The Presentation Podcast with Troy, Nolan, and Sandy is available today! Check out the latest episode, #67 – There are no Mistakes (With Travis Thomas)
Presenting is a skill, an art, an act of being courageous and being the focus to a live audience. But, the secret is, the audience does not know your slides, your talking points or what you are going to say. Join an amazing conversation where Troy, Nolan and Sandy are joined by Travis Thomas, author and improv comedian, as we talk about how presenters, like an onstage comedian, need to continue presenting like there are no mistakes – because the audience only knows it was a mistake if you tell them.
Intro
Hello December, the finale to 2018!

This month The PowerPoint Blog continues the TLC Creative tradition of our Top 10 for the year on our Facebook page. Here on The PowerPoint Blog we several FREE holiday themed PowerPoint downloads and our design team PowerPoint holiday animation! Over at The Presentation Podcast we first have a guest episode where we talk about presenting like there are no mistakes (a not to be missed episode for anyone that presents!), and then our annual year-in-review conversation. It is a great month to enjoy everything!
Troy @ TLC