Zebra on Wheels Position and Size – Demo
Sometimes, the real power of an add-in is when it is used in combination with a PowerPoint tool. That is exactly what happens here as TLC designer Sara shows in this example of everyday PowerPoint formatting made much easier with Zebra on Wheels, which we also covered in the previous post here.

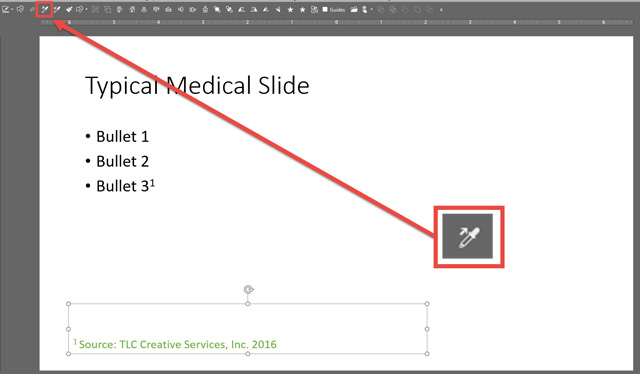
PowerPoint’s built-in format tool, the Eyedropper, can pick up font styling, line spacing, etc. and apply it to another set of text. This is a quick and easy way to achieve consistency throughout your presentations. Below is a quick example of what you can do with this great tool.
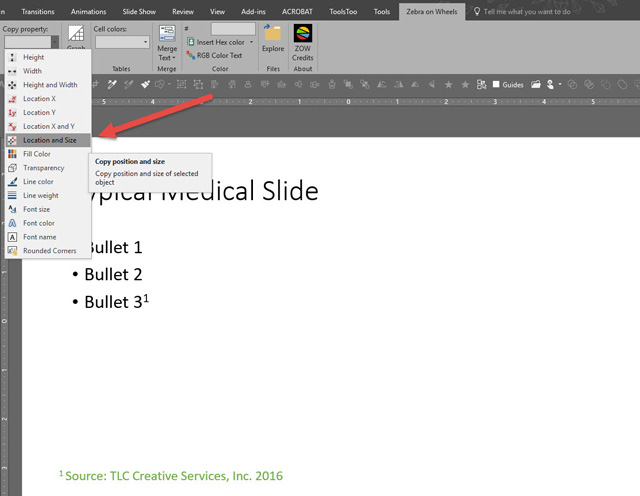
However, with your free download of the Zebra on Wheels add-in, you can copy location and size of the text box, that you cannot with the eye dropper tool.
Using the Eyedropper tool, the reference text box has been formatted to match what will be the master formatting used throughout the deck.
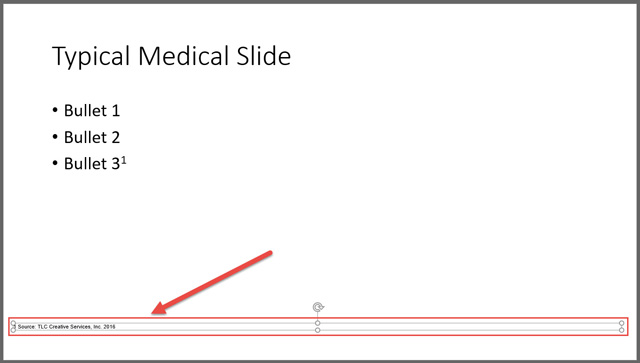
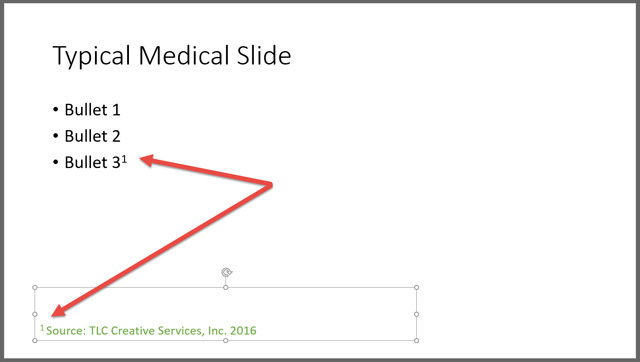
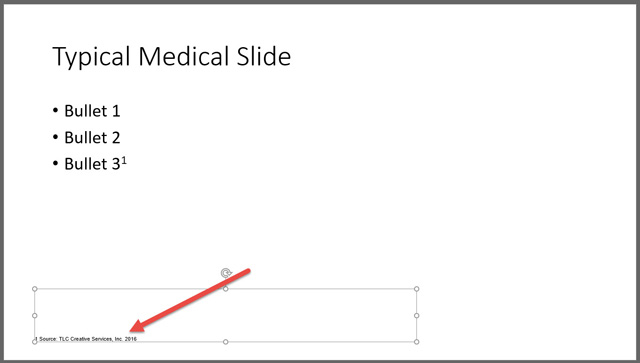
Using Zebra on Wheels’ location and size tool, the reference text box is now in the same exact position and size as the master. This is important for line wraps, when the citation/references are long.
Alone, both of these tools are great, but together, they make it possible to go through an entire 80 slide deck in less than 5 minutes and have every reference text box formatted identically throughout.
Zebra on Wheels add-in can be found at their website here.
-Sara @ TLC
Zebra on Wheels PowerPoint Add-in Review
Zebra on Wheels is another PowerPoint add-in that is FREE. Despite it being available for a few years, it is not common, partly because it is the name of a design firm based in the Netherlands.
They developed their own PowerPoint add-in tool bar to make their presentation design easier, named it after the company and have generously made it available on their company website!

Here are a few examples of tools in the Zebra on Wheels add-in we use at TLC:
[KGVID]https://thepowerpointblog.com/wp-content/uploads/2016/06/unnamed-file-3.mp4[/KGVID]
To find more info or download Zebra on Wheels, click here.
~Troy @ TLC
ToolsToo PowerPoint Add-in
ToolsToo is the creation of another independent developer, and when it comes to making PowerPoint more productive, ToolsToo is amazing!

The add-in has over 70 tools included, so it is a good thing it installs its own ribbon tab to house them all.

On the technical side, ToolsToo is one of the few add-ins that is compatible with both 32-bit and 64-bit Office (virtually all add-ins are only 32-bit compatible). It is coded as a .com add-in vs. a VBA add-in which is more common. It is also one of the few add-ins that can have any button individually added to the QAT, which is great! Lastly, it is also economical costing only $20.00 for the full host of productivity tools.
When developing slides, I make use of the Adjoin, Stretch, Align, Make Same, and Shape Tools section (which means I use a lot of tools from this add-in!). Here are a few of my favorite tools within the ToolsToo add-in:
Make Same Size, Make Same Height, Make Same Width: Select shapes or images and instantly adjust so they are the same size based on the first item selected!
[KGVID]https://thepowerpointblog.com/wp-content/uploads/2016/06/unnamed-file-2.mp4[/KGVID]
Make Same Rounded Corner: This is an agony point in designing with PowerPoint. The rounded corners automatically adjust their size based on the size of the shape/image and there is no way to set them to be the same across shapes. ToolsToo is worth the price just for the Make Same Rounded Corner tool!
[KGVID]https://thepowerpointblog.com/wp-content/uploads/2016/06/unnamed-file-1.mp4[/KGVID]
Make Line Horizontal, Make Line Vertical: Another pain point in designing content is determining if a line is truly straight, or 1/2 degree off… This simple tools forces a line to horizontal or vertical with one click.
[KGVID]https://thepowerpointblog.com/wp-content/uploads/2016/06/unnamed-file.mp4[/KGVID]
There are a lot of tools in this add-in. ToolsToo has become my highest used add-in when designing presentations.
Find out more at the ToolsToo site here.
-Troy @ TLC
PPTools – Image Export
When you need to create images from slides, the PPTools Image Export add-in is invaluable.

PowerPoint 2016 has updated the built-in tool for saving slides as images – and it is really good. But, I still prefer to use the PPTools Image Export add-in. The reason is that the export dialog gives me complete control over the image(s) created.
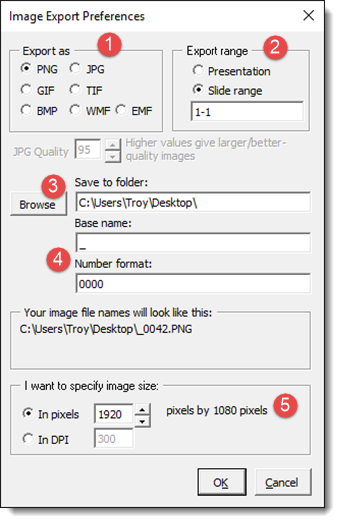
- Select the format for the image (I generally use .png for my images)
- Select a range of slides or the entire presentation (Note: I do like PowerPoint’s option to export the selected slides, something you can manually type in slide numbers here, but a one-click button would be a great addition)
- Easily set a destination for the images
- Create a naming structure for the images (This is great when exporting images from different presenters or multiple versions of the same slides)
- Set the exported image size!
Find out more about PPTools Image Export tool on the web here.
-Troy @ TLC
PPTools – Starter Set
The PPTools Starter Set add-in should be installed on every PowerPoint user’s computer. This venerable add-in (which has remained in use by me since PowerPoint 2003!) has lots of time saving options.
The real power of the PPTools Starter Set is not that it adds new capabilities to PowerPoint, but that it uncovers, or adds, alternate options to built in PowerPoint tools. Here are a few of my favorite options:
![]()
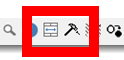
Memorize an Objects Position and Place Objects Exactly: This combination of tools is invaluable. Similar tools are available in other add-ins, but this a great solution. For example, you have a logo that needs to be in the same position on a number of slides – Position where you want it on the first slide, select the logo and click the MEMORIZE tool. Now, go to any other slide, select anything and click the PLACE tool (aka: the hammer – to nail it in place) and it is positioned exactly the same as the first one!
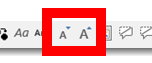
Enlarge and Shrink Text: Yes, PowerPoint has the exact same little A and big A icons and they do the same thing – make text larger or smaller. But, the difference is the native PowerPoint buttons jump the text size based on the preset Office text sizing (18-20-24-28-32-etc.). The PPTools resize text adjusts the text size by 1 pt at a time (19-19-20-21-22-23-etc.), which is exactly what is needed for fine tuning a layout!
Layer Manager: This tool is mostly outdated, but I like to use it as an example of how independent developers are often more in tune with real designer tool needs than the Microsoft Dev team. This amazing tool opens a small dialog and it is basically PowerPoint’s Selection Pane, allowing objects to be arranged in Z order and hidden – but it has been available since PowerPoint 2003!

That is a summary of just 3 of the 15+ tools included with the add-in. There is a FREE version and a paid version with additional tools. Find it on the web here.
-Troy @ TLC
The Presentation Podcast Episode – #7 Released Today!
In this episode, Troy, Nolan, and Sandy discuss “Do bullet points can kill an audience?” and the issues bullet lists can cause. Head over to The Presentation Podcast to listen, or add to your favorite Podcast app!
![]()
The TLC Custom QAT for PowerPoint
This month, I am focusing on PowerPoint add-ins because the ability to extend PowerPoint’s functionality is one of the biggest attributes that allows it to be a “professional” design tool. The first place to start is PowerPoint’s own extensibility with the QAT – Quick Access Toolbar.
I am a big fan of the Quick Access Toolbar. My first post about it was back in 2009. Then, less than a year later, I became an even bigger fan when PowerPoint 2010 added the ability to export and import pre-made QAT toolbar setups. More recently, at the end of 2015, I became distressed over the QAT when an update to PowerPoint 2016 essentially limited its functionality – which has happily been fixed by the Microsoft PowerPoint Dev team (YAY!!).
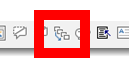
The first step in effectively using and setting up the QAT is to move it from above the menus to below. By default, it is above the menu bar (with FILE / HOME / INSERT / etc.) and only has a few buttons. Click the down arrow on the right and select SHOW BELOW THE RIBBON.
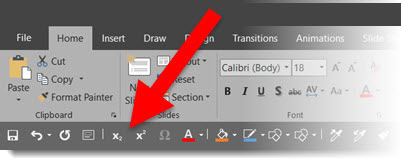
At TLC, we have a very customized QAT installed on all of our computers – and has 37 time saving, always available buttons! For this blog post, I am showing our version that only uses standard PowerPoint features (I do run a more customized version that also integrates some tools from 3rd party add-ins – many of which will be in posts this month).
![]()
Click HERE to download the TLC customized QAT (download .zip file, extract, then follow install information below).
To install:
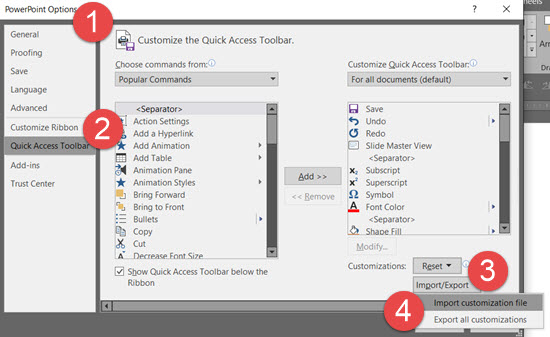
– Go to FILE > OTPIONS
– In the POWERPOINT OPTIONS dialog, go to the QUICK ACCESS TOOLBAR tab
– In the lower right, click the ARROW on the Import/Export button
– Select IMPORT CUSTOMIZATION FILE
– In the FILE OPEN dialog, locate the custom QAT file and click OPEN
– At the warning dialog that existing toolbar setup will be overwritten, click YES
– Customized QAT is now installed!
– Troy @ TLC