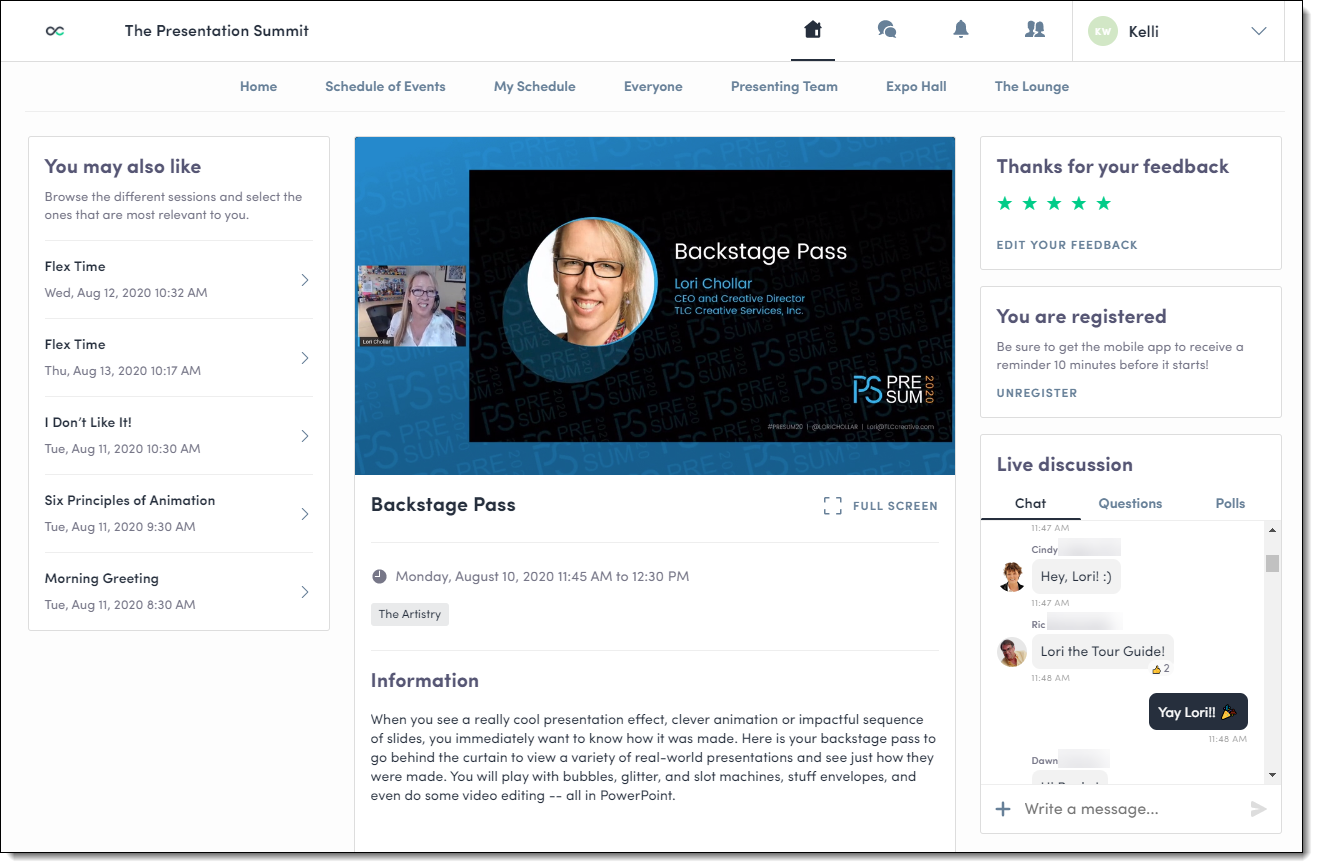
Lori Chollar’s “Backstage Pass” at the Presentation Summit!
The 18th annual Presentation Summit was a virtual event this year due to the pandemic – but it was as informative, fun, and creative as ever! I may be biased, but one of my favorite presentations was Lori’s “Backstage Pass.” She did an amazing job showing some of our favorite animations and slide effects.
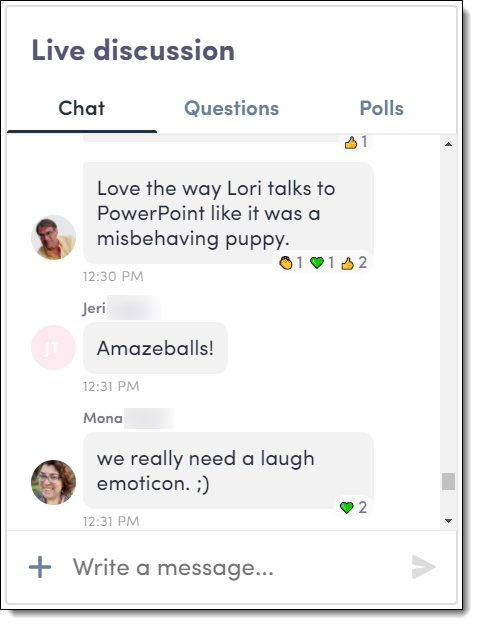
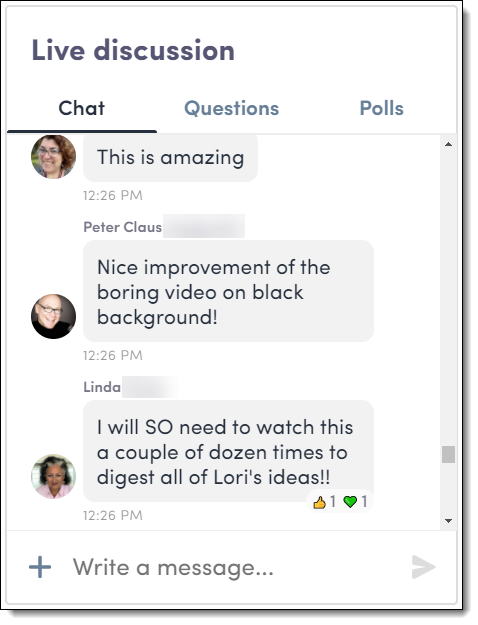
And of course, the audience loved it too. Here’s just a few of the comments from her live presentation:
Troy @ TLC
Podcast 108 announce
A new episode of The Presentation Podcast is available today! The Presentation Summit annual event went virtual for 2020. And a virtual event did not prevent us from coordinating a large group gathered around our virtual table to talk presentations, PowerPoint, and the experience of being at the Presentation Summit. Join this large 15+ person group conversation recorded at the 2020 Presentation Summit!
Listen on Apple Podcasts, Stitcher, Google Play, Spotify and Soundcloud – or search The Presentation Podcast for “The Presentation Summit” or go directly to the episode page here: https://thepresentationpodcast.com/podcast/108
Presenting at the 2020 Presentation Summit
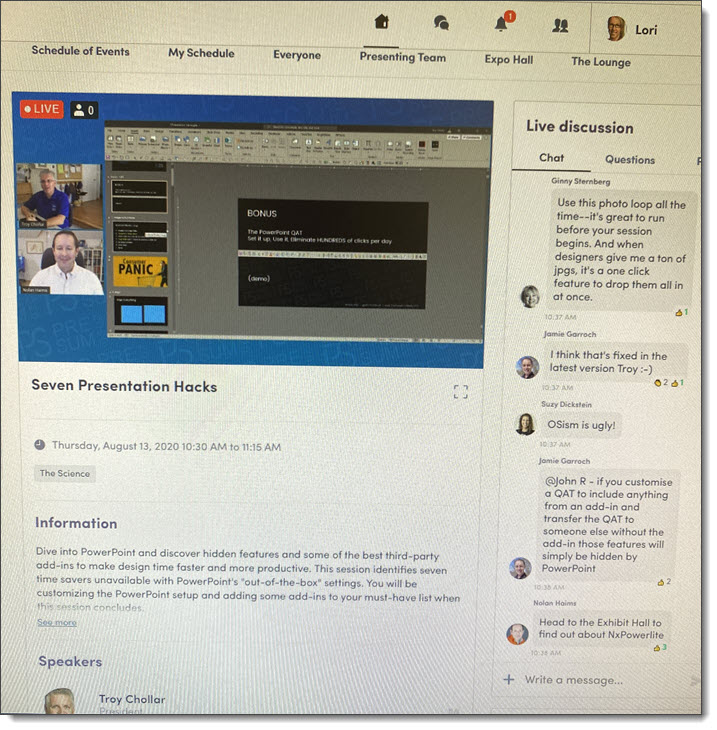
This year the Presentation Summit was a virtual conference, which meant missing time spent among friends and talking about presentations with hundreds of people. However, traditionally I post a picture of me presenting, so here it is…a photo of someone’s computer screen during my presentation “7 Presentation Hacks” (with Nolan, who was the host of my session). It was a fantastic virtual conference with an amazing amount of personal connection opportunities.
Troy @ TLC
Live Transcription Goes Backwards
Presentation Live is a great addition to PowerPoint presenting (see these posts from last month for more details: …). One feature of the transcription that I did not point out clearly was the user experience when they change the selected language.
It’s easy for audience members to switch the transcription to their language of choice. After joining the meeting, the selected language is in the lower left. ![]()
Click it and choose from the list of 60+ languages.
[KGVID]https://thepowerpointblog.com/wp-content/uploads/2020/06/unnamed-file.mp4[/KGVID]
Now the great part! The newly selected language is used almost immediately as the presenter continues their presentation. In addition, all of the previous translation is updated to the new language selection as well (pretty nice feature Microsoft!).
[KGVID]https://thepowerpointblog.com/wp-content/uploads/2020/06/PresentationLive-3.mp4[/KGVID]
Of course, if the audience member speaks the same language as the presenter and doesn’t want to see the transcriptions at all, they can toggle it off in the same Languages menu.
![]()
This will likely never fully replace live translators, but for remote meetings and audience members joining in from their homes, it’s a fantastic alternative.
Troy @ TLC
Paragraph Spacing for the Reader
Now that we’ve improved our text with selective bolding (previous post), now is the time to look at the huge impact line spacing can have on overall legibility.
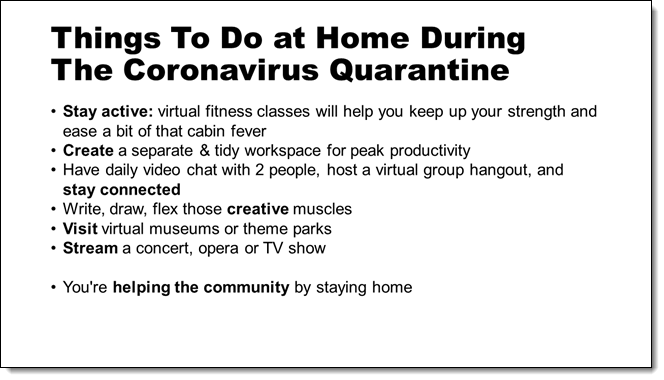
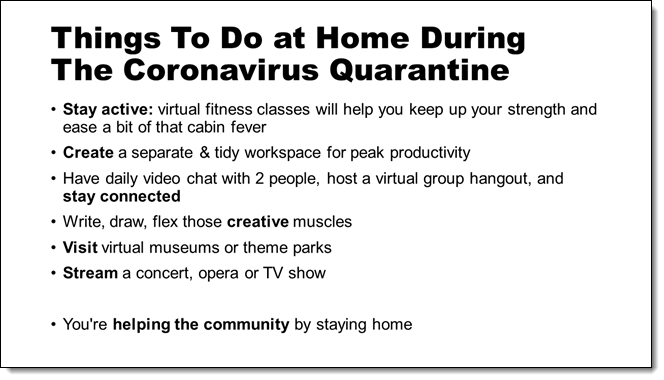
Here is our sample slide with the default 1.0 line spacing applied to every line. Everything is uniform, including the spacing between paragraphs (hard returns) and line wraps (soft returns). The only line of text that really stands out is the final bullet, which is separated by an extra return (not a best practice!)
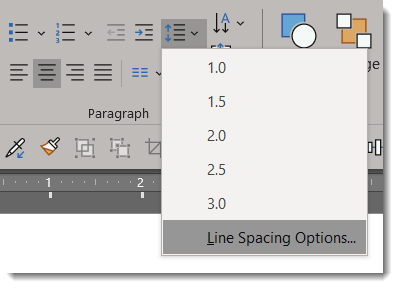
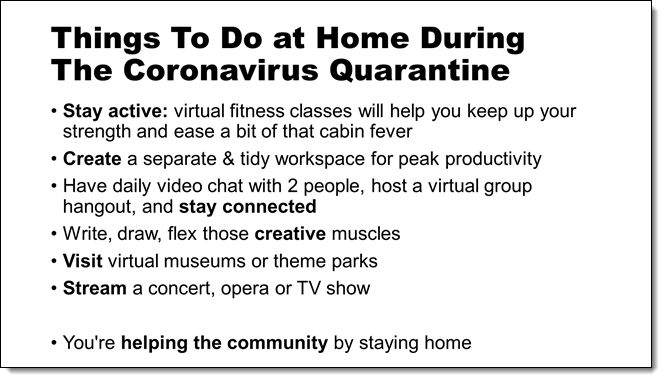
Select the bullet list text and set the line spacing to be a bit tighter at 0.9, and set the paragraph spacing to 12pt.
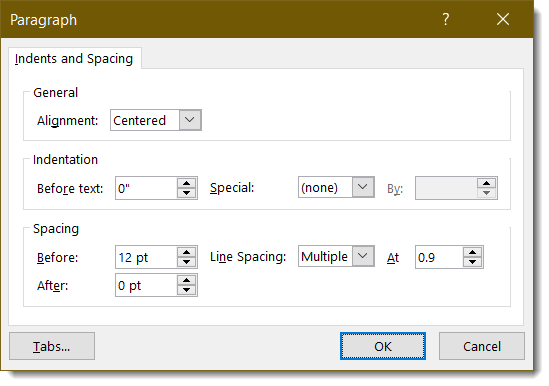
Now the lines of text are clustered better for the reader. The goal is to divide each bullet, keep paragraphs together as a unit and make it easier for the reader to digest the slide content.
Troy @ TLC
When Everything is Bold – Nothing is Bold
Are you designing a presentation with a lot of text? Not sure how to make your points stand-out? Typography is one of the most important aspects of a slide, and how well its done will determine how well you can communicate your message.
One way to grab your viewer’s attention is to utilize a bold font, which is heavier and darker than the regular type. Bold fonts are used for emphasis, but too much bolding can have the exact opposite effect, because when everything is bold – nothing is bold.

Selective bolding is a design process we use often. Be choosing key words to be bold and standout the viewer can quickly see, and read, what is important.
Happy bolding!
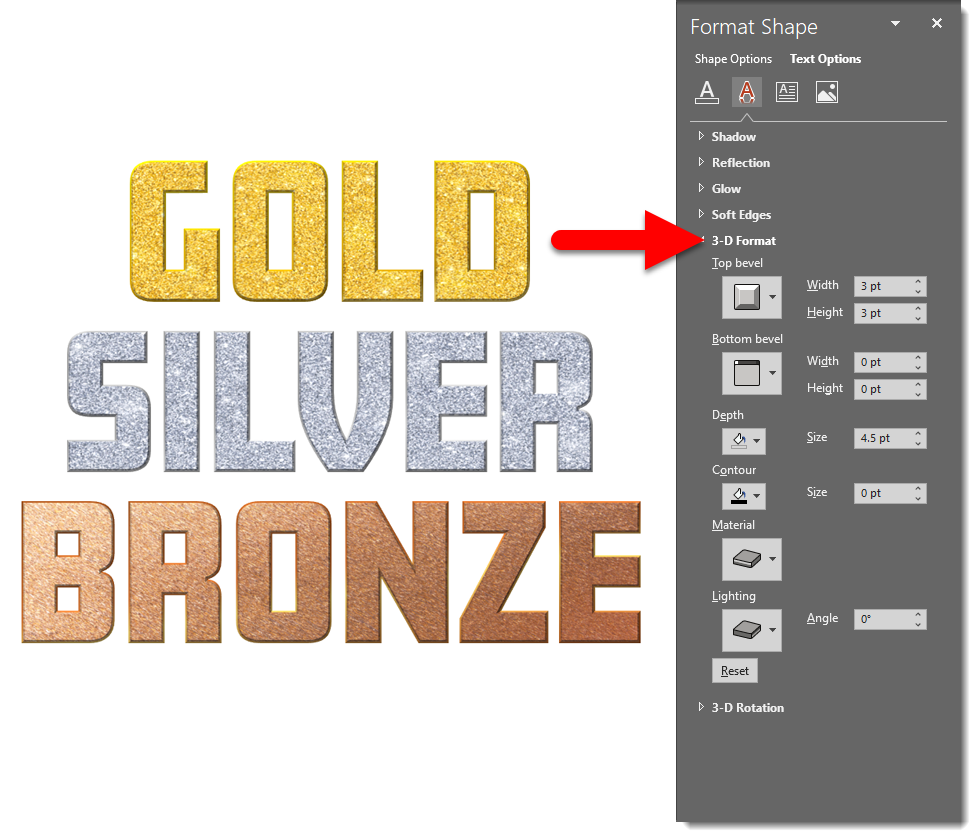
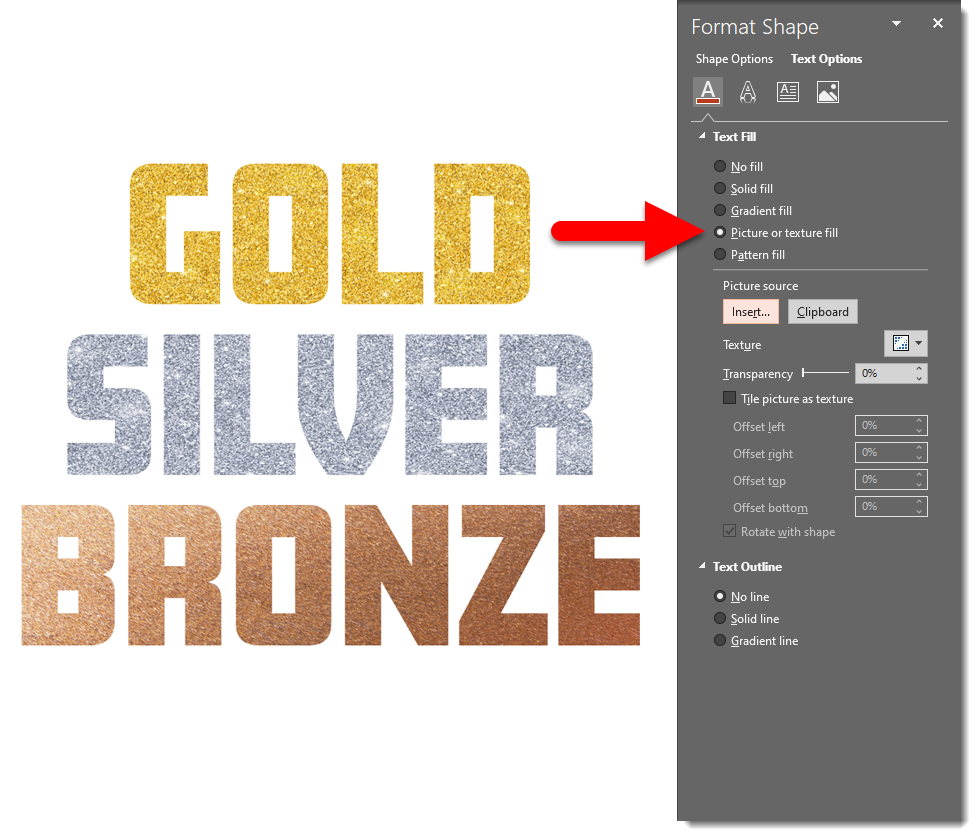
PowerPoint Metallic Text with Image fill
We just reviewed how to make metallic text with gradients, but we can also use Image Fills to create unique effects as well. We used the following still images from Adobe Stock for this example:
For our first example, we just filled the text with the images. Right-click on your text box and select FORMAT SHAPE. Go to the TEXT OPTIONS tab, then choose PICTURE FILL. What’s great is that the text remains editable, and the image will make itself a pattern to fit as much text as is necessary.
Next we took this image-filled text and added a gradient outline on the text to help jazz it up a little bit. Right-click on your text box and select FORMAT SHAPE. Go to the TEXT OPTIONS tab, then scroll to TEXT OUTLINE. We added a similar gradient from our Metallic Lines post. This helps give the text a literal border, as well as add a little more dimension to the text.
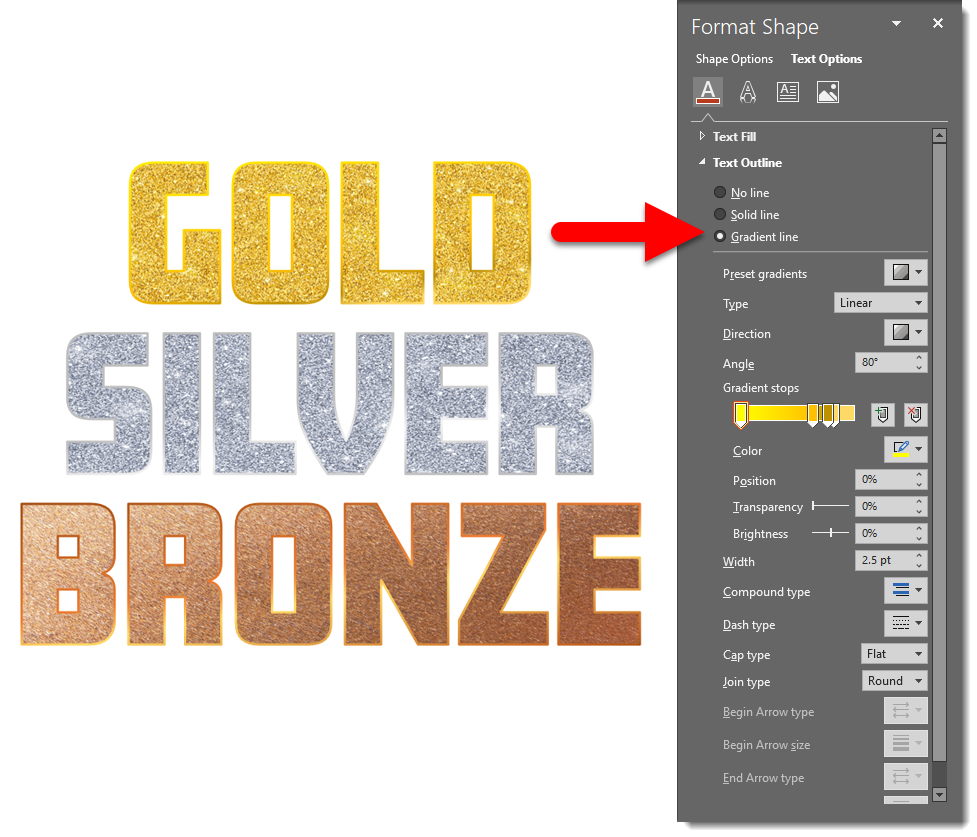
Finally, we added a bevel in addition to the image fill and gradient outline to really elevate the metallic look. Right-click on your text box and select FORMAT SHAPE. Go to the TEXT OPTIONS tab, then the EFFECTS tab. Adjust the bevel depth until you get the effect you’re looking for. We used a deeper bevel to match the bold font.