The PowerPoint® Blog

I work with PowerPoint on a daily basis and I am very honored to be a Microsoft PowerPoint MVP. We have a talented team of presentation designers at TLC Creative Services and ThePowerPointBlog is our area to highlight PowerPoint tips, tricks, examples and tutorials. Enjoy! Troy Chollar

Set Video to Autoplay in PowerPoint

Video in presentations has been a big item for me over the years. With each new version, and update, of PowerPoint I am constantly disappointed in the default settings applied to inserted videos.

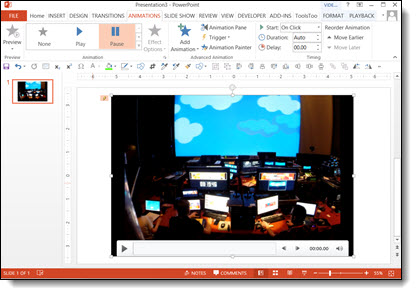
Currently, and in all legacy versions, when a video is inserted the default animation settings is a Trigger animation.
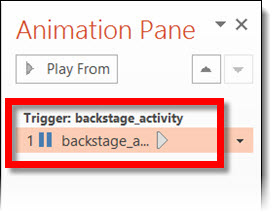
A trigger animation is ‘triggered’ one of two ways, direct interaction (ie. move mouse on screen and click on the programmed item) or secondary action from a programmed animation (ie. when one item is animated it activates the trigger animation).

So, when a video is inserted onto a slide and then present, the video will not play until you move the mouse cursor on the slide and click on the video. Obviously for majority of my meetings the goal is to hide PowerPoint (and hide any software) to create a seamless environment where things ‘just happen’. See a mouse move across a screen is a bad thing.

Up next is a quick step-by-step tutorial on changing the video animation settings to what we use at TLC for virtually all presentation videos.

– Troy @ TLC

By |2016-08-10T09:44:38-07:00May 5th, 2014|Tutorial|

WHY? – PowerPoint’s Default Animation Setting for Videos

Video in presentations has been something I have used for many years. PowerPoint has vastly improved its video features, but currently, and in all legacy versions, when a video is inserted, the default animation settings is a Trigger animation, which is something I am constantly disappointed by.

default animation

A trigger animation is “triggered” one of two ways, direct interaction (ie. move mouse on screen and click on the programmed item) or secondary action from a programmed animation (ie. when one item is animated, it activates the trigger animation).

default animation

So, when a video is inserted onto a slide and then present, the video will not play until you move the mouse cursor on the slide and click on the video. Obviously, for majority of my meetings, the goal is to hide PowerPoint (and hide any software) to create a seamless environment where things “just happen.” Seeing a mouse move across a screen is a bad thing.

default animation

Up next is a step-by-step tutorial on changing the video play animation settings to eliminate the need to see a cursor on the presentation screen.
– Troy @ TLC

By |2016-08-10T09:45:25-07:00May 1st, 2014|Personal, Resource/Misc|

Standby for Reboot

P L E A S E–S T A N D B Y–F O R–S Y S T E M–R E B O O T…

TLC has been going through growing pains and, even with a backlog of nearly 40 blog posts ready to go, I have been wrapped up in many great projects, organizing internal processes and family (how is it possible my oldest is graduating high school, preparing for college and has prom this weekend!). But there is light ahead. I have been slowly finding time to get through this backlog of great tutorials and PowerPoint examples. So I am being smart and keeping things quiet for one more week and starting with a fresh series of posts on May 1st.

Please set your calendars and check back as there will be a continuous stream of content starting soon!

– Troy @ TLC

By |2016-08-10T09:45:47-07:00April 24th, 2014|Personal|

SharePoint Calendars and Internet Explorer Visual Formatting Issue

TLC adopted Office 365 before it was publicly available and have only good things to say about its use in a small business environment. Recently something has gone awry with the SharePoint calendars – something we rely on daily.

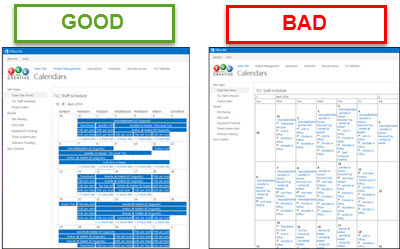
Up until 2 weeks ago, they looked like the left example, but suddenly the visual formatting changed to the ugly and hard to use right example.

But this formatting issue is only seen when using Internet Explorer. If logged in with Firefox, Chrome or any other browser, nothing changed, all looks good. So ironically, only the Microsoft web browser seems to be rendering the Microsoft SharePoint calendars useless!

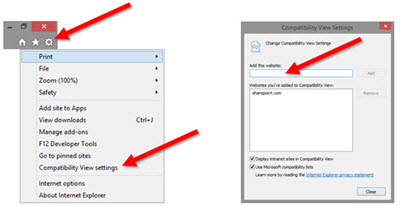
After some research and testing, here is the fix we have implemented on every computer here:

– Open Internet Explorer
– Click the TOOLS icon in the upper right
– Select COMPATABILITY VIEW SETTINGS
– In the ADD THIS WEBSITE field, enter SHAREPOINT.com
– Click ADD and CLOSE
– Now SharePoint calendars should once again display as expected

– Troy @ TLC

By |2016-08-10T09:46:05-07:00April 19th, 2014|Resource/Misc, Tutorial|

Backstage in New Orleans

Spent a week in New Orleans with a new (end) client, coordinating presentations and AV needs. Super show, great crew, wonderful client and, of course, lots of good food! Had Josh from our office on showsite too.

– Troy @ TLC

By |2016-08-10T09:47:20-07:00April 17th, 2014|Personal|

Duarte Releases SlideDocs ‘Book’

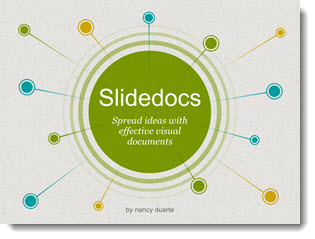
If you have used PowerPoint to create a print document that was never intended to be projected as a slide show, fear not, you are not alone. TLC Creative Services has been creating lots of projects over the past few years that we internally refer to as “PowerPoint Documents.” Nancy Duarte has release a new “book” all about using PowerPoint for non-slide show documents called “SlideDocs.”

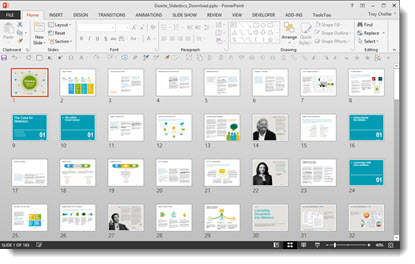
The downloaded book is a giant example of how PowerPoint is used for document design, because it is a PowerPoint file.

The core message of SlideDocs, which I agree with, is there are a range of documents. On the left are formal print design documents. On the right are slide show presentations. In the middle are print documents that are designed in PowerPoint.

I recommend everyone, especially clients, read SlideDocs if nothing else for the overview of graphic design and layout principles in the middle section. Get more info and download the free SlideDocs book and templates here.

– Troy @ TLC

By |2016-08-10T09:47:41-07:00March 20th, 2014|PowerPoint, Resource/Misc|

Using Multiple Masters To Organize

Multiple masters are usually used in relation to different templates in a single file. At TLC, we use multiple master slides for design organization as much as different templates.

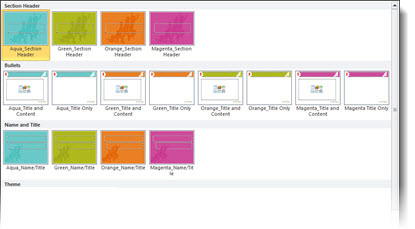
This is from a recent project that was all one template, but with 4 distinct color options. The client requested a simple structure, specifically not 4 duplicate sets of master slides. So we organized the Master Slides into 3 categories:
Top row = section divider slides in each color
Middle row = all of the content slide layouts in each color
Bottom row = title slides in each color

Just another way of providing solutions for clients using the features of PowerPoint’s master slides.

– Troy @ TLC
By |2016-08-10T09:47:58-07:00March 17th, 2014|PowerPoint, Tutorial|

Creating Quote Mark Graphics in PowerPoint 2013

PowerPoint 2010 introduced the very great “Merge Shape” tools (see this post for details). With this toolset, editable vector shapes can be can be created directly in PowerPoint – something I refer to as “Illustrator 2.0.” With PowerPoint 2013, it includes the ability to convert text to vector, which is what we will use to create the stylized quote mark graphics for a complete PowerPoint workflow.

quote mark graphics 1

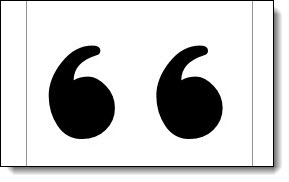
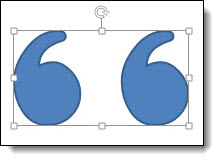
1. Add text in PowerPoint.

quote mark graphics 2

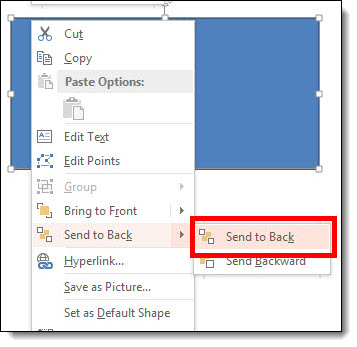
2. Add PPT shape, and send to back behind text.

quote mark graphics 3

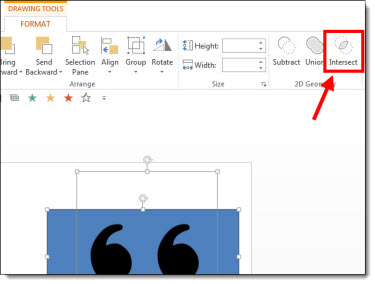
3. Select text and shape. On FORMAT ribbon >> MERGE SHAPES >> INTERSECT

quote mark graphics 4

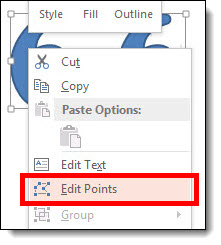
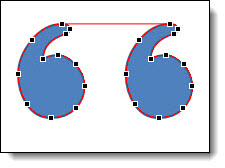
4. The text is no longer editable, as it is now shapes. Right click and select EDIT POINTS just like any shape in PPT.

quote mark graphics 5
quote mark graphics 6
quote mark graphics 7

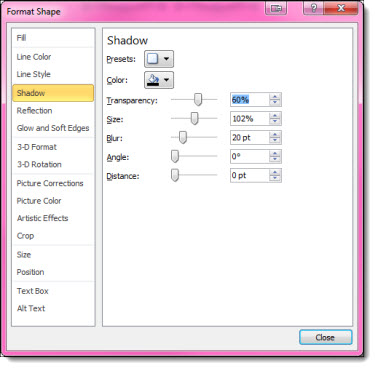
5. Stylize with no fill, light grey outline, drop shadow effect described in this post.

– Troy @ TLC

By |2016-08-10T09:48:18-07:00March 14th, 2014|PowerPoint, Tutorial|

Creating Quote Mark Graphics in Adobe Illustrator for PowerPoint

The previous post showed our visually stylized quote marks on slides with color backgrounds. For us, the process for creating the quote mark graphics is with Adobe Illustrator.

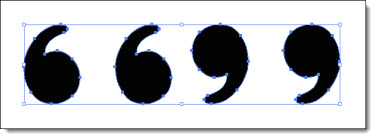
1. First, find a great font for the quote marks. Designer Amber selected Spirax Regular, which you can download here.

2. Select the text and create outlines, which converts from editable text to vector images.

3. The spacing for the quotes was a bit to far apart. Now that they are graphic elements they are easy to select and move a bit closer together.

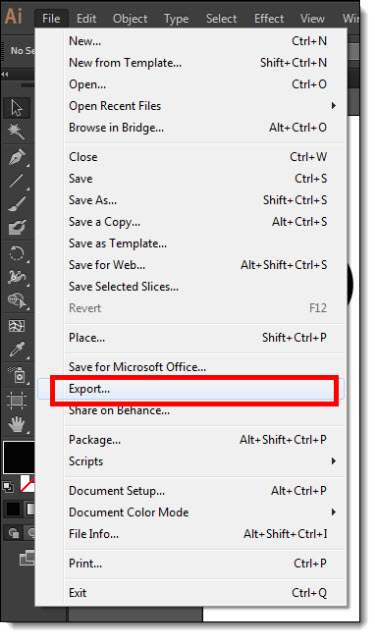
4. Now we want to export the graphics from Adobe Illustrator in a PowerPoint friendly vector format. Go to FILE >> EXPORT

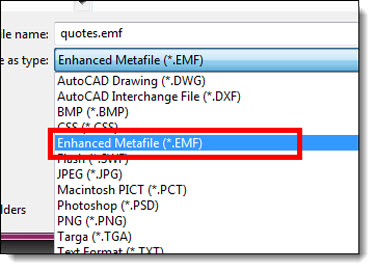
5. Select ENHANCED METAFILE >> EXPORT

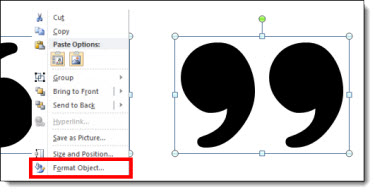
Now with the quote graphics on our computer, we are ready to add them to any slide. See the previous post (here) for details on how to format the graphics in Powerpoint.

– Troy @ TLC
By |2016-08-10T09:48:37-07:00March 12th, 2014|Personal, Tutorial|

Dynamic Quotes with Background Fill!

Here is one of our favorite visual tricks at TLC Creative Services for making slides with a key quote stand out. Background fill!

I am doing this as a 3-post series: this one shows the end result (see above) and PowerPoint formatting, the next post will detail our development process in Adobe Illustrator, and the third will show a PowerPoint only development process for the graphics. Thanks to Amber, a TLC staff designer, for creating the sample images for this series.

Using the quote mark .emf graphics, they are not very impressive without some styling applied and a special option for their fill color. Insert the .emf graphic (download here).
1. Right click on a quote mark and select FORMAT SHAPE.

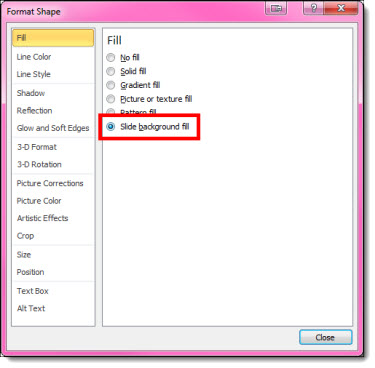
2. Go to FILL and select SLIDE BACKGROUND FILL

3. The Quote marks will disappear on the slide because they are set to be the same background color as the slide.

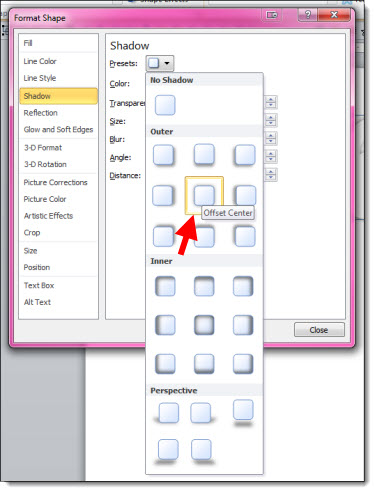
4. Add a shadow effect, bevel, outline, glow or other styling effects to your quote marks. For ours, we have added a subtle drop shadow.

5. Still not super dynamic, but the quote marks are looking more styled.

6. But when placed on a colorful image background – dynamic! Move the quote mark graphics to any part of the slide and their fill updates.

Note: The slide background needs to be set with the Background Fill, not an image on the slide for this effect to work.

– Troy @ TLC
By |2016-08-10T09:48:55-07:00March 10th, 2014|PowerPoint, Templates/Assets, Tutorial|
Go to Top