The PowerPoint® Blog

I work with PowerPoint on a daily basis and I am very honored to be a Microsoft PowerPoint MVP. We have a talented team of presentation designers at TLC Creative Services and ThePowerPointBlog is our area to highlight PowerPoint tips, tricks, examples and tutorials. Enjoy! Troy Chollar

Add Slides to a Presentation That Fit In

Adding slides from one presentation into another and hoping for a button that will automatically format the slides the way needed is just not a feature in PowerPoint. But, the almost magical “Destination vs. Source Formatting” button does exist. For this tutorial, we are going to add slides from the “Blue” presentation (Presentation #1) to the “Purple” presentation (Presentation #2) and make all of the slides the same, so they are all purple.

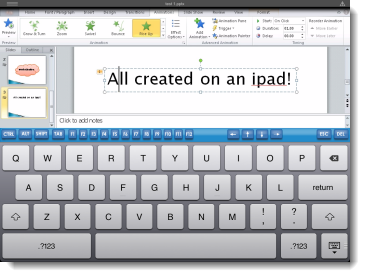
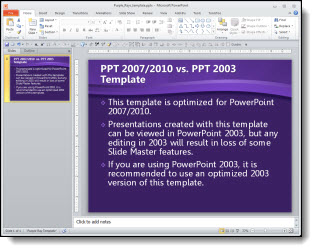
Here is our “blue” presentation (#1):

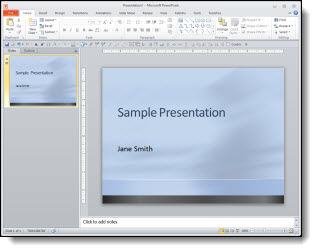
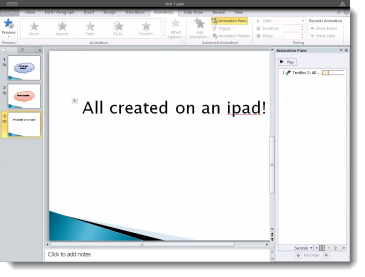
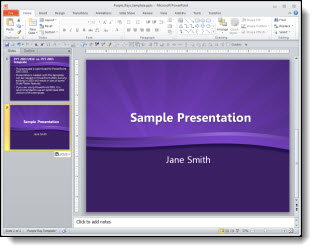
And here is our “purple” presentation (#2):

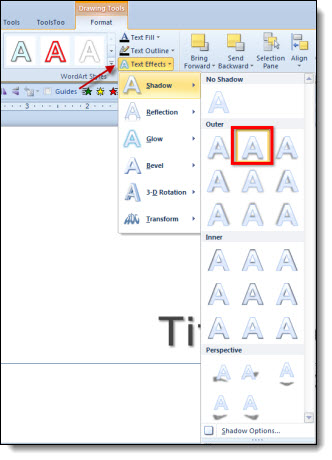
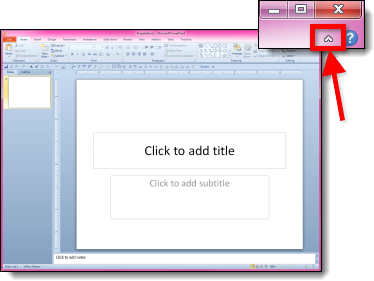
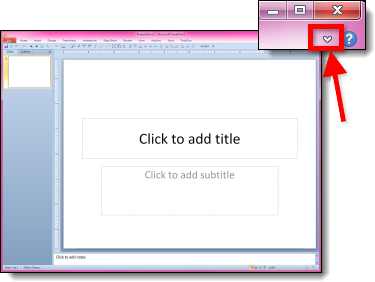
Select the slides from Presentation #1 and copy. The paste them into Presentation #2. To paste in the new slides, right-click and in the pop-up menu in the “Paste Options” sections select “Use Destination Theme:”

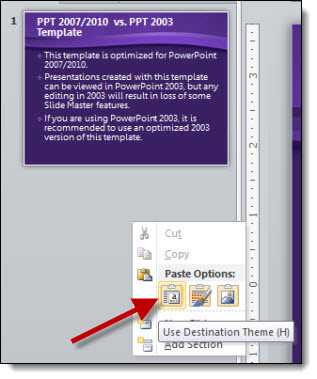
With the USE DESTINATION THEME option, the template for the new slides is assigned to the template used on the slide in front of the insert point. So now all of the blue slides are changed to the purple template.

*Note: There is no “magic” button and with this example the text boxes, background, colors used, etc. were all setup correctly using the template formatting (which also means it is a real template). When updating to the new (purple) template all of the master slide formatting carries over just fine. But there are lots of times when things are not based on template formatting and need to be manually updated (ie. no magic format button).

– Troy @ TLC

By |2016-08-16T09:25:27-07:00April 6th, 2012|Tutorial|

Adobe CS 6 is Coming – and FREE Upgrade Offer

Photoshop, Illustrator, and Acrobat are all common applications we use for presentation projects. Adobe has (finally) announced the time frame for CS6 to be released AND is offering the largest free upgrade they have ever done!


Release date for Adobe CS 6:
By May 31, 2012Free Upgrade:
Purchase Adobe CS 5.5 through May 6, 2012 and receive a one-time upgrade to Adobe CS 6 free.Details for the upgrade offer from the Adobe site are here.

– Troy @ TLC

By |2016-08-16T09:25:56-07:00April 4th, 2012|Resource/Misc|

Why Are The Shadows Not Animating?

Have you run into the issue of during the slide show an animated bullet list of text has the text shadow visible and then the full text animates on top of the shadow? It is a scenario that started with PPT 2007. The good news is, it is not a bug in the program and it is easy to “fix.”

Scenario:
You have shadow effects on your text and a great on-click animation.

But when you view as a slide show, the shadow of the text is not animating!

To Fix:
1. Select the text box.

2. Go to FORMAT >> SHAPE EFFECTS >> SHADOW and change the selection to NO SHADOW.

3. With the text box still selected, go to FORMAT >> TEXT EFFECTS >> SHADOW and choose the shadow style needed.

4. Now when you run as a slide show everything appears when animated!

Why:
PowerPoint has always had two types of shadows: Shape and Text shadows. In PPT 2003, there was really no visual difference between them (at the code level, the two shadow types were different). Starting with PPT 2007, the difference between the two shadows types made a difference in how things are displayed. The non-animating text shadow is the most common way this shows up.

– Troy @ TLC

By |2016-08-16T09:26:21-07:00April 2nd, 2012|Tutorial|

FREE – Adobe Lightroom 4 Live Online Course

I just found out about this (thanks Paul!) and thought others might be interested.

CreativeLIVE is offering an online workshop taught by Laura Shoe, a photographer and instructor from Seattle. Lightroom is Adobe’s incredible digital photography toolbox. The course description says it covers the fundamentals of Lightroom: how to import, organize and edit your photos and videos, create, copy and share and an overview what’s new Lightroom 4.

Get the full details here.

– Troy @ TLC

By |2016-08-16T09:27:06-07:00March 28th, 2012|Resource/Misc|

CloudOn Puts Full PPT on iPad

I have been experimenting with “CloudOn” for the iPad which launched just a month ago. The company description “Use the CloudOn workspace on the iPad to access your files and manage them.” “Edit, review and present docs in Microsoft Office” is a good summary of the offering.

Here are a few screen captures of designing slides on my ipad:

– This is the real PPT 2010, so the same ribbon interface and options (some features are disabled).

– The smaller iPad screen size was a factor in editing slides.

– I really like the keyboard CloudOn uses with all of the Function, CTR, ALT and other keys.

Basically, you are accessing a remote version of Microsoft Office 2010, just like you can connect to your computer through your iPad using LogMeIn or other remote access apps. Of course, the service means you must be online to work in PPT, so WiFi is good or your monthly bandwidth may get a lot more use. It is the real PPT 2010 interface, which is not touch sized (I tap on the wrong icon a lot) and has no gesture control.

For me, it is a fun novelty that does prove more valuable for presenting than designing slides.

– Troy @ TLC

By |2016-08-16T09:28:29-07:00March 26th, 2012|Personal, Resource/Misc|

IPAD Speaker Timer

For many live meetings, a speaker timer, a countdown clock presenters on stage see to know how much longer they have in their allotted time, is very valuable. There are speaker timer units that use proprietary control unit and display, software to run on a computer and display on a monitor (my favorite is “SpeakerTimer Pro” by the company that developed the Playback Pro system – it has the “Timewarp” feature to smoothly adjust the timer to be what you need, not what a real clock would say) and I also have a countdown slide deck (120 slides set to auto advance every 60 seconds).

But having a full computer inline for such a simple task is overkill. Here is a recent show where I loaded up my countdown presentation into Keynote on the iPad, connected the iPad to the monitor and saved a lot of desk space (and lightened my tech case by not needing to pack a computer for the task).

– Troy @ TLC

By |2016-08-16T09:29:20-07:00March 24th, 2012|Resource/Misc|

The new TLC Creative Services office – Behind the Scenes

At the end of 2011, we purchased our new office space, had a great contractor handle moving virtually every wall and door (consolidated a few of the workspaces and hallway into a large workspace for most designers to be in), followed by an IT contractor handling the network wiring (his only question was “Why do you need 43 data ports?”) and some creative planning with the IKEA office furniture app. We have settled in (even have art on the walls!) and are keeping busy doing what we enjoy.

Visitors are welcome (but I do tend to be working in a ballroom somewhere more than at the office).

– Troy @ TLC

By |2016-08-16T09:29:38-07:00March 22nd, 2012|Personal|

Use Background Fill For Great Graphic Elements

I have used this technique on some recent projects that we designed dynamic background art for. The idea uses a simple feature that is used little and creates really dynamic graphic elements that are amazingly easy to use. Here is my sample slide with a dynamic background (thanks to Amber for creating this sample slide and tutorial images).

1. Add a PPT shape of your choice, I am using a standard rectangle. Set it as the background (FORMAT >> BACKGROUND >> PICTURE).

2. Set the PPT shape to “No outline,” solid color fill and no styling.

3. With the shape selected, go to FORMAT >> open the shape options by clicking the small icon in lower right >> under FILL >> SLIDE BACKGROUND FILL (last option).

4. NOTE: The shape has now disappeared with only the shape selection lines visible.

5. What you do here determines the look you create. I am using 3D perspective and some styling options. Select the shape.
– Add 3D Rotation (we are starting the “Perspective Relaxed” preset).

– Add a 3D Format for a bevel effect (Circle bevel with the width at 7pt and height at 8pt).

6. Now we see the interesting effect when the background fill is combined with some shape styling.

7. To really create a dynamic visual the next step is to select the shape and modify the 3-D Rotation perspective to 120 degrees.

8. With the new 3D formatting we can really see the effect of the background fill in the shape.

9. To create a full Title Slide layout, the shape was enlarged for more depth and stretched across the slide. Then duplicated, reduced in size and moved under the subtitle text box. The background fill automatically adjusts to the new placement on the background to create new looks for the same shape

Click here to download the sample slide.

– Troy @ TLC

By |2016-08-16T09:29:58-07:00March 20th, 2012|Tutorial|

Show/Hide the Ribbon in PPT 2010

The ribbon, introduced in Office 2007, is a compact layout. But there are times when having a bit larger work area is helpful. For those times, starting with PPT 2010, the ribbon can be hidden to increase the work area.

Here is the standard edit view with the ribbon. In the upper right corner is a small up/down icon:

Click the up/down icon and it hides or shows the ribbon:

– Troy @ TLC

By |2016-08-16T09:30:26-07:00March 18th, 2012|Tutorial|
Go to Top