In a presentation, clarity of data is the goal. When presenting charts, our goal is not only to convey information, but to do so efficiently, so much that our design team goal is for a chart to convey its story in just one second. A chart where the viewer immediately understands the core message, without having to think through a lot of unnecessary visual noise.

Let’s look at some examples of PowerPoint’s default charts and how TLC Creative team transforms it into a streamlined, highly effective visual.
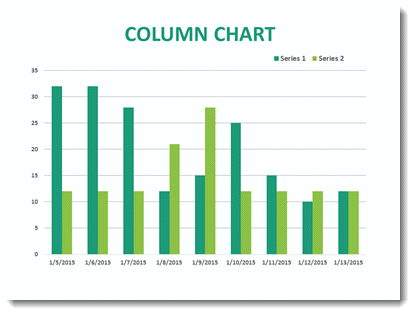
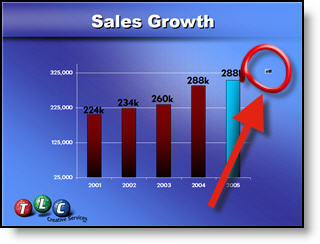
The Cluttered Default Chart
Let’s start with a traditional chart, complete with all the usual visual elements.
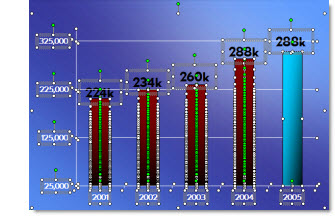
This chart contains every possible visual component:
- Axis lines – both horizontal and vertical.
- Axis labels – showing the scale of values.
- Axis demarcation lines – to show intervals.
- Legend – to explain the different data series.
- Title – to provide a description of what the chart is about.
- Data labels – showing the exact value of each data point.
While this chart is technically “correct” in that it has all the necessary elements to be fully interpretable, it’s also overwhelming. The amount of information in the presentation makes it hard for the viewer to focus on any one key insight.

What’s the Problem?
This chart is packed with details, but the viewer might struggle to extract the one key takeaway quickly. Maybe you want to highlight a single data point or illustrate a trend without making the viewer sift through a lot of information. The goal is to cut out the visual clutter so that the data speaks for itself.
Streamlining the Chart Styling
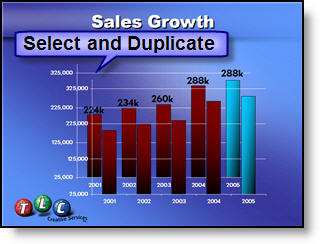
Now, let’s transform that chart into one that can be absorbed in just one second.

What has changed?
- Grey bars represent the general data, but they are now muted to draw attention away from them.
- One green bar stands out. This bar is the focus of the chart, the key data point that the viewer should immediately notice.
- The large data label on the green bar clearly shows the value, reinforcing its importance.
- No gridlines to distract the viewer.
- The legend and title have been removed because they’re unnecessary for this simple, focused visualization.
- The Y-axis only shows the minimum and maximum values, which immediately sets the scale without additional numbers cluttering the view.
The Goal of the 1-Second Chart
By eliminating the excess, we create a 1-second chart. A chart that tells you exactly what you need to know. In this case, you might see that one data point is much higher than the others, immediately identifying it as the key takeaway from the chart. The viewer doesn’t need to spend time interpreting axis labels or other extraneous elements – the message is crystal clear.
Why Does This Work?
- Simplicity: Humans process visuals much faster than text or numbers. By focusing on the most important data point, the chart makes a quick impression.
- Focus: The viewer’s attention is drawn directly to the green bar, the focal point of the story.
- Instant comprehension: When there’s minimal distraction, the brain processes the key insight more efficiently.
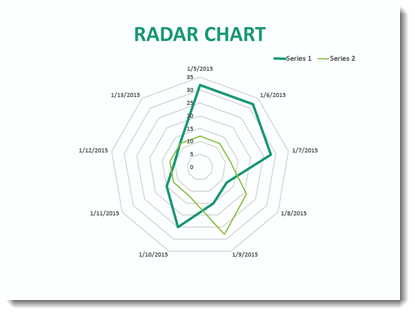
1-Story Line Chart
Let’s now look at a typical line. Axis titles, chart title, legend (that matches the axis labels), data points (generically positioned) all together is a lot to process. It is a lot of visual clutter. Line charts are often used to show trends over time or the relationship between variables. In the lower version of the line chart, lots of visual clutter has been removed and the important data point for this part of the talk is quickly and clearly identified.

- One green line stands out as the key focus, indicating the primary trend or the data point that is most important.
- The green line is accompanied by a bold green data label clearly showing the exact value of the message.
- Data labels have been moved from the default positioning to beside each data point.
- Gridlines are a lighter grey.
- Legend and titles are removed to simplify the chart, letting the viewer focus on the essential data.
- The Y-axis units simplified to whole numbers, which also reduces the number of gridlines.
Conclusion: The Power of Minimalism in Data Visualization

In data visualization, less can be more. A well-designed chart should prioritize clarity over complexity, especially when you want to convey a key point quickly. The 1-second chart is an exercise in simplification, removing the excess and letting the data shine. By focusing on the key message and eliminating everything that doesn’t support it, we create a PowerPoint that delivers its story in a flash.
So, next time you’re preparing a chart, ask yourself: What’s the one thing I want my audience to walk away with? And then design your chart to make that insight as clear and immediate as possible.
By reducing distractions and focusing on the essentials, you can create charts that don’t just inform—they communicate.
-The TLC Creative Presentation Design Team