The PowerPoint® Blog

I work with PowerPoint on a daily basis and I am very honored to be a Microsoft PowerPoint MVP. We have a talented team of presentation designers at TLC Creative Services and ThePowerPointBlog is our area to highlight PowerPoint tips, tricks, examples and tutorials. Enjoy! Troy Chollar

It’s All Aglow

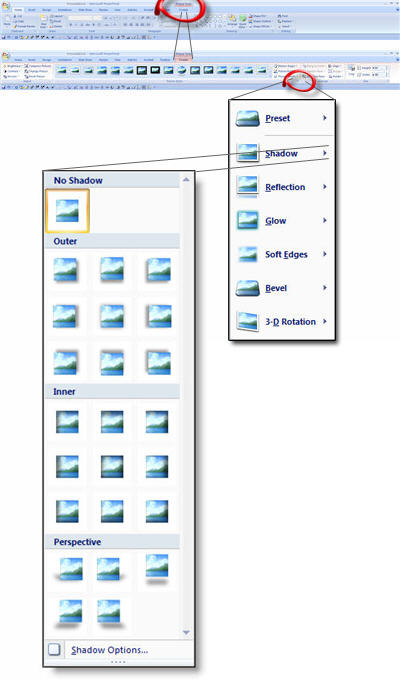
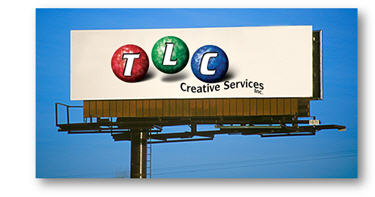
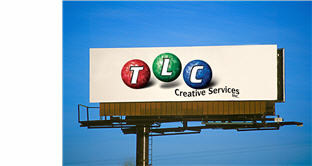
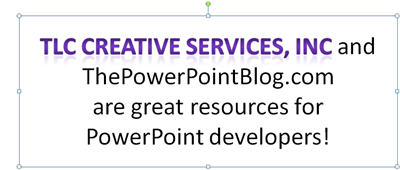
A glow is similiar to a drop shadow – soft feathered edge, any color, etc. The difference is a glow uniformly goes around the entire image vs. offset on 1 or 2 sides. Here is our sample image with a blue glow applied.

– Troy @ TLC

By |2016-11-17T14:47:45-07:00December 17th, 2007|Tutorial|

Shadow Presets

One of the great decisions on the Microsoft design team was to make most features have a set of presets – the most common ways to use that feature (of course the better would be to allow the user to also develop and add their own creations to the presets).

To access the shadow presets:
Select an image >> go to the FORMAT tab >> PICTURE EFFECTS >> SHADOW

– Troy @ TLC

By |2016-11-17T14:48:07-07:00December 14th, 2007|Tutorial|

Real Shadows!

As shown a few posts ago on text, PowerPoint 2007 has vastily improved drop shadows! Now we are able to create a nice “photoshop” feathered shadow. Here is our sample image with drop shadow applied:

This is a true soft feathered edge shadow:

With this one feature I have eliminated lots of time preparing images in PhotoShop!

– Troy @ TLC

By |2016-11-17T14:48:27-07:00December 13th, 2007|Tutorial|

Office 2007 SP1 Released

Service Pack 1 for Office 2007 has been released ahead of schedule!

It should remedy some issues, especially if running Vista and Office 2007, and has a number of performance and stability updates. Microsoft’s info and download page is here (although it is officially released you may have to wait a bit longer as the download page on Microsoft’s website seems to be down for the moment….).

– Troy @ TLC

By |2016-11-17T14:49:25-07:00December 11th, 2007|Software/Add-Ins|

PPT 2007 and Imported Photos

Well I just finished a series on lots of the great things that can be done with text in PowerPoint 2007. Next up is a series of posts on what can be accomplished with imported photos!

And as a sneak peak, here is the image everything is going to happen to:

– Troy @ TLC

By |2016-11-17T14:49:48-07:00December 10th, 2007|Tutorial|

3D Perspective to Text

The Z-Axis is a common item in 3D applications. It is one of the axes in a three dimensional system that gives things a 3D perspective. Now PowerPoint has some z-axis features, which Microsoft refers to as ‘3D Rotation.’ All three of these text boxes were created from the same one. The top one shows the visual effect applied to the text (bevel and reflection). The bottom two apply 3D Rotation for some GREAT Visual effects!

And all of these remain editable text.

– Troy @ TLC

By |2016-11-17T14:50:07-07:00December 5th, 2007|Tutorial|

Kerning!!

If you have used desktop publishing software you are familiar with the concept of kerning. With (variable width) fonts, different pairs of characters are spaced differently. Kerning is the adjustment of spacing between letters to obtain a more pleasing appearance. The great news is that PowerPoint now has some basic kerning capabilities. Microsoft calls it ‘Character Spacing’ and here is the quick menu.

We can also get more fine control over the Character Spacing by opening the Character Spacing dialog window.

Here are a few examples of kerning in use. The top text is the standard, or normal, kerning. The second one is expanded and the third is condensed. All is still editable text and can be applied to select text within a single text box.

– Troy @ TLC

By |2016-11-17T14:50:27-07:00December 3rd, 2007|Tutorial|

Modify Text Preset Visual Effects

All of the presets are based on the template color scheme. But perhaps you like one effect, but it is not in the needed color – here the subtle gradient and subtle reflection are the effect desired.

But what is really needed is a blue gradient. Instead of going in and manually setting options, I can apply the preset effect (shown above), then open the manual settings dialog and just adjust the colors to achieve the needed graphic.

So you can create this effect in a matter of seconds:

– Troy @ TLC

By |2016-11-17T14:54:14-07:00November 30th, 2007|Tutorial|

Text Effect Presets

One of the nice features is the new preset effects. Once text is selected you can use any of the preset visual effects to easily add a dynamic look.

– Troy @ TLC

By |2016-11-17T14:54:36-07:00November 28th, 2007|Tutorial|
Go to Top