The PowerPoint® Blog

I work with PowerPoint on a daily basis and I am very honored to be a Microsoft PowerPoint MVP. We have a talented team of presentation designers at TLC Creative Services and ThePowerPointBlog is our area to highlight PowerPoint tips, tricks, examples and tutorials. Enjoy! Troy Chollar

How to Apply a Saved Color Scheme to an Existing PowerPoint

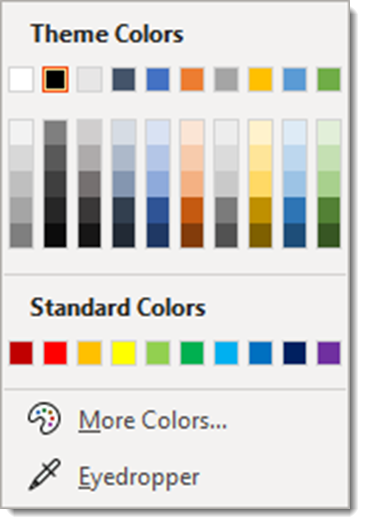
Any PowerPoint slide deck can have any preset color scheme applied to it – and everything in that presentation that uses the color scheme for their colors will automatically update! This includes text, shapes, charts, tables and more. It is amazing when the slide content is setup to use color scheme colors – and frustrating when it does not…

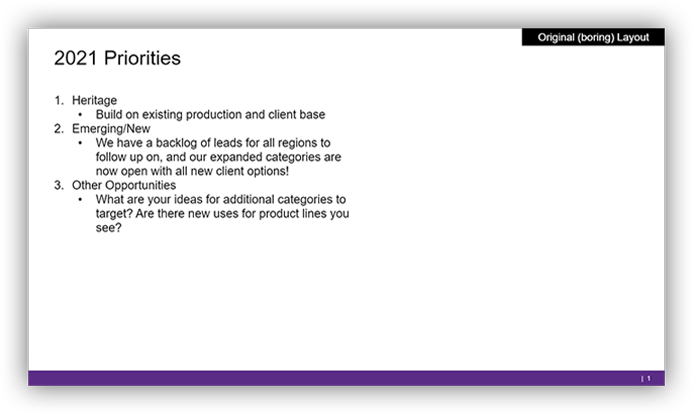
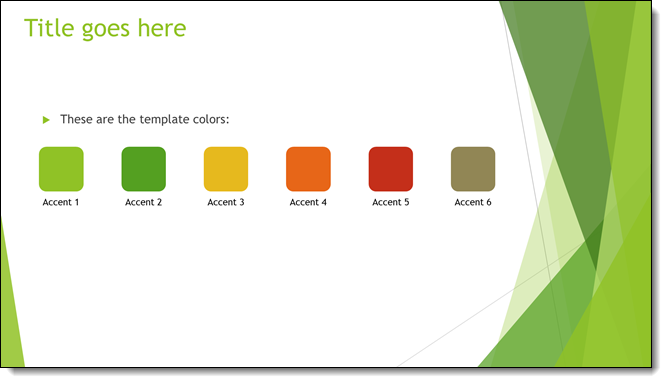
Here is our example presentation, that uses a green color scheme – and the template was developed using the color scheme.

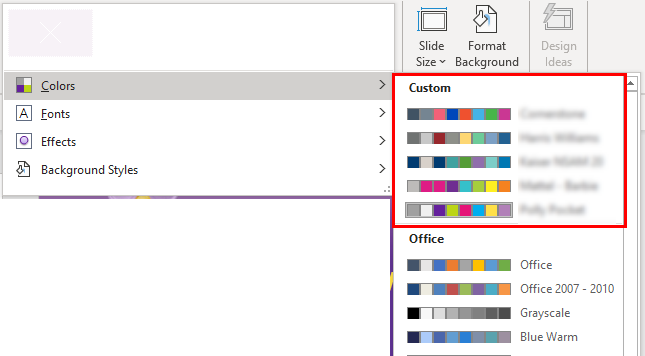
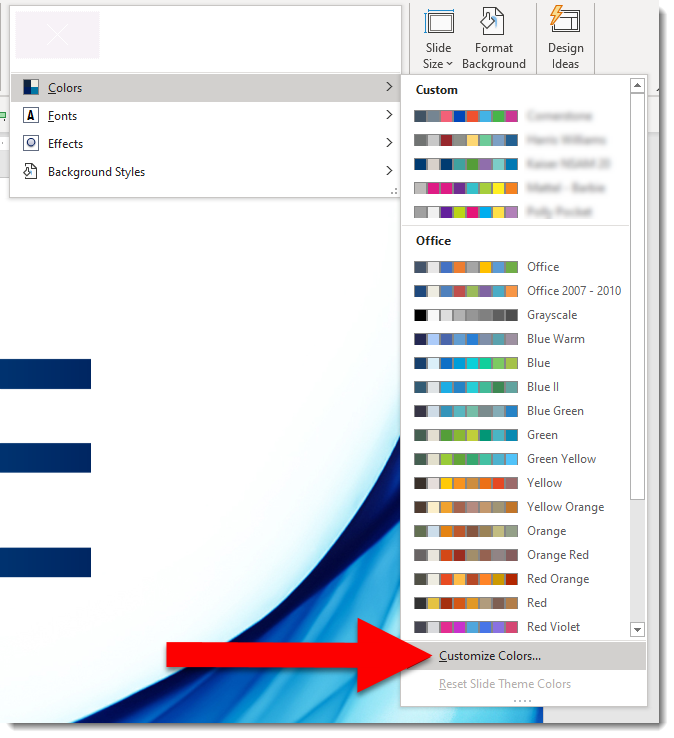
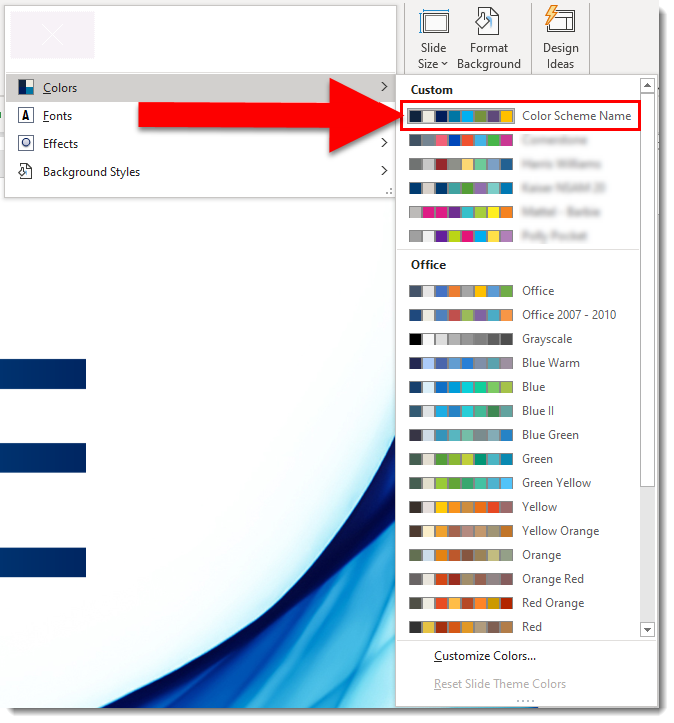
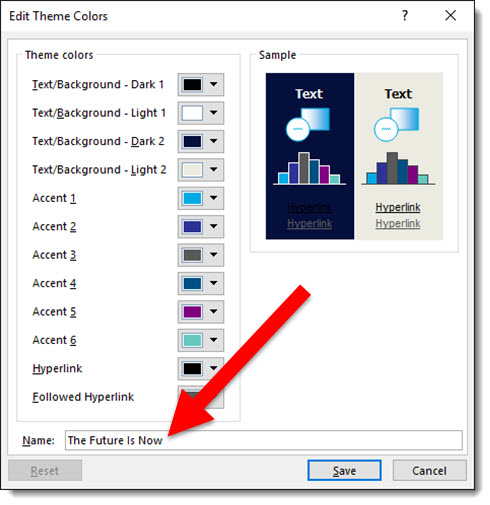
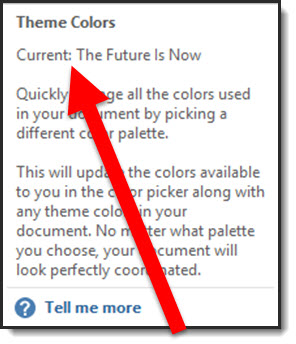
We want to update this presentation to the “blue” division. We can easily update the presentation to the “blue” color scheme (see previous blog post for how to add color schemes to PowerPoints CUSTOM list). To update the presentation to the needed color scheme, go to DESIGN > COLORS > select the desired color scheme.

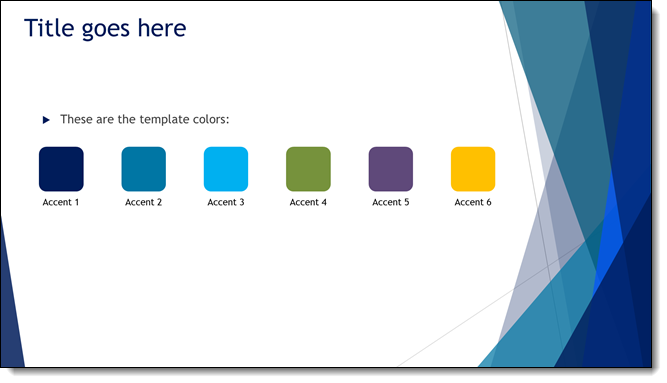
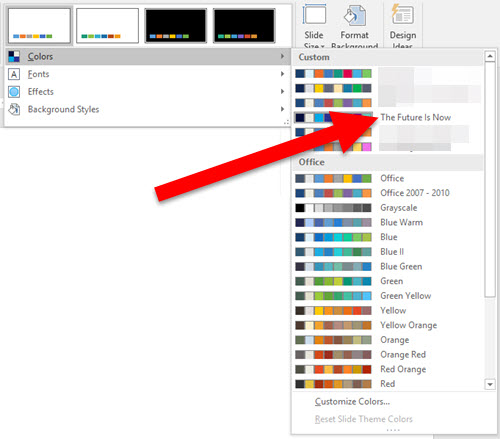
As you rollover the different schemes, the color schemes preview. Ultimately we have selected the “blue” color scheme for this presentation.

[videopack id=”14012″]https://thepowerpointblog.com/wp-content/uploads/2020/05/PPT_Colors_PT_2_screencapture.mp4[/videopack]

Troy @ TLC


By |2021-05-17T13:02:57-07:00May 13th, 2020|Tutorial|

How to Save and Name a Custom Color Theme in PowerPoint

Any presentation can have any custom color scheme applied to it. This tutorial is how to save a custom color scheme from one presentation, or template, to your computer and then apply it to any other presentation.

1. Custom color schemes, for example from a custom PowerPoint template, is displayed in DESIGN > COLORS > CUSTOM. Note, custom color schemes that have been saved to your computer show up in this list.


3. To save the color scheme from any file/template, click CUSTOMIZE COLORS at the bottom of the list.

4. The CREATE NEW THEME COLORS dialog opens and displays all of the assigned colors. The only action you need is to give the color scheme a name (see previous post for tip on seeing the assigned name). 

5. Replace “Custom 1” with a descriptive name. For this tutorials we will use “Custom Color Scheme Name” and click SAVE

6. Now you will have access to the “Color Scheme Name” custom colors on your computer and can apply them to any presentation or template. 


Troy @ TLC

By |2020-04-24T10:44:16-07:00May 11th, 2020|Tutorial|

What is the PowerPoint color scheme name of this file?

Every custom color scheme has a name. But when the CREATE NEW THEME COLORS dialog is opened, the color scheme name is a generic “custom 1” name. It is not intuitive on finding the color scheme name, so here is a tutorial on how to see the color scheme name currently being used by a file.

— Note: I am reposting what I put online back on April 29, 2016

Every template has a Custom Color Scheme. And every color scheme has a custom name. For example: Here is a custom PowerPoint template I am working on, and I named the template color scheme “The Future Is Now” which is the theme name of the event where it will be used.

Template Color Scheme -1

And when I look at the color schemes available on my computer, this theme is listed – because it was created on this computer:

Template Color Scheme -5

But on any other computer, with the template open, if I look at the color schemes, The Future Is Now is not listed:

Template Color Scheme -2

To find the Custom Color Scheme name, do this:

  • Go to VIEW > SLIDE MASTER > BACKGROUND > mouse over (do not click) COLORSTemplate Color Scheme -3
  • The pop up dialog shows the current template color scheme name
    Template Color Scheme -4

Now you can edit the existing color scheme and know what name to give it.

-Troy @ TLC

By |2020-04-24T18:08:16-07:00May 8th, 2020|Tutorial|

The Design Challenge #4 Designs!

It has been a fun week designing a WOW slide – and working with a Microsoft Teams workflow! The TLC Creative design team’s entries for Challenge #4 are in and they all succeed in going from the boring bullet list to a spectacular WOW slide design.

As a reminder. the design team was tasked with not only a slide design, but to work from one shared presentation file hosted in a Microsoft Teams project channel. The design team had a fun time getting familiar with accessing PowerPoint within Teams – and not having a ‘save’ button. Here are our COVID-19 Design Challenge #4 results!

By |2020-05-02T14:47:30-07:00May 6th, 2020|Portfolio|

New Episode of The Presentation Podcast – Slide Design for Remote Presenting

A new episode of The Presentation Podcast is available today! Troy, Nolan and Sandy are joined by Richard Goring of BrightCarbon, Mike Parkinson of Billion Dollar Graphics, and Cliff Kennedy of Kennedy Speech Communications for a great episode! This conversation is about slide design and presenting techniques of remote presenting.

Listen on Apple Podcasts, Stitcher, Google Play, Spotify and Soundcloud – just search for The Presentation Podcast for “Being a Remote Presenter (with Ken Molay)” or go direct to the episode page here: https://thepresentationpodcast.com/podcast/101

By |2020-05-06T16:17:09-07:00May 5th, 2020|Resource/Misc|

COVID Design Challenge #4

With this challenge, not only did our design team have to put together some amazing design, but they had to do it all working in Microsoft Teams! So part of this design challenge was our design team all being forced into the world of Microsoft Teams for file management (we have been using Teams for calls, meetings and presenting, but now transitioning to incorporating it file management, editing and communication). 

For our design challenge #4 a master slide deck was uploaded to the Teams project “channel”. Slide 1 was the base boring bullet list of black text on a white background. Each designer had an assigned slide, with zero design applied.

Each designer was challenged to develop their own slide with the same base content, but any layout and visuals they envisioned. Again, based on a Microsoft Teams workflow, the catch was all design had to be done from the shared presentation. No downloading, and not keeping the file connected to the Teams version!

Work from the master slide deck on Microsoft Teams. Slide 1 is the content, and everyone has a slide for design assigned. Develop your version of an original (boring) slide with images, graphics, and visual layout. Use any color scheme and font options, but no animation needed. You cannot download the PowerPoint file to your computer, you can work directly in Teams version of PowerPoint, PowerPoint online or PowerPoint on your computer – but it must always be worked on as a shared file.

Check back later this week to see what each design did to turn the boring slide content to a WOW slide!

By |2020-05-02T14:40:35-07:00May 4th, 2020|Resource/Misc|

Our COVID Design Challenge #3

I am very proud of the creativity on our design team. Our internal COVID-19 design challenge put that creativity to the test. The design team was presented with a few design parameters, a simple and very vague slide animation request, and given 2 hours to create amazing. See you Monday with the results!

Here is COVID Design Challenge #3, “40 Lines”. The full name should be “40 lines and 5 slides”. Creating a dynamic animation with 40 lines across the 5 slides. The lines can be any color, any length, any position, any arrangement, any width. Additional content or accent graphics can be added to the slides, but the 40 lines need to be the star.

By |2020-04-20T16:28:59-07:00April 24th, 2020|Resource/Misc|

New PowerPoint Feature – YEAR!

You are probably wondering what the title of this blog post means… Well PowerPoint has a new feature, something that has been requested for year. And it makes me very happy to finally have it!

PowerPoint has added to the date footer list a new option. The ability to just list the year.

Where I see this simple addition being invaluable is for corporate PowerPoint templates (also Word and Excel templates). Every year the template automatically updates to display the current year! If you are not cheering, I am guessing your company template does not include a copyright statement – that needs to be manually updated each year (or updates automatically because your company paid for a very cool, but not cheap, add-in).

Here is a quick example of adding a copyright statement preset on the bottom of all slides in a corporate template. The year automatically updates so the copyright information is always current. For this example I am manually adding text in front of the year “(C) TLC Creative Services”. TIP: text can be added any of the footer placeholders and variable part, in this instance the date, remains coded to update. Works for source and page number footers.

Additional information:

  • This is a four digit year (e.g. “2020”)
  • It was release with Win32 build 16.0.12527+ and Mac build 16.35.2002+
  • It will display on all endpoints (Win32, Mac, mobile, web), including legacy builds (yay!).
  • It may not display on legacy builds that are localized to other languages, and in those instances it defaults to display the first datetime field type (eg. 4/20/2020 would display in the above example)

Troy @ TLC

By |2020-04-20T15:05:40-07:00April 23rd, 2020|PowerPoint|
Go to Top