Still Waiting for the Office Refresh?
I just worked with another designer that noted that their Office had not yet updated to the new “Windows Refresh” – the updated app styling. Sure enough, PowerPoint on their computer had the “rectangle” interface still.

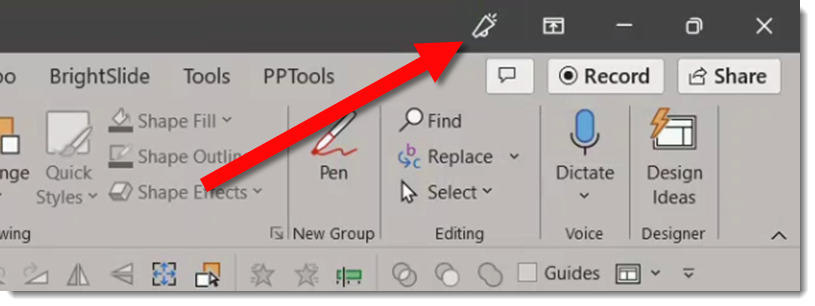
The solution, at this time because the “refresh” has rolled out to all Office 365 accounts now, is to click the “Upcoming Features” megaphone icon.
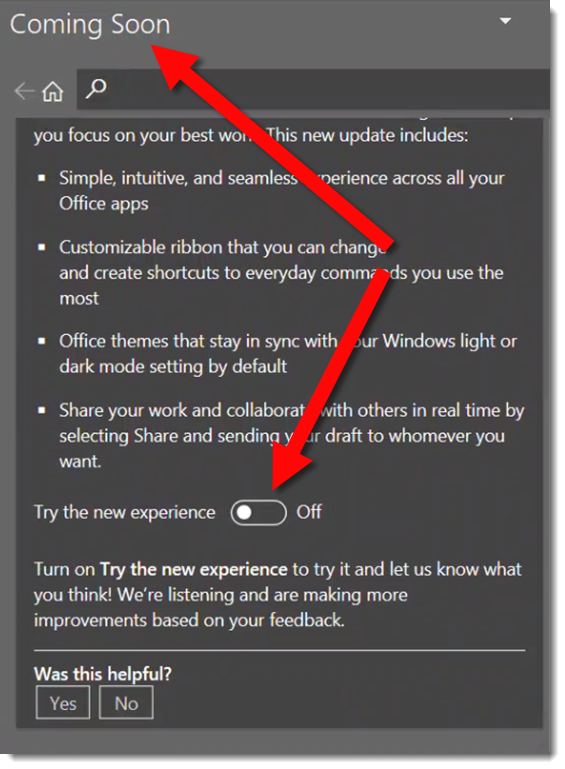
Scroll down the Coming Soon content, find the “Try the Experience” toggle, turn it on, and restart PowerPoint.
The app interface for all Microsoft Office should now be on the most recent, “rounded corner” interface 😊

Troy @ TLC