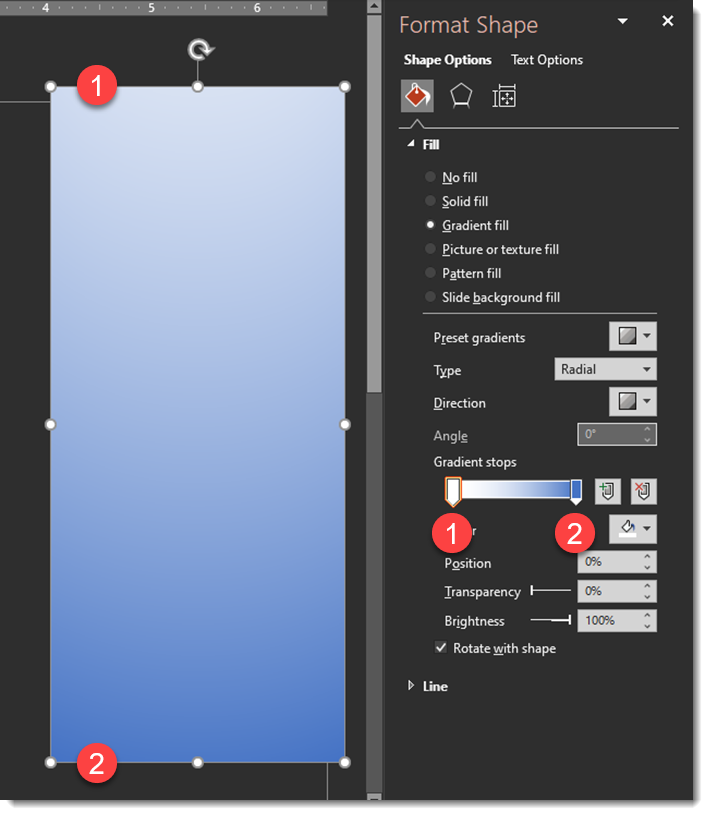
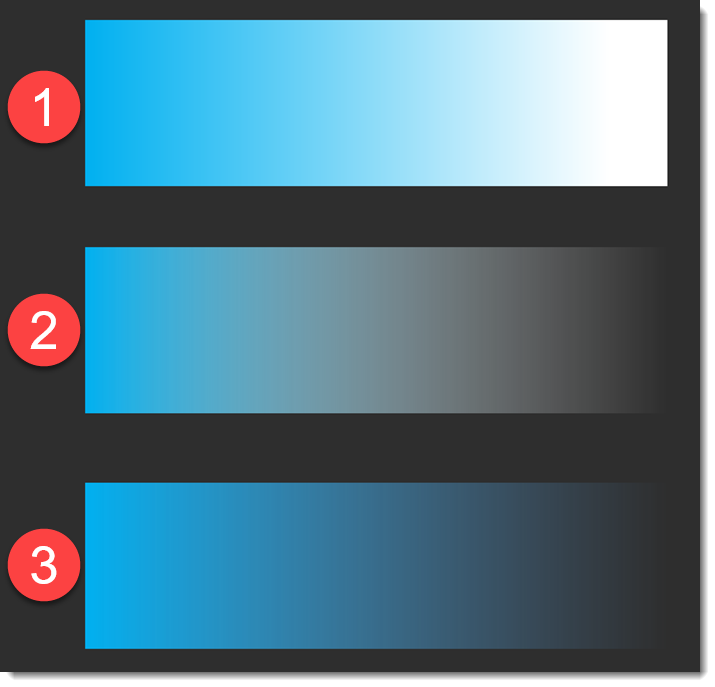
These 3 gradients are the same PowerPoint rectangle set as a 2 stop gradient. The goal is a smooth gradient from the solid color on the left to a nice transparency on the right. The visual appearance is a “1 stop gradient; color to nothing”.
#1 is solid colors, blue to white.
#2 is the solid blue to the white set to 100% transparency (ie. not visible)
#3 is the solid blue to a 100% transparency blue (this is the secret!)
Looking at the details for the three gradients.
#1 displays exactly as expected; solid blue to solid white with a smooth gradient from left to right.
#2 is not what is expected; solid blue to a muddy grey. Note, stop #2 is white, which does not match the step #1 color and PowerPoint is showing the color blend from blue to white in the visible gradient (ick!).
#3 is the exact same transparency settings, but color stop #2 has been updated to be the same blue as stop #1. The result is a wonderful, smooth gradient of the left blue fading to nothing. The reason is that the color blend from blue-to-the-same-blue does not create any tertiary colors in the blend.
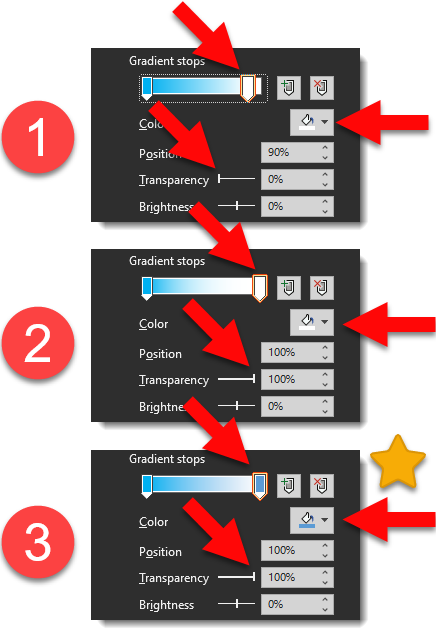
* * #3 is the secret to creating smooth fades to nothing in PowerPoint!
Troy @ TLC