Tutorial

Customize The PPT Auto Lorem Ipsum Text

But wait, there’s more!

In addition to the secret code shown in the previous post, you can add parameters to control how many paragraphs of sample text – and how many lines per paragraph.

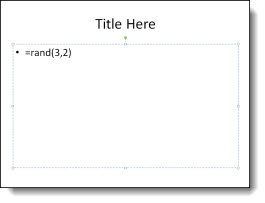
Here is my sample slide, I have have added the parameters to insert 3 paragraphs of 2 lines each with “=rand(3,2)“.

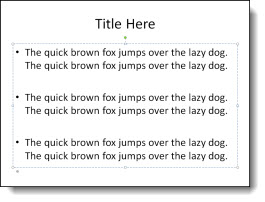
Just click the enter key and it turns into this (3 paragraphs of 2 lines each):

– Troy @ TLC

By |2016-08-16T11:05:27-07:00September 18th, 2010|Tutorial|

Auto Lorem Ipsum Text

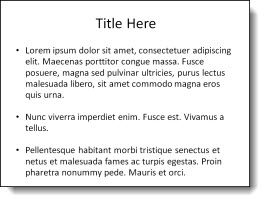
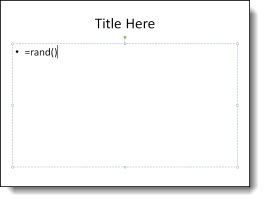
This is a cool and useful trick that has been in PowerPoint for a few versions. It is good for creating quick sample slides. Basically there is a bit of hidden code in PowerPoint that you can activate by typing “=rand()“.

Here is my sample slide (default PPT template) and I have typed the ‘secret’ coding.

Then press enter and it fills the text box (and beyond) with “The quick brown fox…” text.

– Troy @ TLC

By |2016-08-16T11:05:42-07:00September 16th, 2010|Tutorial|

Apply “Sharpen” to Images

PPT 2010 has lots of great Photoshop-like effects built into the application. This post is highlighting the SHARPEN AND SOFTEN filter in a real-world situation.

Here is my original image.

Here is the effects applied to stylize the image (rounded corners, bevel, reflection, etc.). All looks great, but look at the face – it is not as crisp and defined.

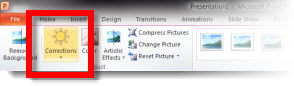
With the image selected go to FORMAT >> ADJUST section >> CORRECTIONS

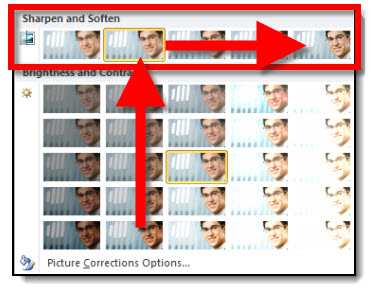
Looking at the top row is the SHARPEN AND SOFTEN quick options. The highlighted box shows what is currently applied to the image. I am going to click and apply the far right option which is a much greater sharpen filter.

Here is the same image, same stylizing effects, but with the greater sharpen filter setting. The bevel is there, the reflection is there and the face is super crisp.

– Troy @ TLC

By |2016-08-16T11:06:32-07:00September 10th, 2010|Tutorial|

Clear Formatting Fast (With Keyboard Command!)

Q – What is the fastest way to clear the formatting to text, shape or picture?
A – Select and use keyboard

Here is my example. I have formatted the company name with a gradient fill and reflection. Now I want to go back to just the original text (bottom). To get there I just select the text and click the CTRL + SPACEBAR. Done.

– Troy @ TLC

By |2016-08-16T11:07:13-07:00September 3rd, 2010|Tutorial|

“Where Did I Save That Presentation?”

“Where did I save that presentation?” is something I say or hear daily. In PPT 2010 there is a great addition to the ‘Recent Documents’ feature.

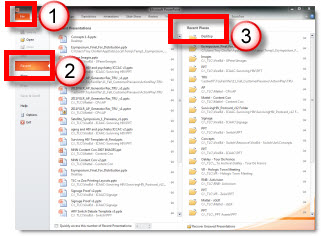
Go to FILE >> RECENT >> RECENT PLACES

The right column shows the folder location of the past 20 saved presentations. Click any of the locations and a OPEN dialog lets you pick any presentation in that folder.

– Troy @ TLC

By |2016-08-16T11:07:37-07:00September 1st, 2010|Tutorial|

Set Movie To Mute

Sometimes a movie has sound, but you don’t want it. There are lots of reasons; video of a surgery and you don’t want the audience to hear ‘Uh-oh’ in the background, a screen capture video and the application sound FX are distracting, or any number of other reasons.

From within PPT you can set a movie to play muted.

PPT 2003:
1. Select movie

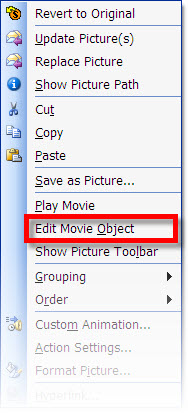
2. Right-click and choose EDIT MOVIE OBJECT

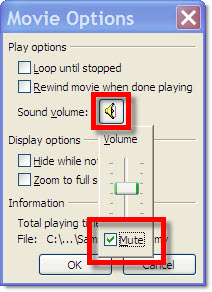
3. Click speaker icon and click MUTE

PPT 2007:
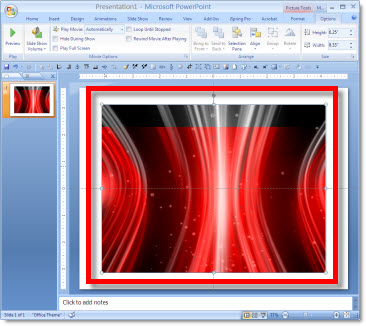
1. Select movie

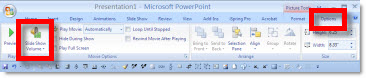
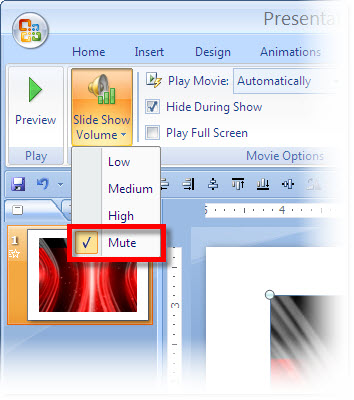
2. Go to OPTIONS tab and click the speaker icon

3. Select MUTE

PPT 2010:
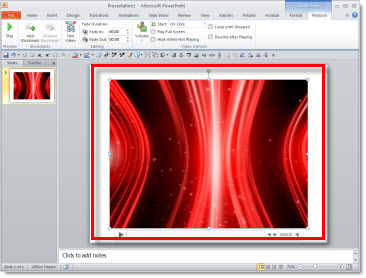
1. Select movie

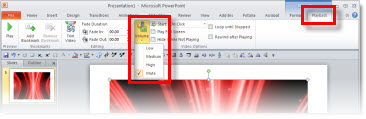
2. Go to PLAYBACK tab, click the speaker icon, select MUTE

– Troy @ TLC

By |2016-08-16T11:15:12-07:00August 10th, 2010|Tutorial|

Automatically Advance To Next Slide When Movie is Done

You have a great opening movie for your presentation. But at the end of the movie the slide shows black (last frame of movie) until you advance to the next slide. This is the last thing you want to think about as you prepare to present.

The solution is fairly easy; it is just not a movie option so you may be looking in the wrong place.

Here is my sample slide with the opening movie.

Select the movie and roll over the playback bar (see Aug. 6 post) to see how long the movie is. On my sample slide the movie is 00:08.12 seconds long.

Go to the TRANSITIONS tab.

Add a time that is shorter than the movie to the AFTER box (I used 3 seconds)

That’s it. To automatically advance to next slide after the movie plays the slide transition just needs to be a shorter time than video. In the sample I set the automatic slide advance to 00:03:00 seconds, but the video is 00:08.12 seconds. The slide will not advance until the video is done (even though it is longer than 3 seocnds).

– Troy @ TLC

By |2016-08-16T11:15:44-07:00August 8th, 2010|Tutorial|

How Long is My Movie?

The Animation Pane does not show how long a movie is (like it does for all other animations). Here is one way to check, from inside PowerPoint, for PPT 2003, 2007 and 2010.

PPT 2003:
1. Select video

2. Right-click and choose EDIT MOVIE OBJECT

3. At the bottom of the MOVIE OPTIONS dialog it shows TOTAL PLAYING TIME

PPT 2007:
1. Select video

2. Under the OPTIONS Tab, click the MOVIE OPTIONS Pop-up Menu

3. At the bottom of the MOVIE OPTIONS dialog it shows TOTAL PLAYING TIME

PPT 2010:
1. Select video

2. Roll mouse over the dynamic playback bar to the end

– Troy @ TLC

By |2016-08-16T11:16:00-07:00August 6th, 2010|Tutorial|

Loop 1st Movie While the Second Plays Too

My sample slide shows 2 movies of heart surgery in action. Both movies are set to play at the same time (July 29 post) and set to loop (July 31 post). But here the presenter wants to talk to the 1st movie, and then click to play the 2nd movie.

The first step is to adjust the animations:
1. Open the Animation Pane

2. Select the 2nd movie and change its animation to ON CLICK

– I prefer to do this on the ANIMATION tab

– But the animation start for movies can also be changed on the PLAYBACK tab

3. Select the 1st movie and TIMING (to open the PLAY VIDEO dialog)

4. The REPEAT needs to be set to UNTIL END OF SLIDE vs. Until Next Click

** PPT 2003 and 2007 the default is UNTIL NEXT CLICK, so if modifying legacy presentations this will need to be checked. PPT 2010 the default is UNTIL END OF SLIDE, so it ‘automatically’ sets up the 1st movie to continue playing while the 2nd plays.

– Troy @ TLC
By |2016-08-16T11:16:20-07:00August 4th, 2010|Tutorial|

Set Movies to Loop

Here is my same sample slide from an earlier post. Because this is a short seamless animated loop it is usually set to loop. Setting a movie to loop takes only a few easy steps.

1. Select movie

2. With the movie selected the VIDEO TOOLS functions are added to the ribbon.

3. Go to the PLAYBACK tab and click LOOP UNTIL STOPPED

Then repeat the same steps for the 2nd movie. The animation pane does not show the movie playback time, just a simple ‘appear’ icon. But if you repeat (eg. loop) any other element (text, shape, picture, etc.) the timeline shows the length of each loop and how many repeats it is set to do. For comparison, here is the animation pane the movie and three inserted shapes all set to repeat 3X’s. The vertical line is the end of the animation and then the repeat – which only shows up on the shapes, the movie animation only shows the play icon (no looping information).

– Troy @ TLC
By |2016-08-16T11:16:50-07:00August 2nd, 2010|Tutorial|
Go to Top