
The Presentation Podcast Episode #55 Released Today!
A new episode of The Presentation Podcast with Troy, Nolan, and Sandy is available today! Check out the latest episode, #55 – Let’s Talk PowerPoint Templates (a Virtual Discussion).
PowerPoint Templates have lots of setup, design, distribution and end-use considerations. For this episode we have a virtual conversation with a number of presentation design experts volunteering their expertise and recommendations on everything PowerPoint templates.
Morph Any Shape to Another Shape While Creating A Presentation – Change Shape
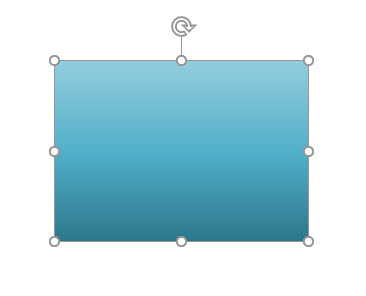
Using existing assets is almost always faster than creating something new, or worse, creating something, again, and again, and again. Everyone should know of PowerPoints CHANGE SHAPE feature! For example, we have created a rectangle with a custom gradient. Now styling is going to be rounded rectangles. Easy, just do this:
Select the rectangle.
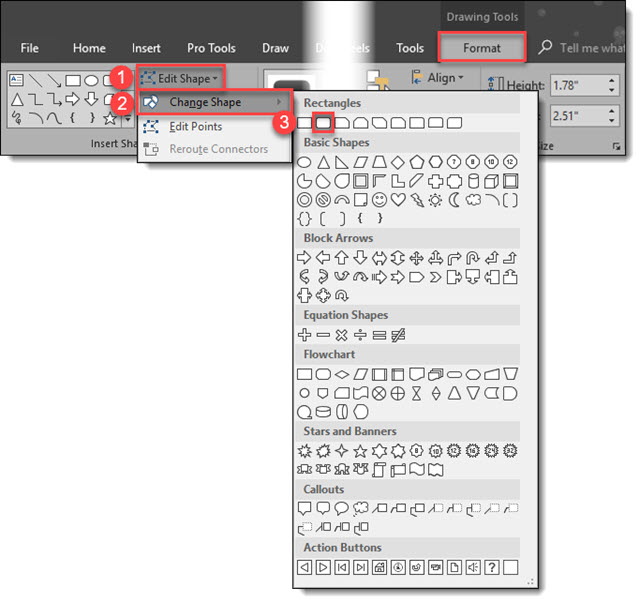
Under the Drawing Tools > Format Tab, click Edit Shape > Change Shape > Rounded Rectangle.
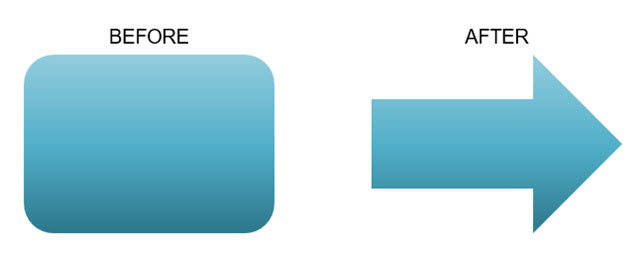
The rectangle will now be converted to a rounded rectangle. Done!

Repeat to convert all the already formatted, positioned and animated rectangles throughout the presentation to the updated rounded rectangle styling in minutes. Or, leverage that wonderful custom gradient by morphing the rounded rectangle to an arrow, or any other shape in the Change Shape library.
Tip: All TLC Creative design computers have the Change Shape drop down menu on our QAT for even quicker design and formatting.
Troy @ TLC
June is Hacking PowerPoint
Welcome to June 2018! This month we are having lots of fun geeking out on tweaks and hacks that can be done in PowerPoint!
Troy @ TLC
It’s A Bright Pink World Full of Animation!
Sometimes a presentation project is just all about the animation. In this case we were tasked with developing a 2+ minute motion graphics video to be used as a meeting opener, a short segment is here for preview. We developed the video all in PowerPoint, exported to video with a music track. It is not the tool that creates bad, boring and bland presentations – PowerPoint is just a canvas, and can accomplish wonderful results in the hands of professional design team.
Troy @ TLC
User Navigation Demo Using Animation
This is a unique project: it’s not a true slide presentation, but a presentation demonstrating potential user navigation flow within a theoretical app. Because this is setup to be presented, we developed a 16×9 version of the app, used oversize icons and simplified much of the content so the audience has large, easy to track content. It was a presentation, but not a presentation of slides, but the content was revised to be the same size (aspect ratio) as slides… got it?
Here is the final motion graphic styling, all developed using PowerPoint.
[KGVID]https://thepowerpointblog.com/wp-content/uploads/2018/05/unnamed-file-3.mp4[/KGVID]
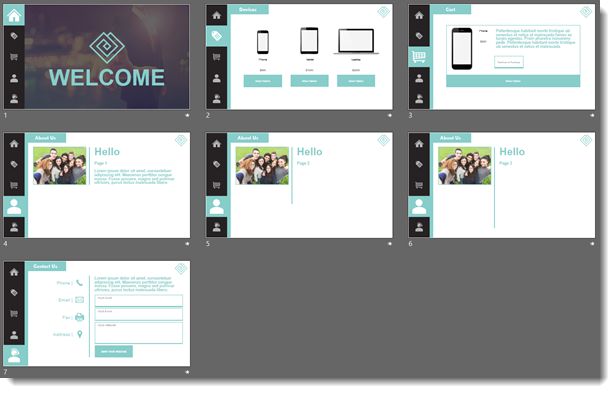
For reference, the above video is from 7 slides:
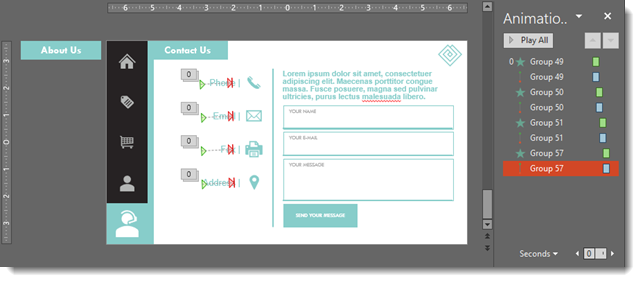
There is a combination of on-slide animation and Morph transition to achieve all motion graphic effects:
Troy @ TLC
Social Media Landscape
Sometimes animation has become too easy. For example, during a recent project, it took longer for the animation request to be explained than to develop. Two slides, move logos, crop and let morph do everything for us with these social media landscape slides.
[KGVID]https://thepowerpointblog.com/wp-content/uploads/2018/05/unnamed-file-1.mp4[/KGVID]
Troy @ TLC
Map Pin Locations
Here is some more animation fun from another presentation project. The goal of this slide was to show national coverage (from the original 3 locations). The talking points were not specific to the locations, but on the positive corporate office growth. We knew there was time for a subtle animation of the map pin locations that filled some of the talk.
[KGVID]https://thepowerpointblog.com/wp-content/uploads/2018/05/unnamed-file-4.mp4[/KGVID]
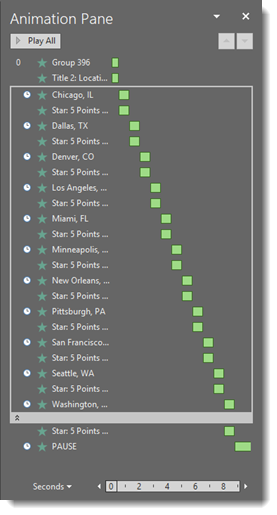
The animation pane shows every line of text and every map marker, which were set in a 9 second animation.
Troy @ TLC