
PowerPoint Zoom – Overview of Options
PowerPoint’s newest feature is Zoom. It is a combination of Custom Shows, in-presentation hyperlinks, the Morph transition, and some new features like dynamic live updating content. It is available to Office 365 subscription PowerPoint 2016. Seeing Zoom in use is definitely the easiest way to explain Zoom, but today I want to go over the technical stuff. Check back all week as I have video demos showing how this new tool can be used.

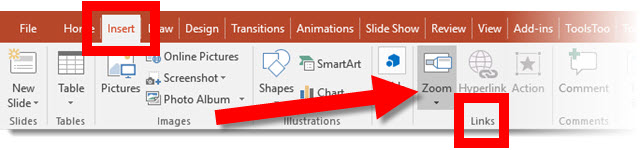
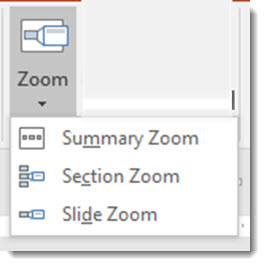
To get to Zoom, go to INSERT tab > LINKS section > ZOOM drop down.
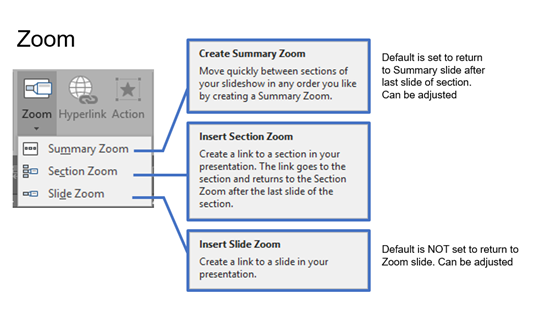
There are 3 options:
CREATE SUMMARY: Automatically adds sections to a presentation if they are not present and adds a new navigation slide with links to each section, and links default to go-to-location.
SECTION ZOOM: Only previously created sections are available and links are added to the slide currently being edited, and links default to Show-and-Return.
SLIDE ZOOM: Adds links to any selected slides, and links default to go-to-location.
Once a Zoom is added to a presentation, the ZOOM FORMAT tab is available.
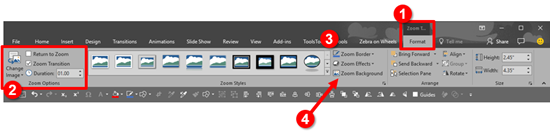
- Once a Zoom thumbnail is selected, the additional options become available under the Zoom Tab
- Zoom Options: Settings include Change Image of thumbnail, Option to return to the Zoom slide (show-and-return), and the length/duration of the zoom transition
- Stylize with borders or additional Zoom Styles and Effects become available from the drop down menu (basically any photo styling option is available to a Zoom thumbnail)
- Option to remove the slide Zoom Background and fill with a different color or image from the Fill menu (this is a very cool new feature, look for a blog post on it coming up!)
Legacy PowerPoint
- Yes, Zoom does work on non-Office 365 PowerPoint (eg. PowerPoint 2016 back to 2007)
- Instead of the dynamic zoom effect, the destination slide transition is used
– Troy @ TLC
Blogs Infographic
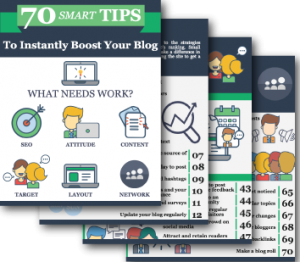
Every now and then, I find something that is worth sharing. This infographic is not only well designed (lots of good ideas for iconography and layouts for presentations), but has lots of great information about coordinating and adding posts to a blog.
Check out this infographic at webmag.co “70 Tips to Boost Your Blog” and be inspired.
– Troy @ TLC
Hide the PowerPoint Ribbon
The PowerPoint Ribbon is super helpful in being in the same place on all installs of PowerPoint. Sometimes, it uses valuable screen real estate. Luckily, it is easy to hide the Ribbon, just click the small upper arrow on the right.

When the Ribbon is turned off, PowerPoint frees up all that space just by displaying the menu bar (and on my install, the QAT that is below the menu bar).
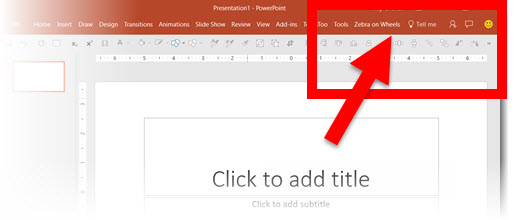
Any time a menu item is clicked, the Ribbon temporarily displays.
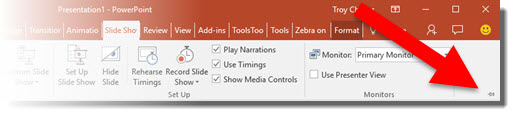
To make the Ribbon stay visible, click any menu item, then click the small thumbtack icon on the right.
-Troy @ TLC
Zoom Demo Webinar Today
Today at 11:00am PST / 2:00pm EST, The Presentation Guild is hosting a Free Webinar with a Microsoft Program Manager demonstrating a new PowerPoint Zoom tool – with Troy Chollar from TLC Creative Services as the moderator/host for this live demo. Hope you can join everyone!

Register and get details here.
Or, view the webinar recording here.
-Troy @ TLC
The Presentation Podcast Episode #12 Released Today!
A new episode from The Presentation Podcast with Troy, Nolan, and Sandy is available today! Listen to their discussion on “Agency Work” or add to your favorite podcasts at The Presentation Podcast.
PowerPoint Content vs. Picture Placeholders
Inserting an image using the preset Picture Placeholders seems like a super shortcut, until things get frustrating with why images do not insert the same way every time a Picture Placeholder is used. The reason, almost always, is knowing there are two types of Placeholders – and each handles images differently.
Here is an explanation and example using a Content Placeholder vs. Picture Placeholder – and as a side note, neither option works the way I feel it really should…
CONTENT PLACEHOLDER
Inserting an image in the Content placeholder, identified by this icon, offers the option of inserting various elements: Tables, Charts, Smart Art, Video, and Images.

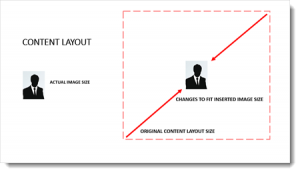
Inserting an image in the Content placeholder adjusts the layout to the size of the actual image. If you insert a small image, the placeholder shrinks to the small size image. If you insert a large image, the image will at maximum be the size of the slide and the placeholder will grow to that size. The downside is the preset position and size on the master layout is ignored and the slide content needs to be manually repositioned and sized.
PICTURE PLACEHOLDER
Inserting an image in the Picture placeholder adjusts image to fill the size of the layout. The downside here is the image is often cut off and needs to be repositioned and resized using the Crop tool.
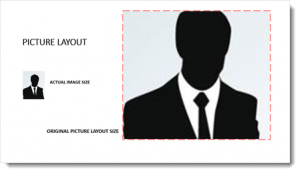
While both Placeholder options are pro’s and con’s, at least now you have an idea of what PowerPoint is doing and what to expect.
-Troy @ TLC
Video Demo of Zoom
PowerPoint is adding a new feature named ZOOM.
Zoom leverages the Morph transition and Sections to create a new way to quickly develop non-linear presentations with a new dynamic visual effect. Here is a quick demo of how easy it is to create custom shows within a presentation using Zoom.
[KGVID]https://thepowerpointblog.com/wp-content/uploads/2016/08/unnamed-file-2.mp4[/KGVID]
– Troy @ TLC