
Grow-Shrink Animation – Part II
This is a continuation of the Part I post on May 22. In this tutorial PowerPoint presentation I make a photo shrink and then grow back to its 100%, without any resolution loss. Okay, so it is a tutorial on how to use animation to fake it, but the results are great and it is a technique I use on many projects.
Click here to download the PowerPoint file (900k). The entire animation sequence is broken down into individual steps over 10 slides.
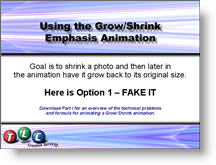
And there is a forthcoming part three, which is another technique for making an image grow, without resolution loss.
– Troy @ TLC
Xcelsius PowerPoint Ready Samples
PPT MVP, Glenna Shaw, has added some new Xcelsius samples and downloadable “templates” for all to use in their presentations. Even more fun, is that all of the samples are working on her site as web-page items. Play with them and download from here.
If you are unfamiliar with Xcelsius, have some good MS Excel skills, and want to really make charts and graphs POP in a presentation, this is an incredible application to use. Click here to visit the Xcelsius website.
Troy @ TLC
Steve Jobs 1984 Presentation
I prepare lots of presentations for company executives, for lots of big events. The presentations are like mini-Hollywood productions: animations, photography, precise timing to coordinate with the speakers script, wide-screens, multiple screens (up to 160′ of screen!), etc.
But take a journey back in time and it is almost amazing to me what was high-tech and “unbelievable.” Click here to view Steve Jobs original keynote speach unvieling the Macintosh computer.

Note: the computer display during the presentation is not connected to anything but shot with a camera that is projected.
– Troy @ TLC
Perspector 3 adds 3D Shapes to PowerPoint

Yesterday I downloaded and installed the latest version of Perspector – version 3, which was released earlier this week. The update (from version 2) went smooth and in experimenting it is easy to see that it now has even even larger library of 3D elements and some really impressive charts. Check out all of the details at the Perspector website!
Glen Miller, has some great tutorials and samples using Perspector. Click here to see some real world samples of Perspector in use.
~ Troy @ TLC
Office 2007 – Beta 2
Yesterday was the official release of Office 2007 Beta 2. Anyone is free to download (for free) and see what all the news is about. Of course being a beta, not everything is working 100%, but the new User Interface has to be experienced as words cannot explain it sufficiently. Even more impressive is seeing the new charts and tables engine in action!
The download is 550MB, so have a fast connection. Click here to go to Microsofts Beta download site (wait for the flash animation to finish and click the “Try Now” button).
– Troy @ TLC
Enlarge an Image (Part 1)
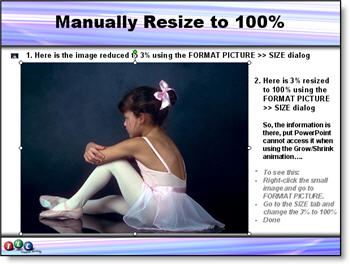
There are some great animation effects that can be achieved using the “Emphasis” animations. One of the more frustrating is the Grow/Shrink emphasis. I have a developed a two part tutorial to go into details on how best to use this animation effect. Download Part I here (1 MB PPT file).
Troy @ TLC
PhotoShop’s Trim Feature
When creating presentations I spend a lot of time in PhotoShop. And a lot of that time is spent creating images with no background around the object so it can float anywhere on the PowerPoint slide. The TRIM feature in PhotoShop is invaluable – yet few designers have heard of it!
(1) So you have an image like this.

(2) You spend time in PhotoShop “cutting out” the image so it sits on a transparent background.

(3) Now you are going to save it as a .png with transparency. But any space around the image is only going to make for a larger file size (it is transparent space, so you don’t need it, or want it). Enter the TRIM tool.
In Photoshop go to IMAGE >> TRIM.
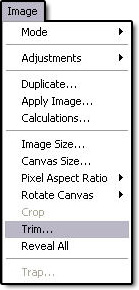
(4) Make sure the settings are like these.
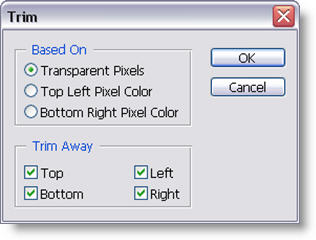
(5) PhotoShop will crop the image down to the exact pixel dimensions of the image!

Now when you save the image as a .png with transparency you are assured of only saving the necessary file size!
Troy @ TLC