
Bitmap and Vector Graphics
My friend, and fellow PowerPoint MVP, Geetesh over at Indezine just added a very good article on his website on what bitmap and vector graphics are. It is a very quick read and provides a good understanding of how these two formats vary, which is important when resizing images in a presentation. Click here to read it.
-Troy @ TLC
“Click and Type” – Office 2007
I have one project in that involves tons of typesetting. The fine tuning of sentences that I much prefer to do in a desktop publishing application, or even MS Word; PowerPoint just does not have the tools to make this tedious task from being painful.
BUT, Jensen Harris just yesterday made note of one tool being ported over to PowerPoint that will make these tasks a bit easier! The “Click and Type” tool found in MS Word will now be in all Office apps – and the at is good news! Check out the details at Jensen’s blog here.
-Troy @ TLC
Animation Sample (Airport Security Analogy)
Here is a presentation that is a series of animated slides from a project where the speaker needed to explain the company’s medical process to a non-medical audience. We decided on developing an analogy of the various industry processes with something everyone is familiar with – airport security.
As is typical for many of the presentations I work on, it is primarily 90% custom PhotoShop elements animated in PowerPoint. Download the presentation for review and inspiration. I have left it as an editable presentation for those that want to look at the animation timeline and techniques can do so. Click here to download (4.5 MB ).
Troy @ TLC
Minimum Laptop Specs – My opinion
Earlier in the week I posted a reply on the PPT Newsgroup (A resource everyone using PowerPoint should take advantage of) on a fairly common question – “What should I buy for PowerPoint Presentations?” Of course my answer is ‘the biggest, fastest and most powerful’ but I realise that is not the most budget appropriate answer… So here is my recommendation on the minimum specs for a new computer:
- A lot really depends on your PowerPoint use, if using animation and video playback, and if you will be running more than one application at a time. Here would be my minimum requirements for a laptop today:
- – Intel DuoCore, P4 or Centrino CPU (eg. not a celeron), I do not use AMD but the equivalents.
- – 1 GB of RAM
- – 64 MB of Video RAM (and that is the minimum, with 128-256 MB being highly preferable)
- – On video ram there is a big difference in shared vs. dedicated memory. For PowerPoint to playback animation, flash files, movies and even audio the computer really needs to have dedicated memory (this allows the use of the ‘Hardware Acceleration’ feature). It should be by ATI or Nvidia.
- – Everything else is just a matter of what is offered. I prefer a wide screen for a laptop. Having a physical on/off switch for the wireless is
desirable and you cannot have enough USB ports.
Hope that is helpful.
– Troy @ TLC
Make Your Own Custom Bullet Collection
Perhaps you have some custom picture bullets that you use ongoing. Never fear, there is a fairly easy way to organize your own collection.
(1) Either create your own folder to contain the bullet images or use the Office default folder (see item #1 on 5-8-06 post).
(2) Copy picture bullet images into folder
(3) Open the Clip Organizer (see item 3 on the 5-6-06 post) and go to FILE >> NEW COLLECTION.
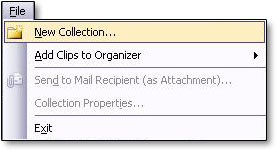
(4) Name the collection and click okay.
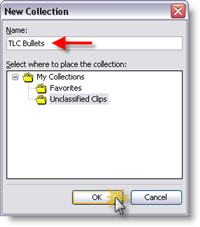
(5) Select the new collection in the COLLECTION LIST column. Go to FILE >> CLIPS TO ORGANIZER >> ON MY OWN.
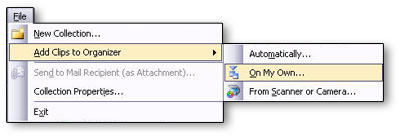
(6) Repeat for all images in your personalized collection. Note: You can use the >> CLIPS TO ORGANIZER >> AUTOMATICALLY to search the computer, then select the specific folder to add all new images at one time.
(7) Now when you add Custom Picture Bullets to any presentation, your collection of bullets is available!
-Troy @ TLC
Remove Default Picture Bullets
So, maybe like me you find some of the default picture bullets one you will not use… So here is where to go and find the hidden files to remove them.
(1) The first step is to open Windows Explorer and navigate to the folder that contains the images. Go to C: >> PROGRAM FILES >> MICROSOFT 2003 (or current installed version) >> MEDIA >> OFFICE 11 >> BULLETS (I said the files were hidden).
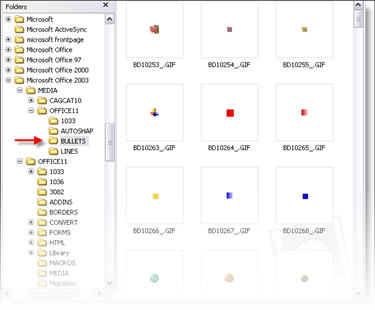
(2) Now we need to go to the Clip Art Organizer (see May 6 post). In the Clip Organizer go to OFFICE COLLECTIONS >> WEB ELEMENTS >> BULLETS. You will note that any of the default bullets you deleted in step #1 has the yellow, no link, “x”.
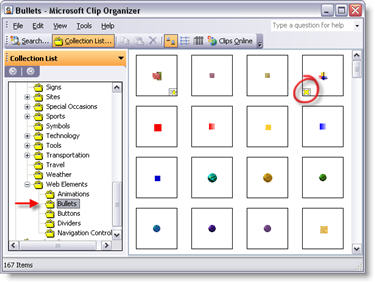
(3) You can remove the non-linked icons as described in the May 6 post.
– Troy @ TLC
Removing Unused Custom Bullet Icons
For virtually every PowerPoint template I design, it includes a custom set of picture bullets. Up until recently I was frustrated with having the old icons still sitting in the Custom Picture Bullets dialog when they no longer existed on my computer. But there is a solution – although it is a bit hidden. Here is how to clean up your PICTURE BULLETS dialog and remove the old and unused!!!
(1) Let’s review how we insert a custom picture bullet. With bulleted text selected, go to FORMAT >> BULLETS AND NUMBERING. On the BULLETED tab click the PICTURE button.
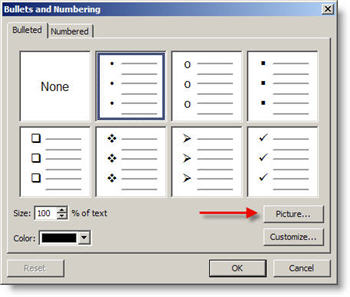
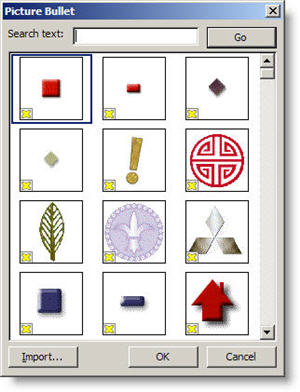
(2) Here you can see a small portion of the custom bullets that were used for previous presentations. The problem is, the source files for these are in the archives, not on the computer. They are completely useless here. Of course the little yellow X seems to be a way to delete them… but it is not. The yellow X tells you there is no item linked to this icon (which is why we want to delete it 🙂 )
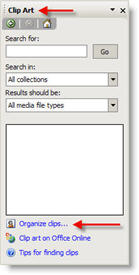
(3) To remove these icons go to the Clip Art task pane; INSERT >> PICTURE >> CLIP ART. Click the ORGANIZE CLIPS link at the bottom.
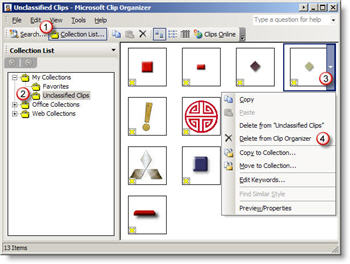
(4) Inside the Microsoft Clip Organizer you need to:
1. Click COLLECTION LIST to view the pane
2. Open MY COLLECTIONS and UNCLASSIFIED CLIPS
3. Click on the unwanted icon
4. Select DELETE from the menu
5. Done! (repeat for as many as needed)
– Troy @ TLC