
Add Custom Bullets to a Presentation
Now that we have developed our custom picture bullet in PhotoShop, we can insert them into a PowerPoint presentation. The process is fairly simple (Note: I am using PowerPoint 2003 for this tutorial).
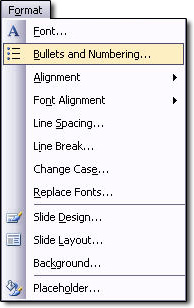
(1) Select the bulleted text. Go to FORMAT >> BULLETS AND NUMBERING.
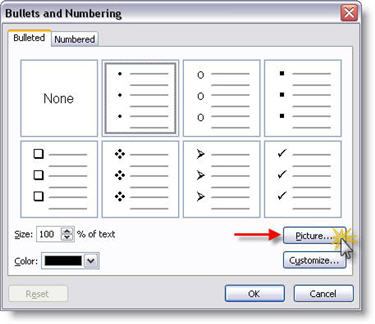
(2) From the BULLETS AND NUMBERING dialog click PICTURE.
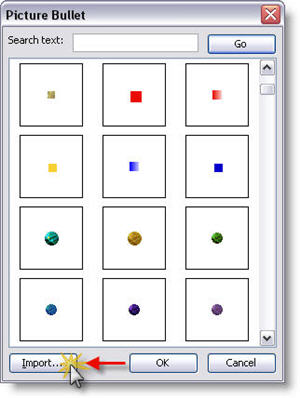
(3) From the PICTURE BULLET dialog click IMPORT.
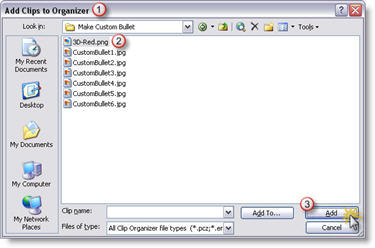
(4) Note the next dialog box is the ADD CLIPS TO ORGANIZOR dialog (import later in this series). From here find the .png image created and click ADD.
(5) Find the newly added picture bullet in the PICTURE BULLET dialog and click OK.
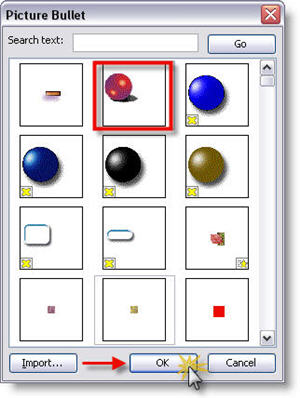
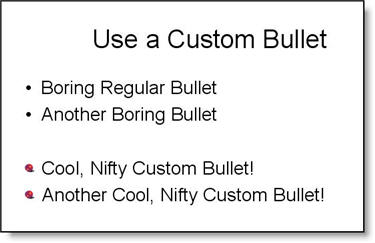
(6) Your selected bulleted text now has a COOL and NIFTY custom bullet!
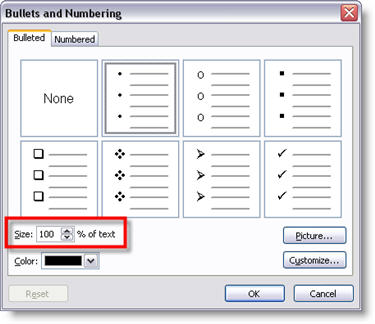
(7) If the bullet is to large or small, select the bulleted text, go to FORMAT >> BULLETS AND NUMBERING, and use the SIZE % OF TEXT to adjust.
– Troy @ TLC
Create a Custom PowerPoint Bullet
This is the first in at least a 4 part mini-series. Custom picture bullets were introduced with PowerPoint XP and they make a great addition to any presentation! I use custom picture bullets in many ways, always with the idea of how can they coordinate with the overall presentation. My custom bullets have ranged from simple color coordinated stylized shapes, to miniatures of the company logo, to small object icons that relate to the subject.
The first step is developing the artwork for the custom bullet. Note: I am using PhotoShop CS for this tutorial, but the process can be applied to virtually any image editing application.
(1) Create a new document. Note the file size is very small and we ALWAYS use RGB for PowerPoint images.
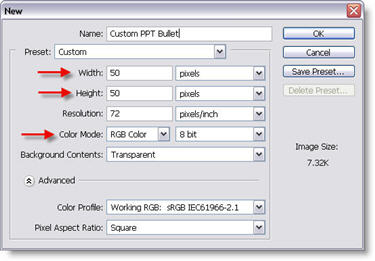
(2) Create your bullet artwork, sized to stay within the 50x50px area. I am creating a simple 3D sphere with a drop shadow.
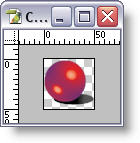
(3) Go to IMAGE >> CANVAS SIZE. Here we are going to increase the canvas size so the final image will have our bullet artwork horizontally on the far left and centered vertically.
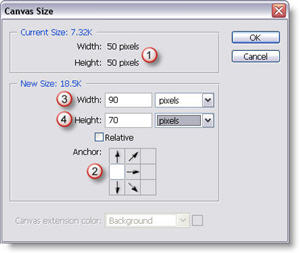
1. This is our original file size
2. Use this setting to force the new canvas area to keep the artwork on the far left, but allow it to be vertically centered.
3. Increase the width to 90px, this will provide a space between our bullet and the PowerPoint text.
4. Increase the height to 70px, this will vertically center our bullet on the PowerPoint text.
(4) The final step is to save the image as a .png with transparency (see “The Power of Ping” tutorial here for details).
– Troy @ TLC
Another Presenter’s University Article
Betsy Weber from Techsmith has a new article on Presenter’s University, Screencasting Tips for Beginners. If you use Camtasia it is definitely worth checking out for the ton of good tips. I was fortunate enough to be asked to be one of the contributors on the article. You can read it by clicking here.
Troy @ TLC
New Article (Projectors and PowerPoint)
Presenter’s University just posted my latest article. This article is a look into the technical apsects of the Display Control Settings to send the proper signal to a projector (or secondary display). Hopefully many people will find the information clear, consise, and helpful!

Click here to read it.
-Troy @ TLC
Display Standards Chart
While researching an upcoming article I found this incredibly detailed illustration of the various display standards out there. Understanding the various display sizes is important when designing a presentation that will viewed on a non-standard aspect ratio (eg. wide screen).
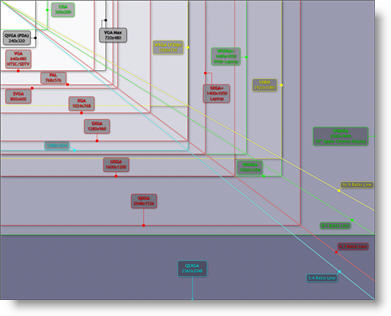
This chart comes from the Wikipedia section of Answers.com when searching “Display Resolution.” Click here to view a full resolution version (2560x2048px).
Troy @ TLC
Adding Sounds To Interactive Elements
It is the fine details that make a project perfect. On a current project with lots of interactivity, includes mouse over / roll over sounds. Of course what is a good mouse over sound is somewhat subjective. To make communication easy I quickly created this mini-application that allowed the client to preview a selection of sounds, with the selected being added to the presentation. Click here to open, or download (500k).
Troy @ TLC
Circle and Triangle Shadow Boxes
The Shadow Box concept is not constrained to rectangles. I use variations of Shadow Boxes in every conceivable way, always with the goal of adding depth and visual dynamics to the slides. Here are two samples I created that use a circle and triangle.

Here I duplicated the circle, removed the outline/stroke and went into the Fill Effects exactly the same as described in the previous post. But here I am using a color for the center and I manually distorted the circle to give it the cast shadow effect.
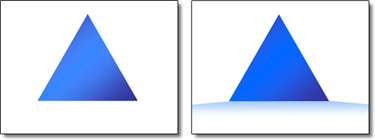
Here I duplicated the Pyramid, removed the outline/stroke and went into the fill effects. The difference is that I set the Shading Styles to be Horizontal so the gradient went from the top of the image to nothing at the bottom. I then really distorted the autoshape (extending it far beyond the boundary of the viewable slide) and positioned to create the drop shadow effect.
Troy @ TLC