
Create Shadow Boxes
A simple shadow element can add depth and eliminate some of the flat look and feel of a slide. In the last post I added a simple shadow box to a list box and a chart, here is how to create the shadow box – using PowerPoint autoshapes.
First create a rectangle. Set the fill to black and no outline/stroke.

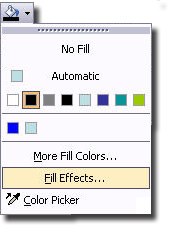
With the rectangle selected go to the Fill Effects.
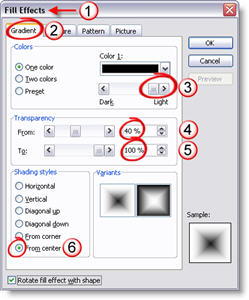
(1) In the Fill Effects window
(2) Go to the Gradient tab
(3) Move the slider all the way to the right/lighter
(4) Adjust the From opacity to 40%
(5) The To opacity should be at 100% (set when we moved the slider in #3)
(6) In the Shading Styles select From Center
Your rectangle will now look like this:

The best thing about this rectangle is that it is a native PowerPoint autoshape. It can be adjusted as large or small as needed without any distortion or loss of quality. In addition you can go back into the Fill Effects and change the color and the inner opacity to best suite your slide!
Troy @ TLC
Visual Appeal to “Standard” Elements
If you look at these two examples, there is only one difference between the “before and after” elements; the addition of a shadow box to add depth.
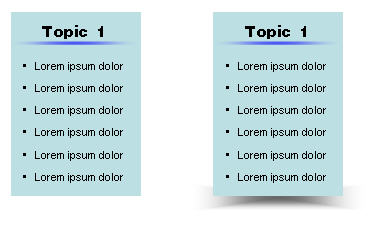
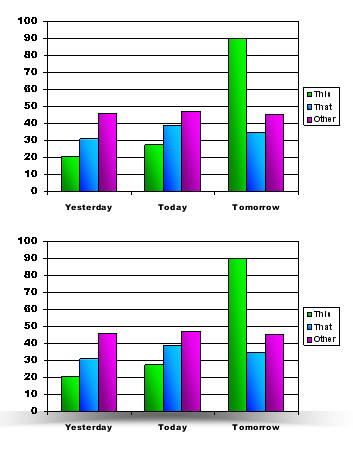
The wonderful thing about both of these is the shadow box element was created using native PowerPoint autoshapes. So in just a few clicks elements in your presentation can get a little extra pizzaz!
(Up next, how to create shadow boxes)
Troy @ TLC
Acura Show and Versatubes
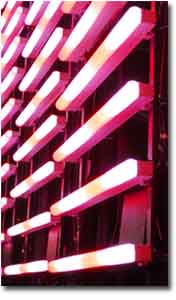
Just wrapped up work at the New York Auto Show (weather was perfect!). Here is the staging for the Acura meeting. The large screen in the center is a traditional (high-definition) rear-projection screen. All of the bars on the sides are called Versatubes.
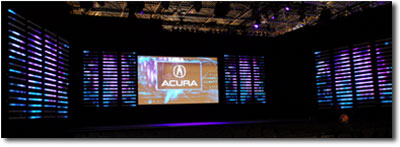
1 computer for center screen graphics. 1 computer for LED Versatubes on the immediate left/right of center screen. 1 computer for LED Versatubes on the left/right sidewalls. The versatubes are literally a grid of “light bars” that interpret the video signal and display the PowerPoint slide across them. Think of pointillism(eg. seraut)when looked at up close is just a bunch of dots, but from a distance it is a picture; same idea with versatubes.
Making Movies SMALL and making them WORK
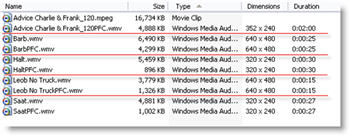
So the best way to assure (as much as possible) that linked movies play is to create them using a standard Windows Codec and use the most native Windows format (.wmv). The easiest way to accomplish this, reduce the file size and maintain quality is to have the PFCMedia add-in handle inserting and converting the movie.
One of the surprises is how well it optimizes the video files. Take a look at these before and after file sizes. The .mpeg1 files were supplied by client and the **PFC.wmv files created with PFCMedia, almost a 50% file size reduction and no noticeable quality loss during playback!
Troy @ TLC
Computer Cables Gone Wild
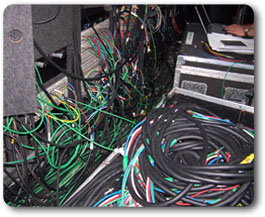
I am spending the week at the New York Auto Show working on press event presentations for both Honda and Acura. Tons of very cool presentation technology in action, but it just dawned on me how big of a mess I’ve created over the past two days.
Here is what happens when you have no room to work and you setup eight computers, power for stage lighting, controls for car turntables and I’m not sure what else is down there at this point…
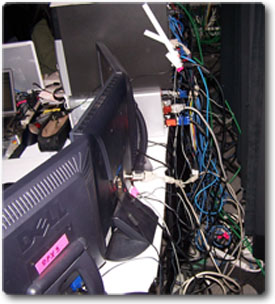
Of course it could always be worse. Here is the just one of the video production area cabling!
Troy @ TLC
How many people are suppose to be at this meeting…
Okay, for most this will not apply. But I am in meetings at convention centers and resorts every week. It is always a bad day when someone miscalculated and to many people are squished into to small of meeting room. Here is an interesting online calculator that estimates how big a room should be reserved based on the seating type, and type of table used, and number of people attending. Check it out here.
-Troy @ TLC
Is it a Good Seat? Find Out on SeatGuru.com
I travel to a different show virtually every week, so I am constantly on airplanes (this week L.A., next week New York for the NY Auto Show). Of course with a cross country flight I want to make sure I have a good seat, preferably with a power port.
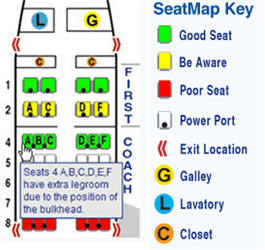
You may have noticed that some seats seem better than others – I have. After booking my flight, my first stop is SeatGuru.com. With your airline and flight info, look up the seating chart for that airplane, make sure you do not have a ‘yellow’ seat, check if it has a powerport and make sure you have the best seat in your category!
– Troy @ TLC