powerpoint

Baseline Shift/Offset Any Text, Any Amount

If you need a custom super-script registration mark, or special text layout, using the OFFSET option can be the solution. Select text to adjust, open font dialog, and customize the Offset box.

Here is the standard super-scripted registration mark and a customized registration:

Another use of the text offset can be custom layouts such as this:

Note: I am not saying this is a good layout idea, just that it is possible all within one text box.

– Troy @ TLC

By |2016-08-16T10:32:10-07:00January 25th, 2011|Personal, Tutorial|

Baseline Shift = “Offset”

When a super-script or sub-script is applied, there is actually an automated adjustment to PowerPoint’s OFFSET function. To access, highlight text and click the arrow on the bottom right of the FONT group to launch the FONT DIALOG BOX.

Super-script text is a 30% baseline shift/offset and sub-script text is a -30% baseline shift/offset.

– Troy @ TLC

By |2016-08-16T10:32:59-07:00January 21st, 2011|Personal, Tutorial|

What is Baseline Shift?

Baseline shift = “To move a selected character up or down relative to the baseline/level of the surrounding text.

Baseline shift is an essential typography fine tuning function. The most common use of it in PowerPoint is when a super-script or sub-script is applied to text. For example, here is my sample text:

After applying the super-script function, the number 1 is raised up higher than the text next to it – the baseline has been shifted.

– Troy @ TLC

By |2016-08-16T10:36:01-07:00January 19th, 2011|Personal, Tutorial|

Collapse the Ribbon

Sometimes having a bigger work area makes designing slides easier. A larger monitor or higher resolution monitor is an option, or just temporarily removing the ribbon is an easier option.

Standard ribbon (taking up screen realestate)

Collapsed ribbon (with more screen realestate for the design work)

– Troy @ TLC

By |2016-08-16T10:36:28-07:00January 16th, 2011|Personal, Tutorial|

Using BackGround Removal and Blur Tools (by Ric Bretschneider)

PowerPoint MVP Ric Bretschneider added a great tutorial to his personal blog this week called “The PowerPoint Blur Trick”.

The image effects are done by combining the Background removal tool, duplicate images, and the Blur tool – all really good ways to achieve ‘Photoshop’ images direct in PowerPoint.

Check out the full tutorial here.

– Troy @ TLC

By |2016-08-16T10:39:09-07:00January 13th, 2011|Tutorial|

Animation Using Super Wide Panoramic Photo

Using the panoramic image from the previous post, here is a sample animation. Actually the audience sees a continuous animation, but from the designer view is a series of slides that use Slide Transitions for the animation effect.

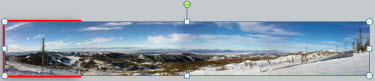
1. Insert panoramic image (it is almost 5Xs the width of a slide)

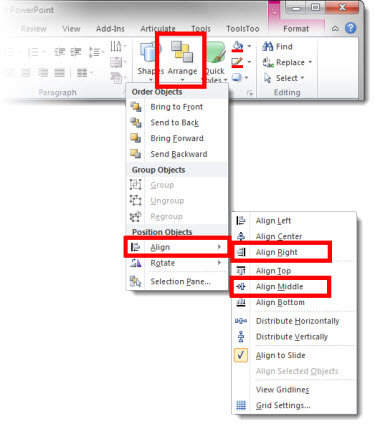
2. Position it by using the Align tools. (1) Align left. (2) Align Middle.

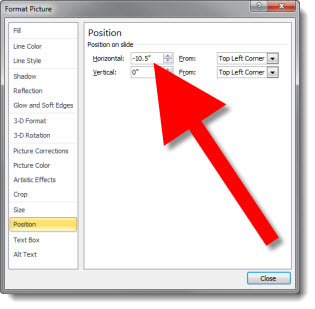
3.Duplicate the slide. Right-click the image >> Format Picture >> Position (left pane) >> set Horizontal to -10.5″ (right pane)

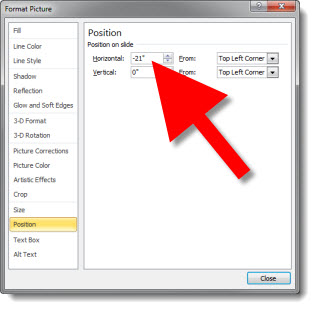
4. Duplicate the slide and repeat process to set horizontal another 10.5″ to the left (-21″)

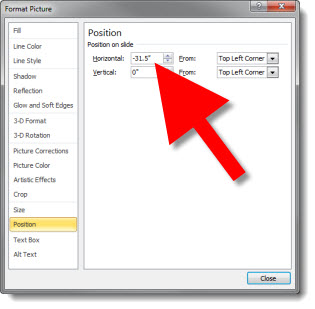
5. Duplicate the slide and repeat process to set horizontal another 10.5″ to the left (-31.5″)

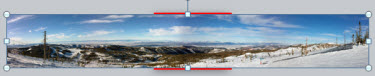
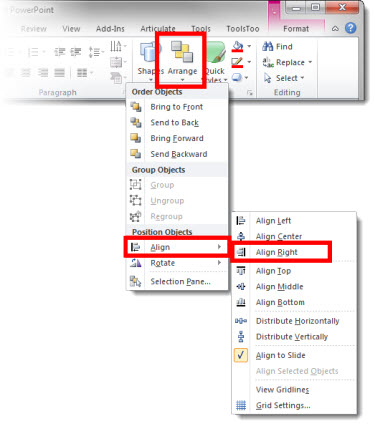
6. Because the image is not exactly another 10.5″ wide, go to HOME tab >> ARANGE >> ALIGN >> ALIGN RIGHT

7. Select all 5 slides and set the slide transition to WIPE

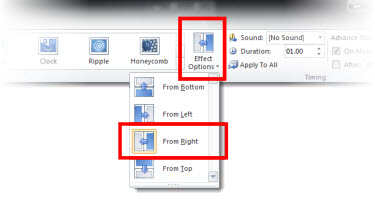
8. With all 5 slides still selected adjust the slide transition – TRANSITIONS tab >> EFFECT OPTIONS >> FROM RIGHT, so the slide transitions visually act as the on-click animations.

The result is a slide show that lets you pan through image from left to right. Download this presntation here.

– Troy @ TLC

By |2016-08-16T10:39:33-07:00January 11th, 2011|Personal, Tutorial|

Flow Diagram – Before & After Slide #22

These slides come from a recent project. The original had a Visio (?) flow diagram. Aside from being an uneditable .jpg image, it was full of colors that were inconsistent with the rest of the deck and could use a bit of professional polish.

The recreated diagram used a subtler color scheme, separate elements to show the sections, and everything recreated in PPT to allow animations and section-by-section edits as needed.

– Troy @ TLC

By |2016-08-16T10:45:28-07:00November 24th, 2010|Portfolio|

Recolor .png Images in PPT

I am continously reflecting on how much more I can do inside PPT 2010 vs. going out to an external application such as Photoshop when developing slides. Here is an example from a recent project that was done in PPT in a matter of seconds vs. opening image in Photoshop, adjusting, saving, importing new version of image.

Here is my highly stylized trend line (used on a slide to show the economy is making progress, without showing any detailed numbers or facts). It is a .png image I prepared in Photoshop and inserted into the presentation.

Here is the same image, now full screen and on the presentation template backgound – it does not have enough contrast against the background.

By selecting the image and then going to FORMAT >> CORRECTIONS I used the presets (all based on the template color scheme) to recolor the trendline image to a color with more contrast.

Done. Move on to next slide.

– Troy @ TLC

By |2016-08-16T10:51:13-07:00November 3rd, 2010|Tutorial|

Movie Length When Trimming

PPT 2010 has added lots of very good video editing tools. In working on a recent project with many videos I happily made use of the Trim feature to set custom start/stop times. But after using a calculator to figure the new section duration (for over an hour), I discovered a new function!

Here is my sample video freshly inserted. The End Time shows the duration of the whole video.

Here is the sample video with custom start and stop times setup. Note the upper right corner where PPT is smart enough to automatically calculate and display the new duration of the video (yeah!)

– Troy @ TLC

By |2016-08-16T11:03:11-07:00September 28th, 2010|Tutorial|

Automatically Insert ‘Real’ Lorem Ipsum Text

And there is more!!

In the previous posts we used the secret coding that has been in PowerPoint since at least PPT 2003. With Office 2007, Word got an update to the coding – but not PowerPoint. But in PPT 2010 the update is included! That is to change the typed code to “=lorem()” and get a real “Lorem ipsum dolor sit amet…” text.

Here is my sample slide again, but now the “rand” is replaced with “lorem”.

Click the enter key and I get 3 paragraphs of real lorem ipsum text (note each paragraph is unique text):

But the ability to customize the number of paragraphs and lines per paragraph detailed in the previous post is not available using the ‘lorem’ option… Maybe in the next version.

– Troy @ TLC

By |2016-08-16T11:04:52-07:00September 20th, 2010|Tutorial|
Go to Top