Our design team recently noted a problem with a template project we were developing. Having a problem with PowerPoint is unfortunately part of the design process, it is part of “working within the limitations of PowerPoint.” But this problem was not making sense. After lots of internal troubleshooting, I started an email conversation with Microsoft Dev and Product Managers about it. This led to discovering something new. Unfortunately, the discovery did not fix the problem, and it led to discovering what Microsoft shows as working, does not – ugh!

So, here’s the deal, PowerPoint is really, really bad at helping users with font management. One glimmer of positive news is Microsoft’s investment in Cloud Fonts. These are fonts that Microsoft owns (or owns usage rights to), that Microsoft applications recognize, and if a font is not installed on your computer, it is automatically downloaded, installed and the document updates to display the correct font. We call these “Microsoft Safe Fonts” and encourage clients to stay within this set of fonts so everyone knows everyone will see the same thing.
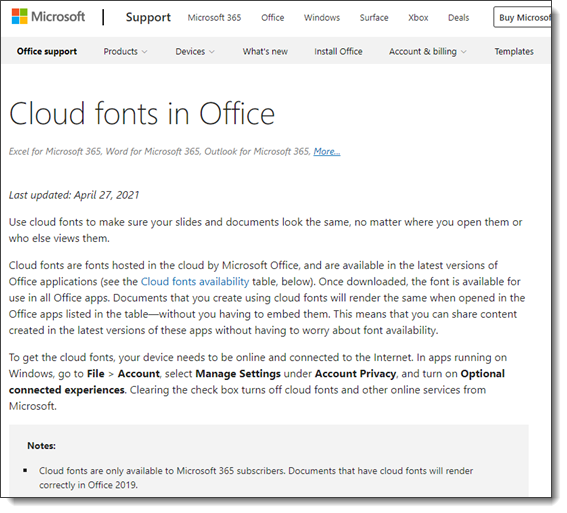
I am going to avoid going into all the ways MS Office fails to manage, help or inform users if a non-standard font is not available when a presentation is opened – or this will become a very long, very negative rant. I am going to stick to Microsoft Cloud Fonts, because these are the good thing, but also the bad. Microsoft has a webpage, Clouds Fonts in Office, with information about what Cloud Fonts are and a list of every cloud font available (go to the page here). It is also fairly up to date showing as of this post, it was last revised just a few months ago on April 27, 2021.
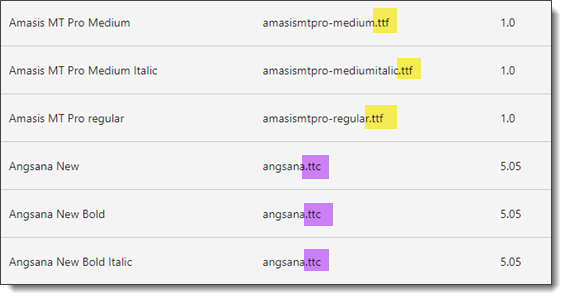
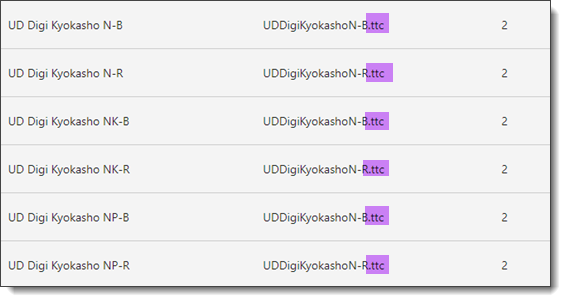
Expand the “Cloud Fonts List” and it is (now) important to note there are two file formats for the fonts. They are either .TTF or .TTC. On the technical side, .TTF is “true type font” which is a mainstay in the font file format options. .TTC is “True Type Collection” and less used. But it should be used more because it is on the technology side of things, a great option. The “collection” part of the True Type Collection format means it can have several variations of a font in a single file vs. needing to manage multiple files, one for each variation. On the image below, left is the font name, middle the file name with file type extension, and right is the version number of that file.
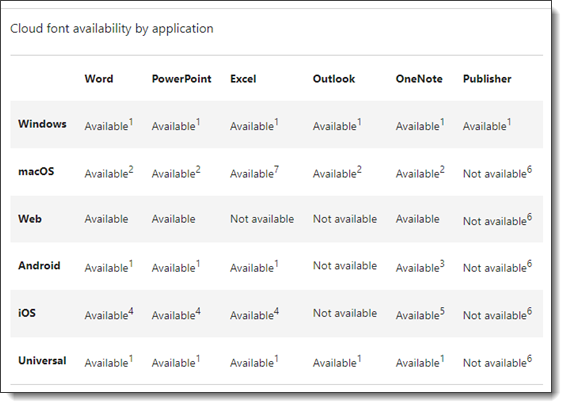
Expand the “Cloud Font Availability by Application” section and there is a nice, organized cross reference of what devices and versions of PowerPoint will work with what (note: it is wrong, we will get to that shortly).
For TLC Creative Services we have studied this information in detail, and I have had the opportunity to interact directly with the Microsoft developers asking clarifying questions. I feel I have a particularly good understanding of fonts on the technical side (hey, years of print design and production makes you obsess over fonts), and a very good understanding of how Microsoft applications, especially PowerPoint, are setup to work with fonts – including where they do not work (that list is much longer than what does work). So when one of our design team emails me saying there is a font display problem, I am prepared to address it and find a work around.
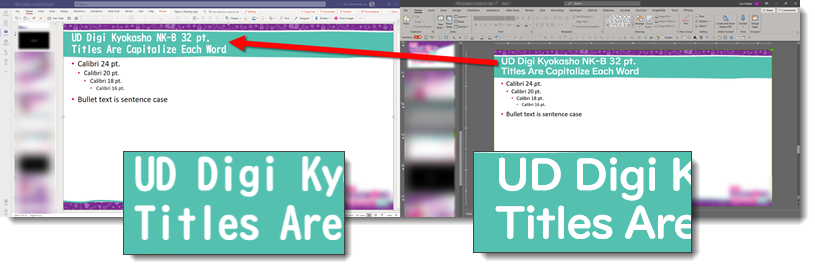
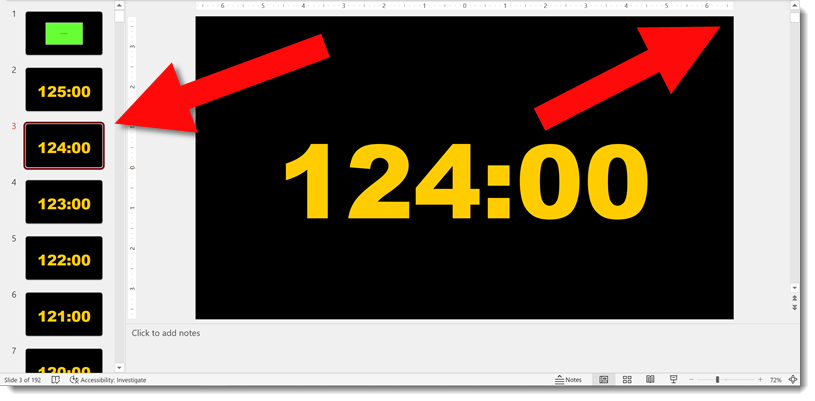
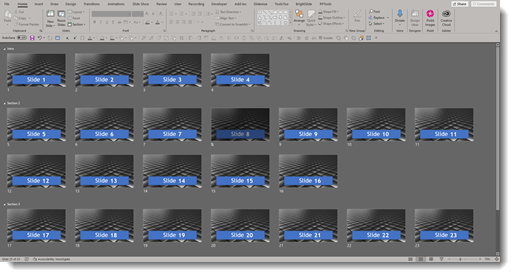
This is same PowerPoint template open in two different versions of PowerPoint. The slide title font is clearly not displaying the same. The immediate questions are; is this a custom font that is not installed on one device? Are we sure this is a Microsoft safe font (eg. font listed on the Microsoft Cloud Fonts in Office web page)? What are the devices? Are both connected to the internet (a cloud font cannot download and install if there is no internet available)? And many other questions to go down the list of potential problems.
This is the same presentation template file open on the same computer, each on a separate monitor, each in a different PowerPoint application. The left image is the file open in Microsoft Teams (aka PowerPoint for the Web). The right part of the image is the file open in the Windows Desktop version of PowerPoint. So, the availability of the cloud font is the same for both because they are the same file being viewed on the same computer – WHAT IS HAPPENING HERE $#@%!?
Here is where things went even further down, in regard to trust. We now know, because of this accidental discovery, there a HUGE MISSING COMMUNICATION piece from Microsoft. Before I rant any further, one of the internal Microsoft managers did promise that a fix for this is in process. No timeline given to this issue we have all been living with for the past 2-3 (?) years of using Microsoft Cloud Fonts, but I am hopeful this blog post will be outdated and just a timestamp of an old problem soon.
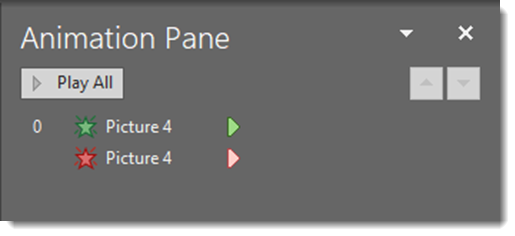
The .TTC file format for fonts is very cool. It allows a single file to hold all of variations of a font. As example, the font being used for slide title text is UD Digi Kyolasho. It has 6 styles, or variations, as it extended font family. With a .TTC, a single file is all that is needed, because it has all 6 variations within it.
Well, it turns out that the .TTC format is to cool for PowerPoint, specifically PowerPoint for the Web (without testing to confirm, I am expanding this to include PowerPoint for Android, IOS and any other version that is not a desktop version). PowerPoint for the Web is unfortunately not able to use those multiple versions of the font in the .TTC file. PowerPoint for the Web can only use the first version of the font family. We would all be okay with this limitation – if we knew about it. The cross reference compatibility chart above makes no mention of .TTC fonts not being supported by PowerPoint for the web and implies they are supported (big oops!).
From our template project, the UD Digi Kyolasho font is a Microsoft Cloud Font. Why the left image (PowerPoint through Microsoft Teams) displayed the N-B variation, which is the correct font family, but wrong version, and the right image (PowerPoint through Desktop PowerPoint) displayed the correct NK-B variation has been a painful journey. We had to explain to the client that the template design will not display the slide title text as expected when viewed in Microsoft Teams or anything other than the desktop PowerPoint app. This is a corporation that has adopted Microsoft Teams and file collaboration as a workflow (Microsoft should be ecstatic!). This is a large corporate client (I am guessing a Microsoft customer with 5000+ seats to Microsoft Office) that trusts us to provide guidance on how best to work with PowerPoint, and they are not excited about Microsoft right now…
I mentioned above that Microsoft said they have a fix in process. This is not a Microsoft only problem. PowerPoint for the Web and other web-based applications cannot fully use .TTC fonts. We can live with another limitation; I just wish Microsoft would have informed everyone of the limitation. The solution that is in process is converting all .TTC fonts to individual .TTF files. When rolled out, the above template will work on all PowerPoint end points, because there will be 6 separate font .TTF files, one for each variation of the UD Digi Kyolasho font. Until I see the font list updated to .TTF files, we are removing .TTC fonts from our “safe fonts” list… ugh!
Troy @ TLC


