Video Across Slides (Sort Of)
Unbeknownst to the world, Microsoft somehow enabled video to play across slides again! This is something I have been requesting since the release of PowerPoint 2010, when video-across-slides stopped working. But don’t get too excited, there are limitations in using it today.
First the technical note: I am using Office 365, PowerPoint 2016 on Windows 10. This is untested on legacy versions or the Mac version.
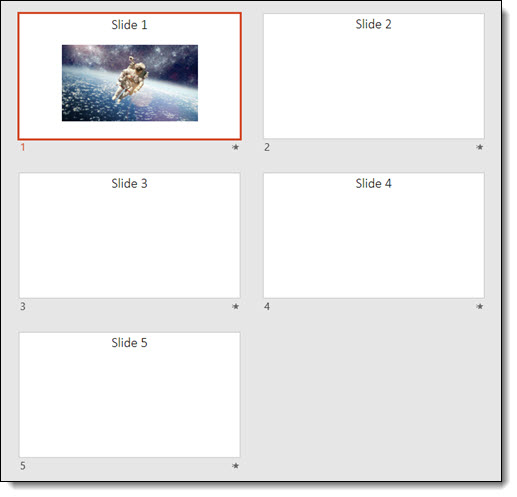
Here is my sample slide deck; 5 slides with a video on slide 1 and indicator text on balance of slides.
When things are setup correct, yes we can play video across slides (yay!) as this video of the sample slides in slideshow demonstrate:
Side note: the above video was a Camtasia screen recording, because I discovered that using the Export As Video option does not show the video across slides (which makes sense with the below explanation of why I believe this is working)
Backstory:
- Back in PowerPoint 2003, a video could be set to continue playing across slides and it would!
- The reason was more of a limitation of PowerPoint that users were able to exploit and make a good thing. Back in PowerPoint 2003 video was not embedded and ran as a separate video player layer on top of PowerPoint. The good news was PowerPoint could keep the external video player going across multiple slides. The bad news was among other things, no PowerPoint content could be on top of the video while it was playing, because it was on top of the slides when playing.
- Fast forward to PowerPoint 2010 and videos became embedded and content could be on top of videos! The downside was the embedded video removed the hand off to an external video player on top of the slides (but the improvements in reliable playback and styling effects were far superior options to have available!)
- Today, video across slides works again. Here is my theory:
- When the play across multiple slides option is selected for a video, the video uses a legacy video player and reverts back to the PowerPoint 2003 model of being a layer on top of PowerPoint. So yes, you can play a video across slides, but the video has a lot of styling limitations.
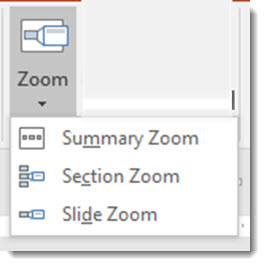
How to Set a Video to Play Across Slides:
- Add video to slide (can be an embedded video, no legacy settings needed)
- My example video was set to play the video automatically
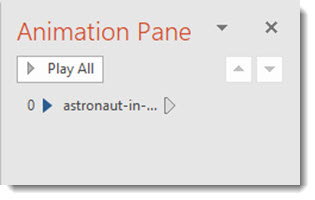
- Open the Animation Pane
- Right-click the video animation
- Select EFFECT OPTIONS
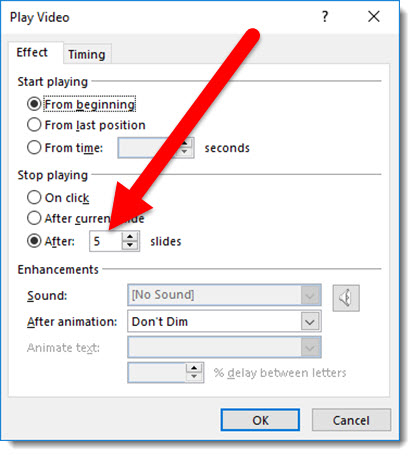
- Go to the EFFECT tab
- Look in the STOP PLAYING section
- Change the AFTER dialog to any number of slides needed (maximum 999 slides)
- Click OKAY
Limitations of Applying Styling Options to Videos That Use The Play Across Slides Option:
- Below video demonstrates things that do not work when play across slides is set; 3D perspective, distorted aspect ratio, reflection, and more
My Advice:
- Don’t count on this working in the future. It was broken for years and suddenly started working (thanks to Taylor Croonquist for mentioning it!). It could easily stop working with another update (and the ultimate update would be to enable video to play-across-slides AND maintain the embedded video player for z-order control and styling effects!!).
- But don’t hesitate to use it if needed. I was recently used a 60 second countdown video to play across a series of slides and all worked perfect (but the request was a circle shaped clock, which I could not do because of the above noted styling limitations). I tested on my show computers and was confident all would work for the meeting. If the same client asks for the same effect next year, I cannot promise it will work until we are close to the meeting date and I can test and confirm it is still a supported feature (eg. I am not sending out Sales Team decks using this feature, because it would be bad for things to stop working in the future).
Troy @ TLC