Oh the many ways to advance a slide
Everyone knows a few ways to advance to the next slide. Everyone seems to use different options (none are wrong). Here is a quick list of the 7 most common slide advance options.

– Troy @ TLC

Everyone knows a few ways to advance to the next slide. Everyone seems to use different options (none are wrong). Here is a quick list of the 7 most common slide advance options.
– Troy @ TLC
[text]Presentations are the creation of many people copy/pasting content into a single slide deck. One of the common content edits is double spaces in sentences. Here is a quick and easy method for removing them.[/text]
[text]1. On the Home ribbon, select “Replace” on the far right.[/text]

[text]2. Under “Find what:” Hit the space bar 2x. Then, under “Replace with:” Hit the space bar 1x. Click “Replace all.”[/text]
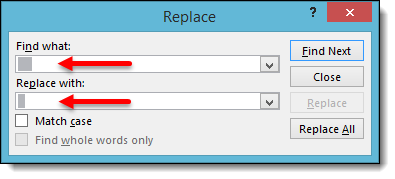
[text]3. PPT will find all instances of double spaces and replace with a single space with 1 click! It searches the Notes section as well as slides, but it’s certainly very helpful in catching the ones hiding in slide content.[/text]
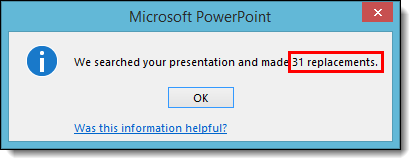
[text]4. If you wanted to see exactly where the erroneous double spaces are, you can opt to click “Find Next” and PPT will take you slide by slide highlighting where the spaces are. You can then choose which ones to change by clicking “Replace” rather than “Replace all.”[/text]
As everyone that has worked in PowerPoint knows, matching rotated items to the same angle can be a challenge. This is especially true when using the rotation handle (the click and drag method). To take the frustration out of this task, let us walk you through manually setting the angle and easily getting multiple items exactly aligned with the same rotation!
Here is our sample slide being created. It has a green rectangle (not a triangle, so we can know the exact angle), and a text box matched to the same rotation as the green rectangle.
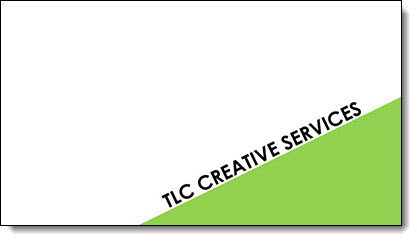
1. First add a rectangle.

2. Next, bring up the Format Options Dialogue Box either by going to Format tab on the tool bar or by right clicking the shape.
– Select SIZE AND POSITION from the right-click pop up menu.
– The Format Shape pane opens to Size and Properties tab.
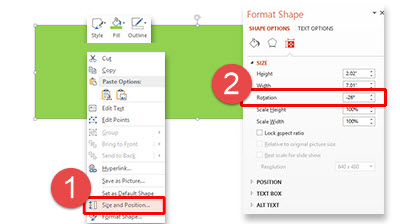
3. In the SIZE section is the ROTATION box.
4. Enter any angle needed (this has a live update, so you can see the angle applied to selected item). For this sample, we used -26 degrees.

5. Add a text box and type (we added TLC CREATIVE SERVICES).

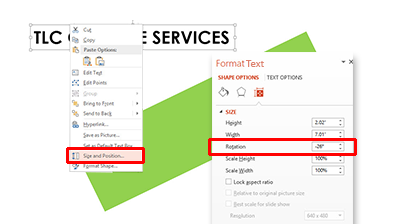
6. With the text selected, we followed the same steps above to rotate the text. Using the Format tab on the tool bar, or by right clicking the text, bring up the Format Options Dialogue Box.
– Select SIZE AND POSITION from the right-click pop up menu.
– In the ROTATION box, enter the angle as the rectangle (-26 degrees in our sample).
7. Position the angled text box above the rectangle.
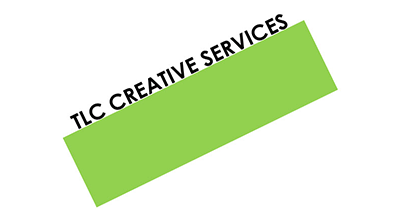
8. Select both the rectangle and text box and move to the lower right of the slide for a great visual layout using perfectly aligned and angled elements for your design!
– Troy @ TLC
As a continuation of the previous post, we are looking at some of the advanced image sizing and placement options for Image Fill Text. Thanks to TLC staff designer, Christie, for this step-by-step tutorial and examples.
We are working from the same sample text.

1. Select the text to add an image fill too.
2. Open the FORMAT SHAPE pane to the text options.
– How to…
3. Select TEXTURE OR PICTURE FILL.
4. Click FILE.
5. Select an image. For this example, I am using a nice flower image that has lots of vibrant colors.
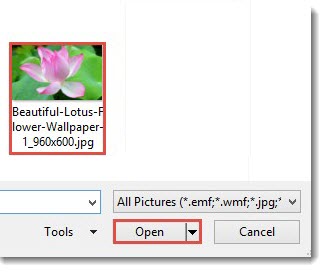
6. The auto fill position and size do not really do much for the overall visual.
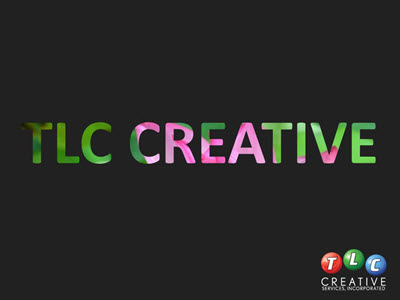
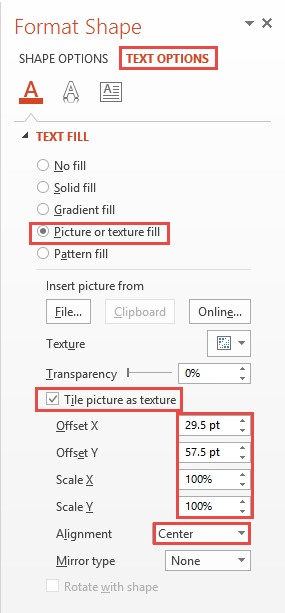
7. Select TILE PICTURE AS TEXTURE. This will allow access to additional formatting options.
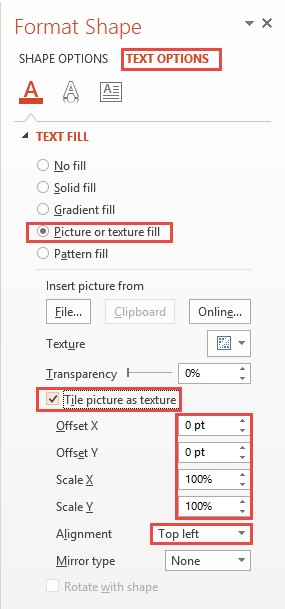
8. Adjust the OFFSET (X and Y), SCALE (X and Y) and ALIGNMENT options to size and position the image for the best visual.
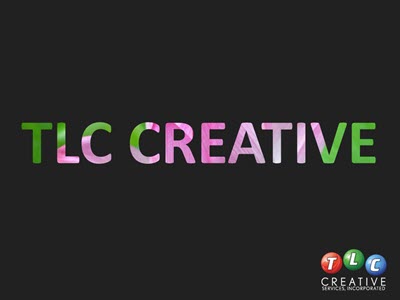
8. Now the image fill adds a lot of the pink tones and a bit of the green on the edges.
The previous post walked through how to “knock out” text from a shape. One negative to that technique is the text is no longer editable. In this post, we are adding a visual styling to text AND keeping it editable. All text can have a color fill, gradient fill, texture fill or PHOTO/IMAGE fill.
Here is my sample text slide, one a black background to help the fill options display.
1. Select the text to fill (*Tip: It does not have to be all of the text in a text box, select just the text you want – this can be a great solution for adding accent focus on specific text).
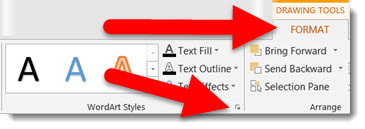
2. Go to FORMAT >> WORDART STYLES section >> FORMAT TEXT EFFECTS to open the FORMAT SHAPE pane to the text formatting tab.
3a. Select PICTURE OR TEXTURE FILL.
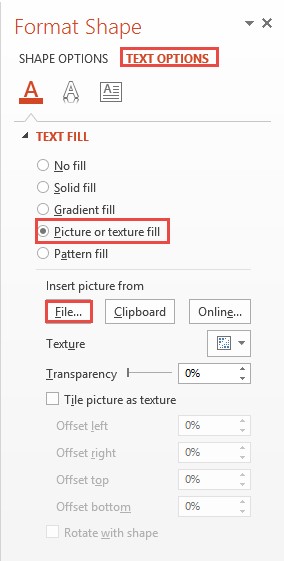
3b. This defaults to filling text with the first texture in the Microsoft library.

4. Click FILE.
5. Select an image to use as the fill – I am using an abstract image.
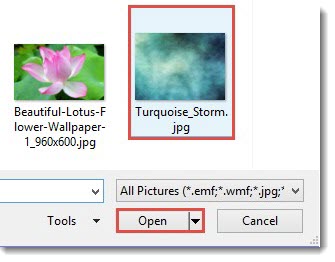
And here is the stylized text, which is editable (change the font, size, text, etc.) and can have any PowerPoint styling options applied (drop shadow, bevel, glow, etc.).

– Troy @ TLC
A very nice design strategy used in print design is creating callouts and bold graphics with text created from the negative space.
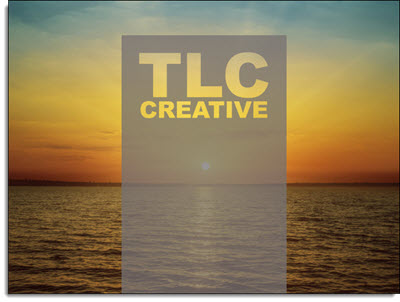
This same style is easily created within PowerPoint for slide design. The above example image was created in PowerPoint 2013 – here is how (thanks to Michelle on the TLC Creative design team for this tutorial).
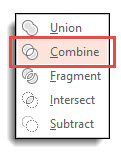
By using PowerPoint Combine Shapes tools (Combine, Intersect, Fragment, Subtract), the process is pretty easy.
1. Add a shape of your choice – I am using a tall vertical bar.
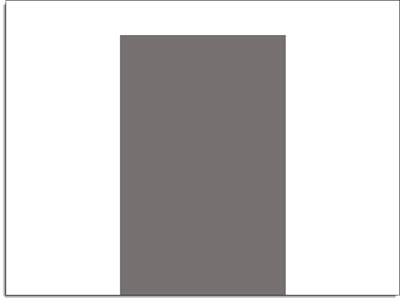
2. Add a separate text box with the text of your choice and format as desired – I am using “TLC Creative” in a typography styled stacked layout.
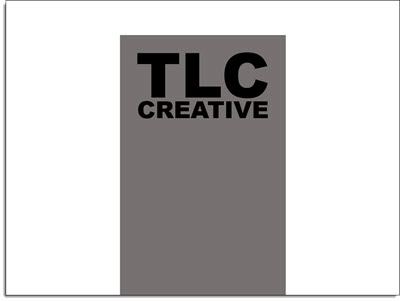
3. Select both objects – Note: Select the RECTANGLE first.
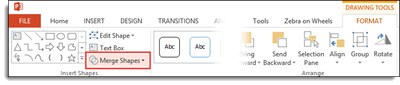
4. With both objects selected, go to FORMAT >> Merge Shapes >> Combine
5. The text is “cut out” of the rectangle. Note: The text is no longer editable as it has been converted to a custom vector shape.
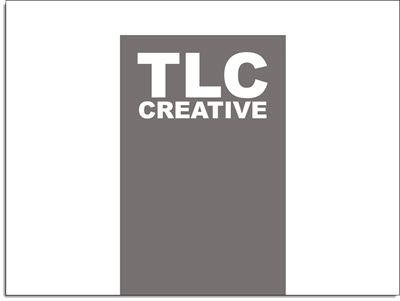
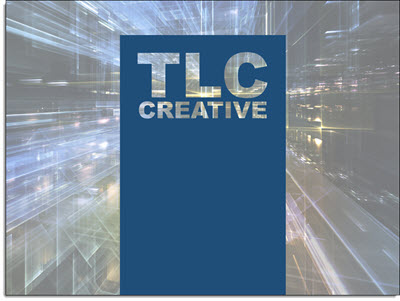
6. The shape is editable, like any other shape. All shaping styling options are available: fill color, gradient fill, transparency, bevel, drop shadow and more.
To really see the effects, place an image behind the new shape. A few examples:
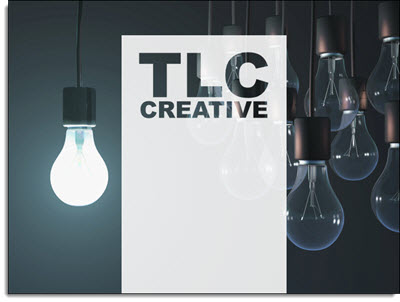
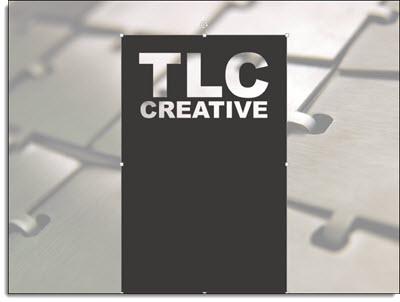
PowerPoint 2010 introduced the Merge Shapes toolset (trust me, it was hidden, but there). In PowerPoint 2013, the Merge Shapes toolset is much more accessible and refined. Here is an example we developed creating a much requested graphic element – puzzle pieces (download link below).
Here are the 4 puzzle pieces.
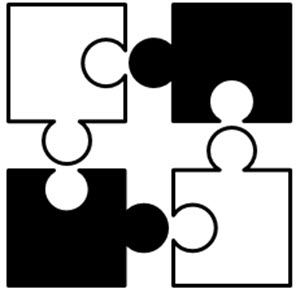
All are PowerPoint shapes
Here is a 4 step process to create your own:
1. Add 4 squares AND 4 small circles, so there are 8 shapes on the slide. COPY the 4 circles.
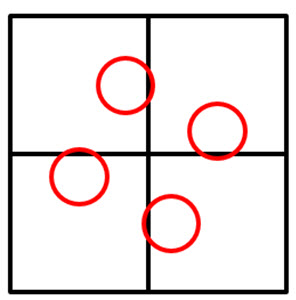
Select all shapes and subtract the circles from the squares to get these 4 shapes.
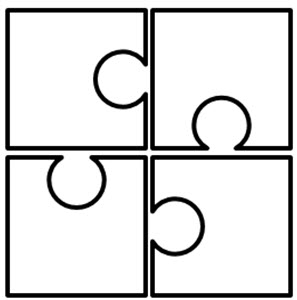
Paste in the 4 circles, so there are 8 shapes on the slide again.
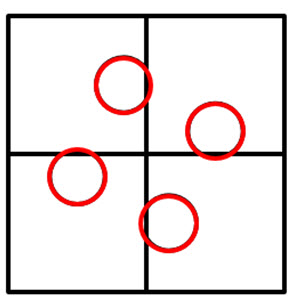
Select all 8 shapes and use the Merge Shapes tool to unite the circles to adjacent squares to create the 4 puzzle pieces.
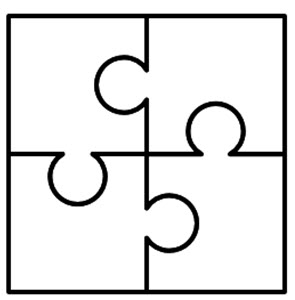
Each puzzle piece is a separate PowerPoint shape.
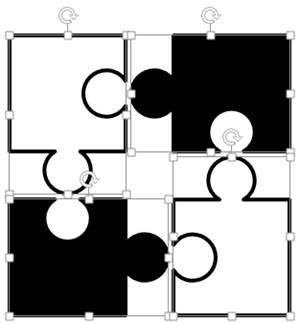
Each puzzle piece is a separate PowerPoint shape that can be resized, animated and recolored directly in PowerPoint.
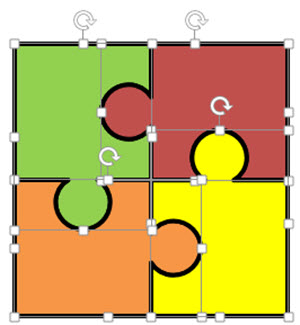
Download a slide with the 4 puzzle pieces: PowerPoint_Puzzle_Pieces
– Troy @ TLC
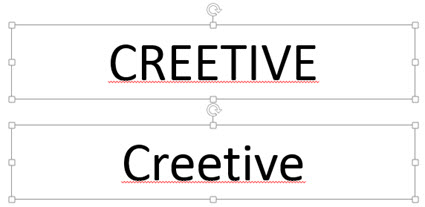
In PowerPoint 2013, the default settings can limit some of Microsoft’s helpful features. With the default settings if you type a word in lower case, spell check automatically lets us know if there is a typo. But if you type the same word in all caps, spell check is not used. Here is my example, which according to Microsoft Office only has 1 misspelled:
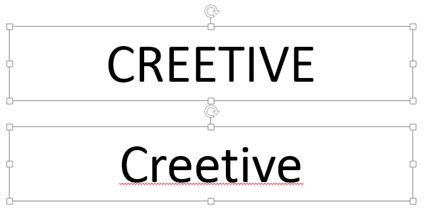
The setting to change is to go to FILE >> OPTIONS >> PROOFING tab
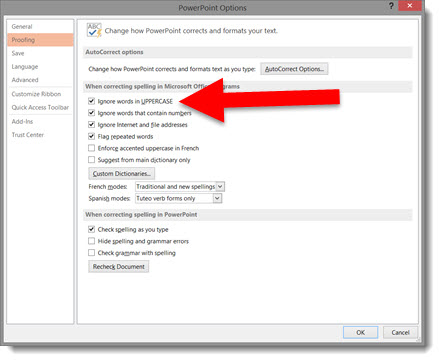
In the WHEN CORRECTING SPELLING IN MICROSOFT OFFICE PROGRAMS section, uncheck IGNORE WORDS IN UPPERCASE
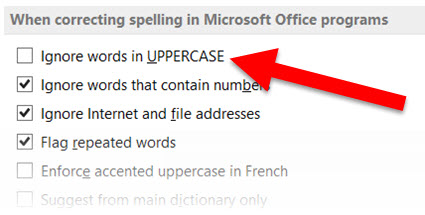
Now All Caps or Lower Case words are par of the spell check feature.
– Troy @ TLC
As another option to correcting images that have been stretched and distorted, the Reset Image options are available on the Ribbon. This is usually quicker way to accomplish the same thing detailed in last blog post.
Here is my stretched and distorted sample image.

To reset the image:
1. Select the image.
2. Go to the FORMAT tab, PICTURE STYLES section, and the RESET PICTURE drop down.

3. Click the triangle on the RESET PICTURE option.
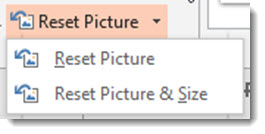
4. RESET PICTURE will remove any styling, such as drop shadow, bevel, border, etc.
5. RESET PICTURE & SIZE removes any styling and reverts the image to the inserted size.
Using RESET PICTURE & SIZE the stretched TLC logo is returned to its correct aspect ratio and is no longer distorted.

– Troy @ TLC
There has been an increase in requests for help with distorted images. I believe a big reason is the shift from 4×3 to 16×9, and images becoming stretched when the page setup is changed.
Here is the TLC image that has been inserted onto a 4×3 slide.

When I change the page setup from 4×3 to 16×9, images distort and the TLC logo looks like this:
Note: With PowerPoint 2013, there are some really great aspect ratio conversion options built in, and for PPT 2007/2010 users, there are some very helpful 3rd party add-ins that make the aspect ratio conversion much easier. All are created to help you from starting on the left and getting the image on the right:

To restore any inserted image to its original aspect ratio:
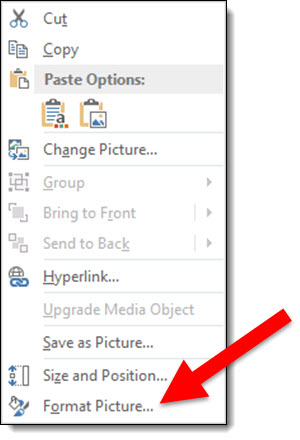
1. Right-click the image and select FORMAT PICTURE
2. From the Format Picture Dialog, go to the SIZE AND PROPERTIES tab
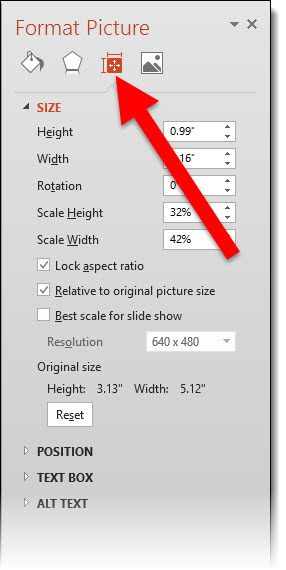
3. Click the RESET button
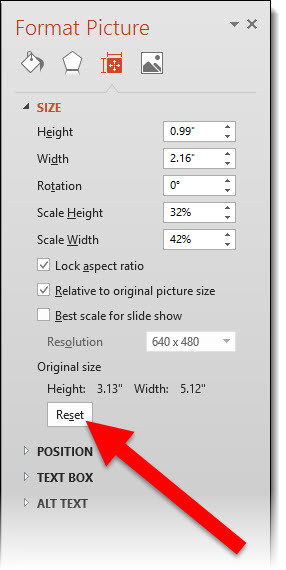
The image will reset to the original inserted size (which also means all effects – shadow, bevel, brightness are removed). Resize the image to fit the slide content area for images that look proportionally correct!
– Troy @ TLC