Tutorial

Is That Straight Line Really Straight…?

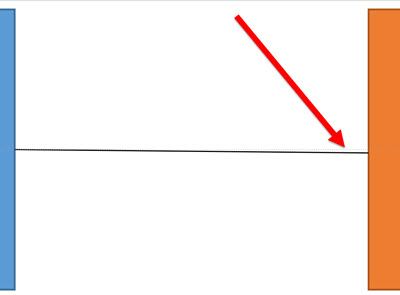
The snap-to-grid, Align to anchor point and random placement of PowerPoint lines can, at times, become frustrating. When reviewing a slide layout, I am often looking at lines and trying to determine if they are straight. For example, after looking at this simple layout, I question whether the line connecting the two boxes is straight or just an optical illusion.

Straight_1


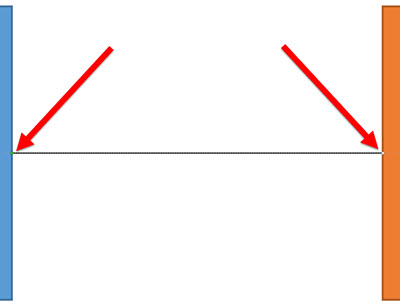
When we zoom in and add a guideline to see what is straight – the connecting line is very slightly off. Not a big deal when viewed as a small image here on the blog. But enlarge this diagram to fit a 40′ wide screen and this small inaccuracy is big!

Straight_2


One of my go to PowerPoint add-in sets is from ToolsToo.

Straight_5

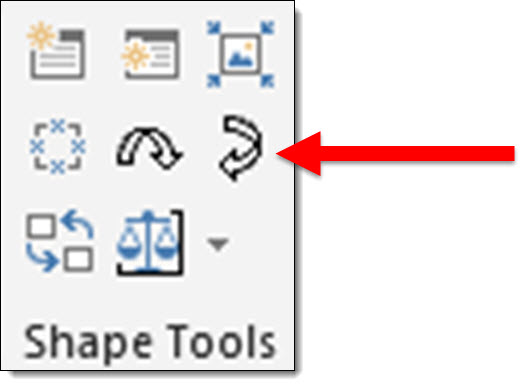
These two tools are in the SHAPE TOOLS section: MAKE LINE HORIZONTAL and MAKE LINE VERTICAL.

Straight_3


Two clicks and I know a line is straight. Select the line, click the horizontal or vertical button and no matter what the line is snapping to, it is set to a straight line on the 0 or 90 degree axis!

Straight_4


– Troy @ TLC


By |2016-08-10T09:34:49-07:00September 10th, 2014|Tutorial|

Mockup Everything for Presentation Images

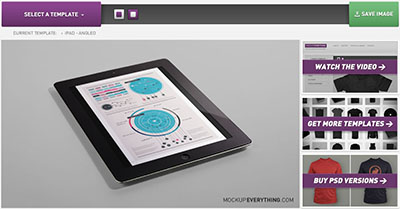
Mockup Everything is a web-based application that lets us quickly create custom graphics with images embedded in iPads, t-shirts, iPhones, magazine covers and many other objects.

Mockup everything 19

TLC staff designer, Michelle, spent some time working with Mockup Everything’s website and wrote up this great overview tutorial on using it.

1. To get started, click on SELECT A TEMPLATE on the homepage to choose one of the free templates to work with.
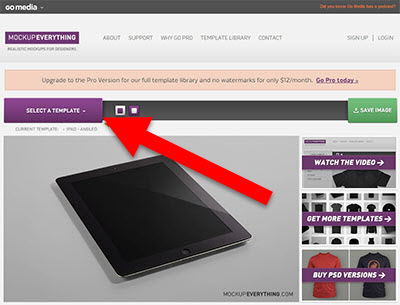
Mockup everything 1

2. For this tutorial, I selected the IPAD – ANGLED template to place our design on.
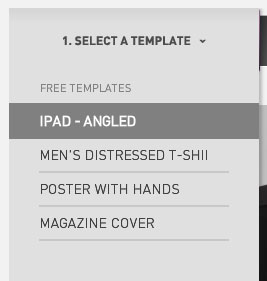
Mockup everything 2

3. Hover over the image of the iPad until you see a blue area highlighted, then click the blue highlighted area to open the import image dialog.
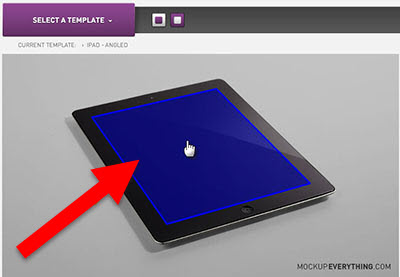
Mockup everything 3

4. Select the image from your computer that you want to place on the template, and click Open.
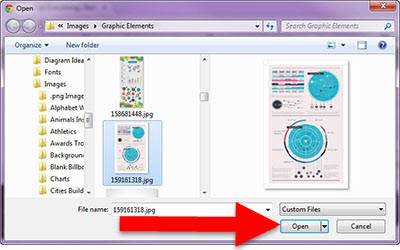
Mockup everything 4

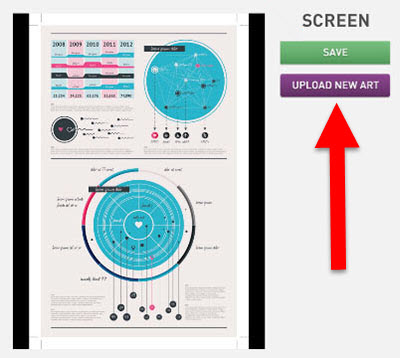
5. Verify that you have selected the correct image by clicking SAVE (or select UPLOAD NEW ART to change the image), and the image will be placed on the template.
Mockup everything 5 Mockup everything_6

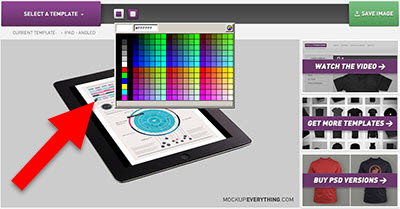
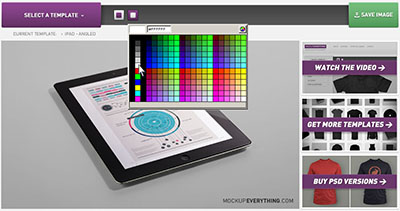
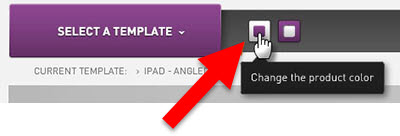
6. My image is not the exact size of the template’s area for the ipad screen, so I am changing the background color behind the image. Select the small square on the left, and choose a color, there are options to use a preset color or an eyedropper tool.
Mockup everything 7 Mockup everything 8

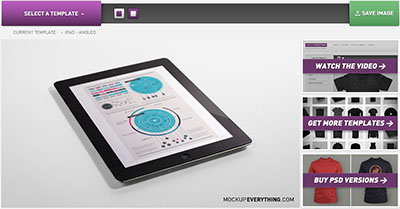
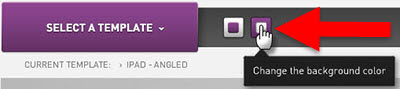
7. Now, I want to change the background image of the template itself by clicking on the other small box, and I will use white as our background.
Mockup everything_10 Mockup everything 11 Mockup everything 12


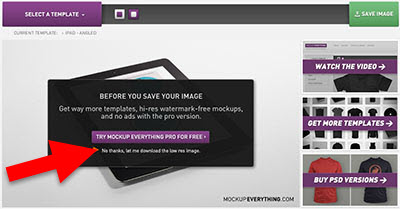
8. To save the custom image, click SAVE IMAGE. If you are using the free version of Mockup Everything, there are options to upgrade for a higher quality resolution and size image. For now, I am just clicking No thanks, let me download the low res image to save the image at a resolution of 72 ppi and a size of 750 x 422 pixels, which is good for most presentation design needs.
Mockup everything 13


9. Once saved, I have an image like the one below ready to insert into PowerPoint.
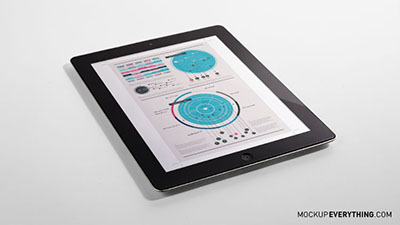
Mockup everything 14


10. There are some great options in the free templates options on Mockup Everything.

Mockup everything 16 Mockup everything 15 Mockup everything 17


11. The PRO version of Mockup Everything is $12 per month and has many more objects, angles and options such as: men’s, women’s, baby and youth apparel, books, magazines, posters, envelopes, business cards, bags, boxes, vinyl records, CD cases, and much more. There are even templates for skateboards, snowboards, different technological devices, outdoor scenes (such as billboards and buses), and beverage containers.
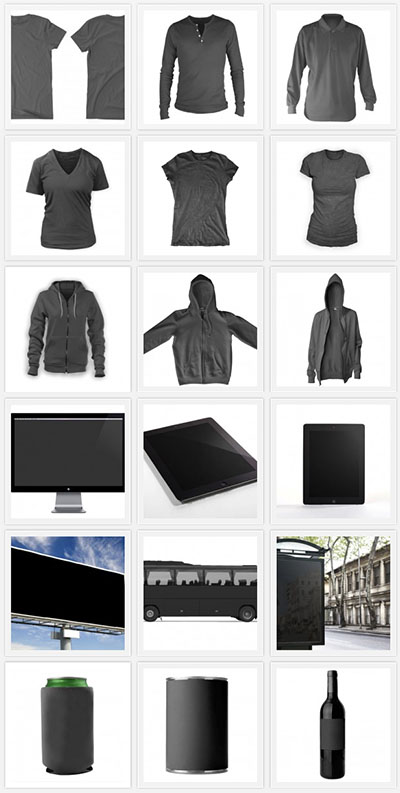
Mockup everything 18


– Michelle @ TLC
By |2016-08-10T09:35:08-07:00September 8th, 2014|Tutorial|

16×9 in a 4×3 world

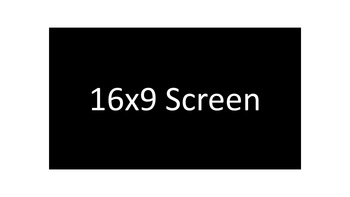
If you have a 16×9 aspect ratio presentation like this:

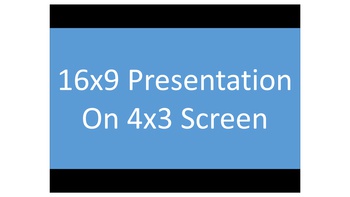
This is what it looks like when projected on to a 4×3 screen:


The presentation is vertically centered and goes left to right. The top and bottom are not used (but the projector will show black in these areas). This is called Letter boxing.

– Troy @ TLC
By |2016-08-10T09:36:37-07:00June 4th, 2014|Tutorial|

4×3 in a 16×9 world

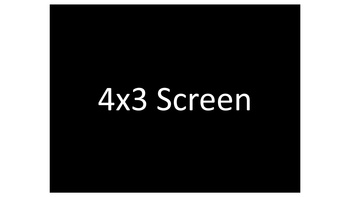
If you have a 4×3 aspect ratio presentation – like this:

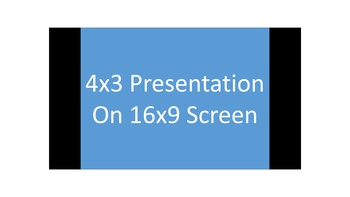
This is what it looks like when projected on to a 16×9 screen:

The presentation is vertically centered and goes top to bottom. The left and right sides are not used (but the projector will show black in these areas). This is called Pillar boxing.

– Troy @ TLC
By |2016-08-10T09:36:55-07:00June 2nd, 2014|Tutorial|

Using PowerPoint’s Shape Merge (3)

Part 3 of the Shape Merge real-world, presentation design examples is a Key shape.

BATTERY
Goal is to create a single PowerPoint shape of a classic battery that can be stylized in any way using Point’s features.

Shape(s) 1 – two rounded corner rectangles to create the battery shape.

Shape 2 – the power/lighting shape is a standard shape in PowerPoint. Rotate, size a position on battery shape (color does not matter – we are going to delete it in the next step).

Shape 3 – select the battery shape, then the lightning bolt shape, use the Shape Merge SUBTRACT. Note: PowerPoint does some interesting things, in this example, the final shape is created visually in the correct orientation, but is actually rotated 326′.

– Troy @ TLC
By |2016-08-10T09:39:02-07:00May 28th, 2014|Tutorial|

Using PowerPoint’s Shape Merge (2)

Part of the Shape Merge real-world, presentation design examples is a Key shape.

KEY
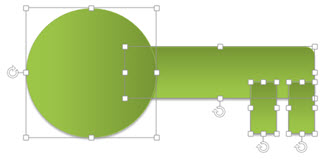
Goal is to create a single PowerPoint shape that can be stylized with different fill colors for an analogy slide of the 3 corporate program “keys.”

Shape(s) 1 – design the key using a circle and set of rectangles.

Select all shapes and use the UNION tool to create a single shape.

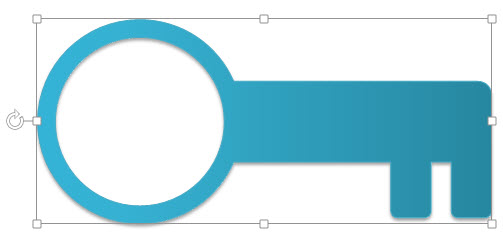
Create a new circle, size and position over the handle part of the key.

Select the key 1st, then the circle and use the SUBTRACT tool to create the final, single shape Key (shadow added, fill changed).

– Troy @ TLC
By |2016-08-10T09:39:19-07:00May 26th, 2014|Tutorial|

Using PowerPoint’s Shape Merge (1)

Christie was tasked with creating a 3-part blog series of creative, real-world, presentation design examples using PowerPoint’s Shape Merge tools (see this post on the Shape Merge Tools).

TARGET
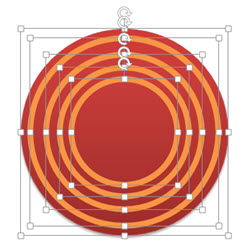
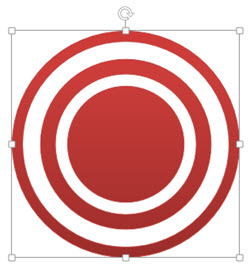
Goal is to create a single PowerPoint shape with the concentric circles of a classic bullseye target. Note: With the Shape Merge tools, the first selected shape will make a difference in which item will be removed.

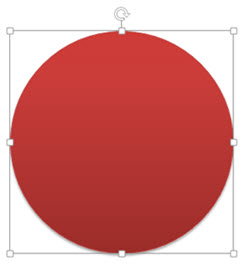
Shape 1

Shape styling – gradient fill:

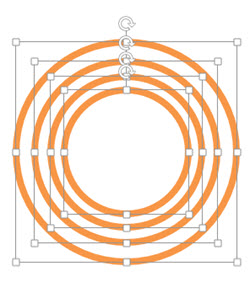
Shape(s) 2: series of 4 circles with thick outlines (color does not matter).

Move Shape 1 (red circle) under Shape 2 and align all:

Select shapes (this is important – select Red circle 1st) and the Shape Merge COMBINE tool:

Final touches – bevel, gradient fill, shadow or any other effect styling can be applied to this new SINGLE SHAPE (I added the gradient fill in the original shape, but added a drop shadow after):

– Troy @ TLC
By |2016-08-10T09:40:53-07:00May 23rd, 2014|Tutorial|

Using Pic Resize to Optimize Images for PowerPoint

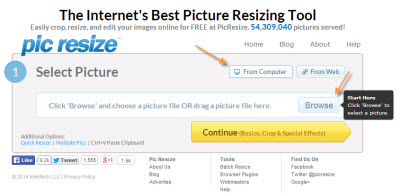
Pic Resize is a very useful tool to resize and edit images that are larger than needed. This website offers a quick and easy-to-use method to optimize a large image so that it fits your needs.

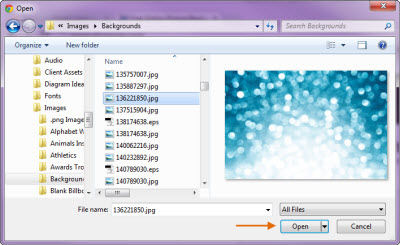
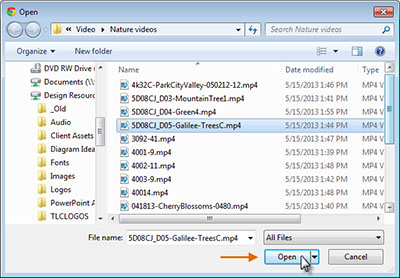
To get started, make sure you have selected From Computer to choose an image on your computer to resize. Click Browse to locate the image on your computer, select the image desired and click Open.

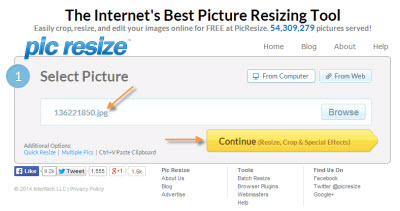
Once you have selected the image, click the Continue (Resize, Crop & Special Effects) button.

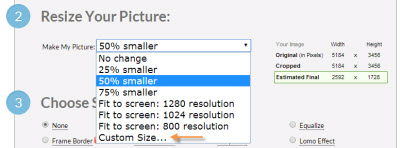
On the top portion of the next page, you can crop or rotate your image, if needed. Continue on to the second section to resize your image. The website defaults to resizing the image to 50% of the original size. If you need a different size, click on the drop down menu and select another preset percentage or resolution. You can also select Custom Size… to enter in the dimensions of your choice.

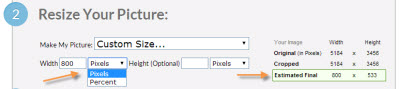
To optimize this image for use within PowerPoint, I will resize this image to 800 pixels wide. By leaving the Height field empty, Pic Resize will automatically keep the image proportionate by determining the correct height value. You can also select a custom percentage of the original image by selecting Percent from the drop down image next to the Width or Height fields. The new dimensions of the image can be found on the right next to Estimated Final, which will be highlighted in green.

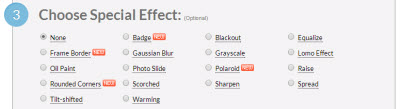
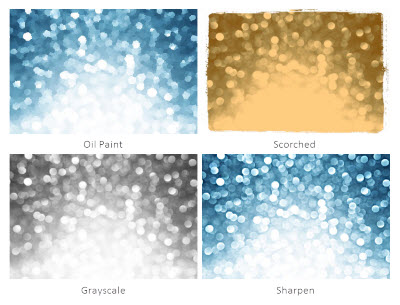
In the next section, you can select one of many special effects to enhance the image, if desired. Some of these special effects include Oil Paint, Scorched, Grayscale, and Sharpen, which can be seen below.

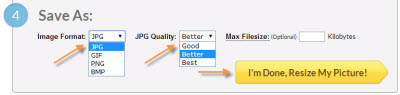
In the last step, you will select the format, quality (if JPEG) and maximum file size (optional) to save your image as. The original format of the image will be automatically populated but JPEG, GIF, PNG, and BMP are all supported. PNG images with alpha transparency are supported, so transparency will be maintained if resized. If resizing to a JPG as the format, you can also select the quality of the image being saved.

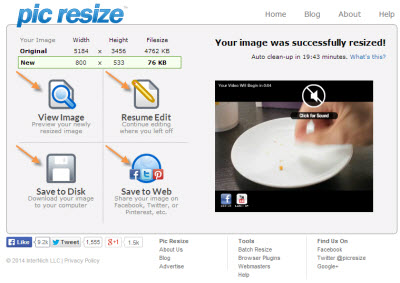
Once you have selected the format and quality, click the I’m Done, Resize My Picture! button. When successfully resized, you can select View Image to preview, Resume Edit to continue editing, Save to Disk to save onto your computer, or Save to Web to upload the image onto a social media website of your choice. For this instance, we would save the image to the desired location by clicking Save to Disk.

Once saved, you now have an optimized version of your image that can be easily used within PowerPoint. Below, you can see the new, optimized image, which was resized from 5184 x 3456 pixels down to 800 x 533 pixels.

– Troy @ TLC
By |2016-08-10T09:41:20-07:00May 21st, 2014|Software/Add-Ins, Tutorial|

Search for Images on Google by Usage Rights

Legal use of images is something we at TLC are always concerned about. It is also something we see abused by many presentation designs (ie. using copyrighted images without permission). One of the largest image resources for someone putting together slides is web images searches, particularly Google Images.

But, Google does provide some good search options to use “legal” images, by searching by usage rights.

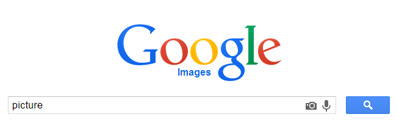
Begin by initiating a Google image search for what you are looking for (in our case, we searched for “picture”), and hit enter, or click search.

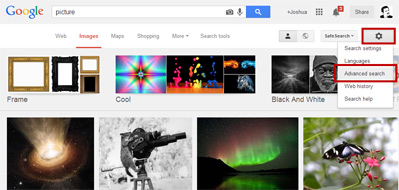
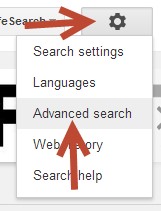
After the search results for “picture” have loaded, you’ll find you have some additional search tools available. What we are looking for in this case is “advanced search,” which you’ll find by selecting the gear icon at the top-left corner.

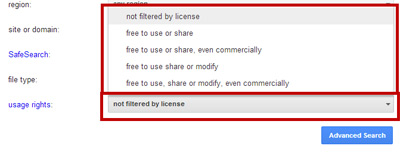
After selecting Advanced Search, you’ll find in the following options available to you under usage rights:

A cautionary note: Some of the images returned under “free to use or share, even commercially” still required attribution, so it’ll be important to double check the terms for each image.

– Troy @ TLC

By |2016-08-10T09:42:15-07:00May 16th, 2014|Resource/Misc, Tutorial|

FreeEncoding.com Online Video Conversion

Transcoding is the process of changing a video from one format to another. For example, converting a .wmv to .mp4, or .avi to .wmv. Transcoding is done with video editing software, which is typically installed on a computer. But there are a number of online apps starting to show up. FreeEncoding.com is a free tool for easily converting videos online. It has a number of encoding options and makes things easy for presentation designers.

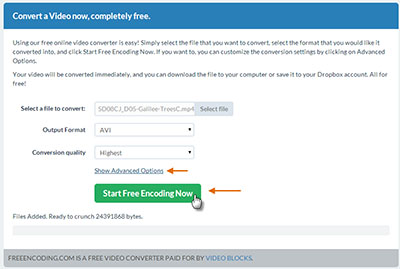
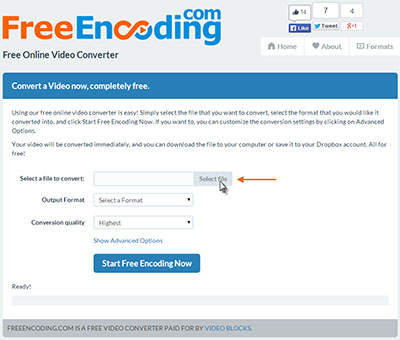
Go to www.freeencoding.com and click SELECT FILE to get started.

Select the video you to convert and click Open.

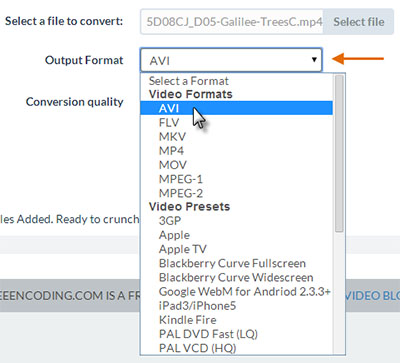
With the video selected, click the drop-down menu next to Output Format and select the format you want to convert your video to. For this instance, we will select AVI as our output format.

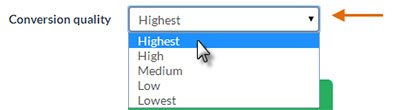
Next, select the Conversion Quality from the next drop-down menu.

You can click on Show Advanced Options to enter specific formatting options, such as resolution, FPS, video or audio bitrate and more. Once all desired formatting options have been selected, click the green Start Free Encoding Now button.

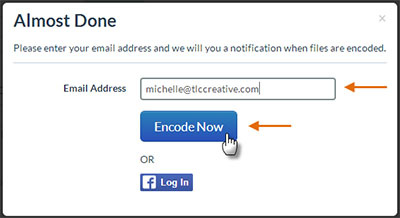
Enter your email address on the next screen (or you can choose to login using Facebook) and click Encode Now to have Free Encoding email you a notification when your video has been converted. An uploading status bar will appear at the bottom of the screen.

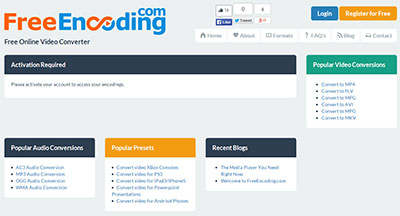
For your first time uploading, the below screen will appear, instructing you to activate your account to access your completed encodings.

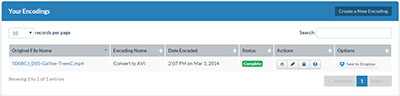
Visit your email, and click on the activation link to access your converted video. Once activation is complete, you will see your video under Your Encodings. There are many actions and options available at this point.

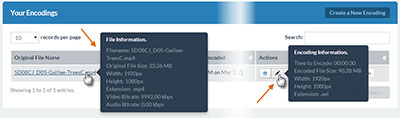
To simply see the File Information you can hover over the link under Original File Name or hover over the pen icon under Actions to see Encoding Information.

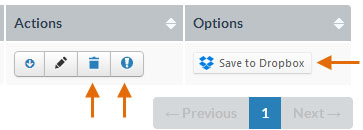
Under Actions, you can also delete the video with the trash icon or report an issue you experienced with the encoding using the exclamation point icon. Also, if you have a Dropbox account, you can choose Save to Dropbox under Options. Otherwise, you are ready to download your encoded video.

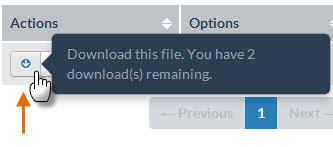
To do so, click on the arrow icon under Actions and save your file to the location of your choice.
Note: You can only download two videos before the oldest will be deleted. The remaining videos you can download appear when hovering over the arrow icon.

– Troy @ TLC

By |2016-08-10T09:42:56-07:00May 14th, 2014|Tutorial|
Go to Top