As a quick follow up to last week’s animation sample (and response to a number of emails), here is why I used Photoshop to create the reflection vs. using PPT2007’s new reflection feature.
First, I am a HUGE supporter of Microsoft’s investment adding better visual effects tools. Further, the reflection effect in PPT 2007 is great!
But it has a few limitations…
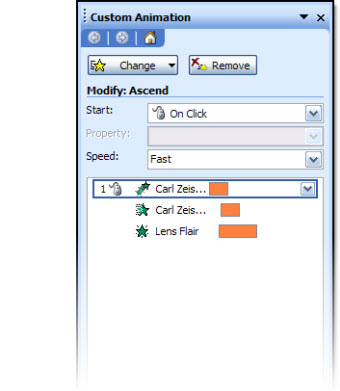
1. Animation – when you view the entrance animation, note that the reflection comes in just a bit behind the actual lens image. This visually adds depth and another level of animation. There is no way to animate on visual effects PPT creates.
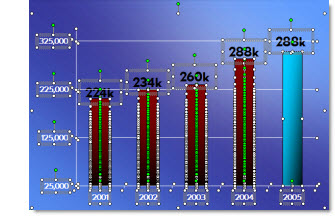
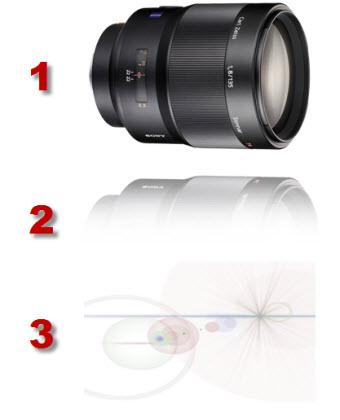
2. It’s all about the angle – PPT 2007’s reflection tool really works best on elements that are flat, or horizontal. As example:
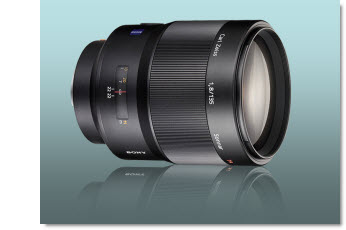
This is the Photoshop reflection inserted as a separate image. Note the reflection starts butted up to image, and can be easily adjusted. It also was manually adjusted to have a bit less of an angle to better match the original graphic (see sample below for more visual example).
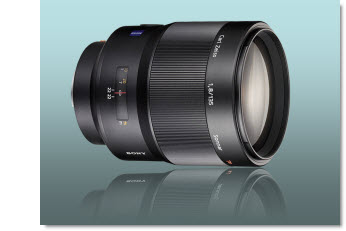
This is the PPT2007 refection effect. In this case even with it on the closest setting, there is still a gap. The angle is also based on the rectangle of the placeholder, so the reflection angle is more distorted.
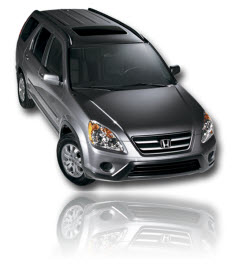
Okay, so this was a really close call if it would be worth going to the extra effort in Photoshop to create separate images. But here is a more pronounced example – and what if I need the reflection on the side of the image…
– Troy @ TLC