Create an Animated GIF from PowerPoint – with Transparent Background!
Creating animated GIFs in PowerPoint is a newer feature, so it may be familiar. However this feature has been updated recently with the ability to export animated GIFs with transparent backgrounds.

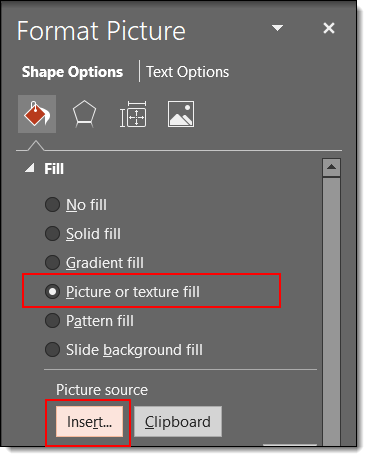
To create an animated GIF with a transparent background, start with a new PowerPoint file. The secret for exporting an animated GIF with transparent background is to us a white background (eg. the slide background is set to white, not a white shape as the bottom layer).
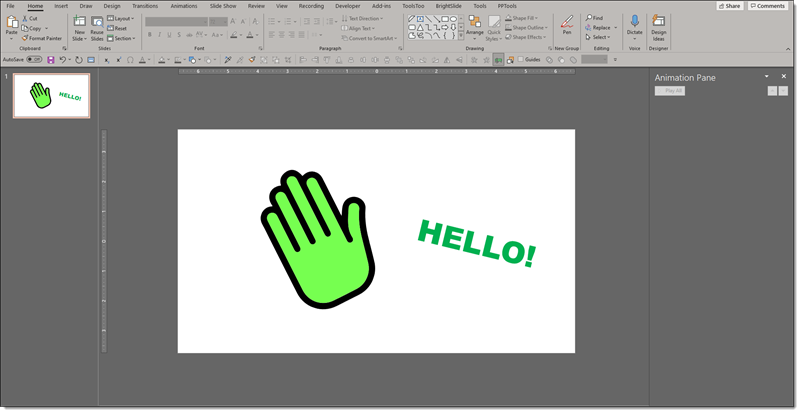
An animated GIF is a “flip book” animation. Each slide is the next part of the motion. There is no animation used in this example animated GIF. Here is the first slide:
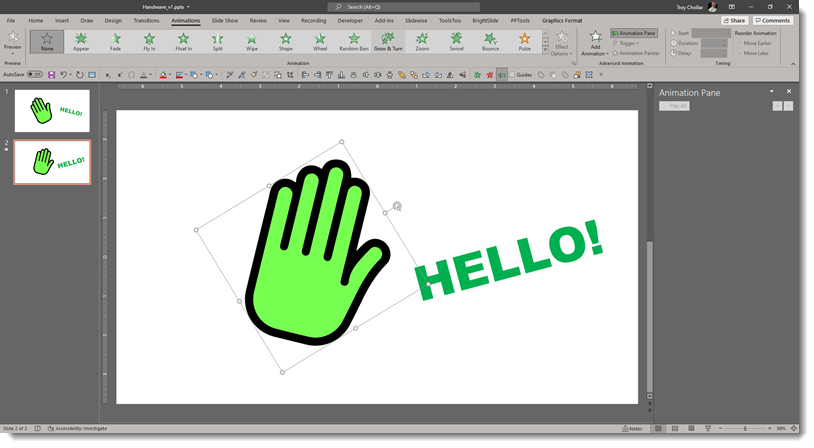
Next, the slide is duplicated and the hand graphic flipped to the opposite view using PowerPoint’s to FLIP HORIZONTAL tool and the text “HELLO” is rotated and larger.
This is a simple 2 step animation, but a 3rd step is needed for the animation effect. So slide 1 is duplicated and set as slide 3.
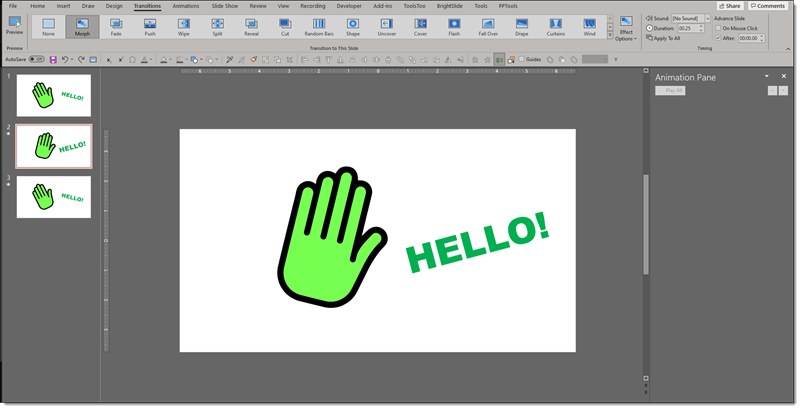
slide 1 transition = NONE, for a seamless transition of the animation. Set automatic slide advance after 0.00 seconds.
slide 2-3 transition = MORPH, which creates the smooth animation of the hand wave and text movement. Duration = .25 seconds. Set automatic slide advance after 0.00 seconds.
It is time to export as an animated GIF.
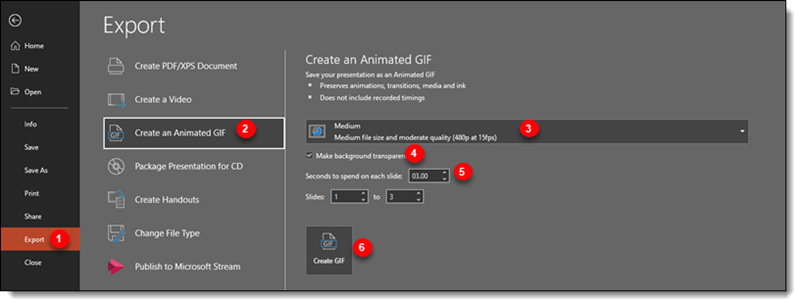
- Go to FILE and select EXPORT
- Select CREATE AN ANIMTED GIF
- Choose the size and quality of the GIF
- Check the box to MAKE BACKGROUND TRANSPARENT (this is the new feature!)
- The “seconds to spend on each slide” can be left with the default value. It will not be used as each slide has a preset automatic transition set.
- click CREATE GIF
And that’s it!

Jake @ TLC