tutorial

Apply “Sharpen” to Images

PPT 2010 has lots of great Photoshop-like effects built into the application. This post is highlighting the SHARPEN AND SOFTEN filter in a real-world situation.

Here is my original image.

Here is the effects applied to stylize the image (rounded corners, bevel, reflection, etc.). All looks great, but look at the face – it is not as crisp and defined.

With the image selected go to FORMAT >> ADJUST section >> CORRECTIONS

Looking at the top row is the SHARPEN AND SOFTEN quick options. The highlighted box shows what is currently applied to the image. I am going to click and apply the far right option which is a much greater sharpen filter.

Here is the same image, same stylizing effects, but with the greater sharpen filter setting. The bevel is there, the reflection is there and the face is super crisp.

– Troy @ TLC

By |2016-08-16T11:06:32-07:00September 10th, 2010|Tutorial|

Automatically Advance To Next Slide When Movie is Done

You have a great opening movie for your presentation. But at the end of the movie the slide shows black (last frame of movie) until you advance to the next slide. This is the last thing you want to think about as you prepare to present.

The solution is fairly easy; it is just not a movie option so you may be looking in the wrong place.

Here is my sample slide with the opening movie.

Select the movie and roll over the playback bar (see Aug. 6 post) to see how long the movie is. On my sample slide the movie is 00:08.12 seconds long.

Go to the TRANSITIONS tab.

Add a time that is shorter than the movie to the AFTER box (I used 3 seconds)

That’s it. To automatically advance to next slide after the movie plays the slide transition just needs to be a shorter time than video. In the sample I set the automatic slide advance to 00:03:00 seconds, but the video is 00:08.12 seconds. The slide will not advance until the video is done (even though it is longer than 3 seocnds).

– Troy @ TLC

By |2016-08-16T11:15:44-07:00August 8th, 2010|Tutorial|

How Long is My Movie?

The Animation Pane does not show how long a movie is (like it does for all other animations). Here is one way to check, from inside PowerPoint, for PPT 2003, 2007 and 2010.

PPT 2003:
1. Select video

2. Right-click and choose EDIT MOVIE OBJECT

3. At the bottom of the MOVIE OPTIONS dialog it shows TOTAL PLAYING TIME

PPT 2007:
1. Select video

2. Under the OPTIONS Tab, click the MOVIE OPTIONS Pop-up Menu

3. At the bottom of the MOVIE OPTIONS dialog it shows TOTAL PLAYING TIME

PPT 2010:
1. Select video

2. Roll mouse over the dynamic playback bar to the end

– Troy @ TLC

By |2016-08-16T11:16:00-07:00August 6th, 2010|Tutorial|

Loop 1st Movie While the Second Plays Too

My sample slide shows 2 movies of heart surgery in action. Both movies are set to play at the same time (July 29 post) and set to loop (July 31 post). But here the presenter wants to talk to the 1st movie, and then click to play the 2nd movie.

The first step is to adjust the animations:
1. Open the Animation Pane

2. Select the 2nd movie and change its animation to ON CLICK

– I prefer to do this on the ANIMATION tab

– But the animation start for movies can also be changed on the PLAYBACK tab

3. Select the 1st movie and TIMING (to open the PLAY VIDEO dialog)

4. The REPEAT needs to be set to UNTIL END OF SLIDE vs. Until Next Click

** PPT 2003 and 2007 the default is UNTIL NEXT CLICK, so if modifying legacy presentations this will need to be checked. PPT 2010 the default is UNTIL END OF SLIDE, so it ‘automatically’ sets up the 1st movie to continue playing while the 2nd plays.

– Troy @ TLC

By |2016-08-16T11:16:20-07:00August 4th, 2010|Tutorial|

Make a Movie Play Automatically in PPT 2010

Because the default action requires the mouse to be seen during the presentation – something not allowed in any large stage production, I change the play animation on every movie. Here is my process:

1. Insert the video: INSERT tab >> VIDEO

2. Locate movie on computer

3. Select movie >> ANIMATIONS tab >> click PLAY to change from PAUSE

4. Change ON CLICK to WITH PREVIOUS

5. Open the Animation Pane and verify the movie play animation is the first in list

– Troy @ TLC

By |2016-08-16T11:17:47-07:00July 29th, 2010|Tutorial|

Where is the PPTools Expert Mode Setting?

I have been using the PPTools “Starter Set Plus” Memorize Position tool.

Here is a typical use:

1. I have a reference/source line at the bottom of a slide

2. I want to have all other reference/source lines throughout the presentation in the exact same position. So on this slide the text box needs to move down

3. A common way to do this, without additional add-ins, but very tedious is to zoom in and position guidelines on the original text and then manually move other text boxes to align with the guidelines

4. The easier and more accurate solution is to select the original text box and pick up its position with the “Memorize Position” addin (left tool)

5. But work is interupted by this information dialog

– Note the last line about turning on Expert Mode to not show the dialog – so where is the expert mode?

6. Click this icon on the Master Toolbar (one of the toolbars installed with any PPTool add-in)

7. The RNR PPTools Preferences dialog opens. It shows all of the PPTools add-ins installed and at the bottom is the check box to turn on/off expert mode

8. This dialog message pops up, click OK

9. Done! Now use the Memorize and Place tools without having an extra dialog interupt the work.

– Troy @ TLC

By |2016-08-16T11:25:04-07:00June 23rd, 2010|Tutorial|

4 Ways To Zoom In/Out While Editing

In the lower right is the zoom options.

(1) The first option is largely unknown to many users, partially because it is not needed often. Clicking the percentage number opens the zoom dialog that has presets and ability to manually enter a specific zoom.

(2) The zoom slider was introduced in PPT 2007 and a is a great way to adjust the zoom level. Zoom ranges from 10% to 400%.

(3) Clicking the far right box is the ‘Fit to Screen’ option which I use a lot!

(4) The fourth option is a combination keyboard/mouse feature.
– Hold the CTRL key
– Roll the mouse scroll wheel. Forward = zoom in. Backward = zoom out.

– Troy @ TLC

By |2016-08-16T11:25:22-07:00June 21st, 2010|Tutorial|

PPT 2010 – Is My Video Going To Be Embedded or Linked?

Inserting a video with PowerPoint 2010 starts the same as PPT 2007. Insert >> Video >> Video From File.

And we still get the same dialog window to choose the video to insert. But the drop down menu is now very important.

If ‘Insert’ is selected the video will be embedded.

If ‘Link to File’ is selected it will be linked to an external file.

Note: find and select video first, then use the Link dropdown because selecting the dropdown is the same as clicking it.

– Troy @ TLC

By |2016-08-16T11:36:34-07:00May 12th, 2010|Tutorial|

Animated Timer

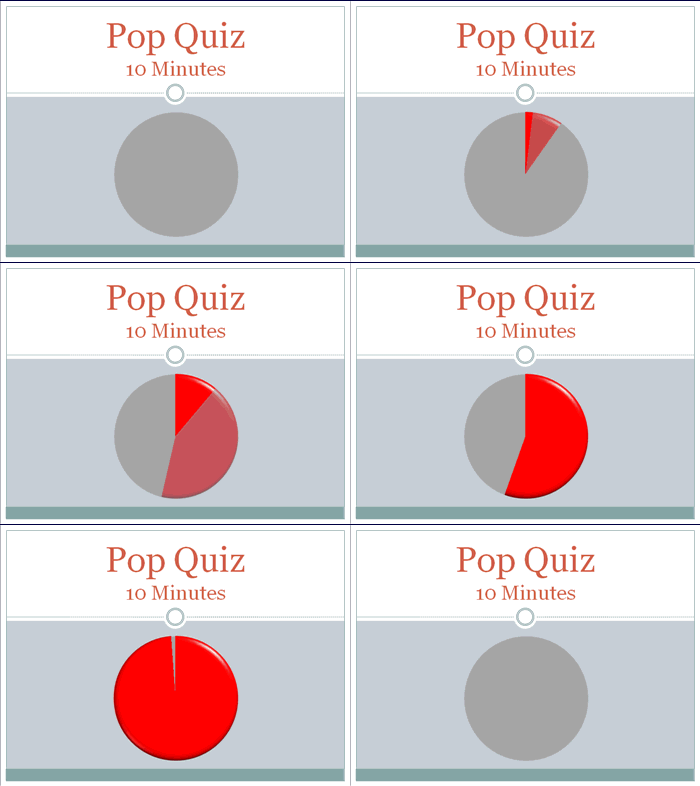
On a recent show I was asked (minutes before needed onscreen) to display a timer for some group interaction. Of course the answer was ‘no problem’… and I got to work. Here is the result:

New Transitions Sample

Making this visual timer is easy.

1. Here is my sample slide, using PPT 2007’s Civic template.

2. Next I created 2 cirlces of identical size. For the “timer” cirlce I made it red and applied some Shape Styling.

3. Using the alignment tools both circles are set to stack and then positioned on slide.

4. Apply an entrance animation to the top/red circle:
– Wheel
– 1 Spoke

5. Customize the time (of the entrance animation) to anything up to 99 minutes.

6. Run the show!

– Troy @ TLC

By |2016-09-16T09:04:42-07:00January 29th, 2010|Tutorial|

Everything Is Jumping (Again) – Fix Selecting Objects

This same problem seems to pop up for many reasons. It is definitely a Windows Vista, and potentially Windows 7, issue. But it effects all versions of PowerPoint. It recently came up again on some of my computers after some Microsoft updates.

The problem is clicking on any object (text box, shape, image, chart, etc) and it jumps slightly. Very annoying.

The solution is (re)setting one of the application options.
1. Locate the actual PowerPoint .exe file. For Vista/Windows 7 it will be here:
c: >> Program Files >> Microsoft Office >> Office12

2. Right-click and open the PROPERTIES

3. Go the the COMPATIBILITY TAB and be sure the DISABLE DESKTOP COMPOSITION is checked.

Run PowerPoint and all should be resolved!

– Troy @ TLC

By |2016-09-16T09:28:46-07:00October 23rd, 2009|Tutorial|
Go to Top