The PowerPoint® Blog

I work with PowerPoint on a daily basis and I am very honored to be a Microsoft PowerPoint MVP. We have a talented team of presentation designers at TLC Creative Services and ThePowerPointBlog is our area to highlight PowerPoint tips, tricks, examples and tutorials. Enjoy! Troy Chollar

Create a Panoramic Image in Photoshop

Sometimes presentations need specialty images that are beyond the capabilities of PowerPoint. Here is my process for creating panoramic images:

1. Take a series of photos, aligning as close as possible. Here are my sample images – 4 photos taken from the 11,000′ elevation peak at BrianHead ski resort in Utah.
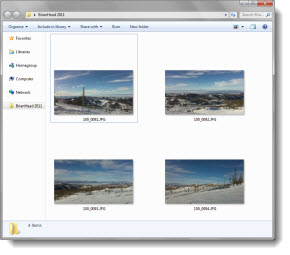
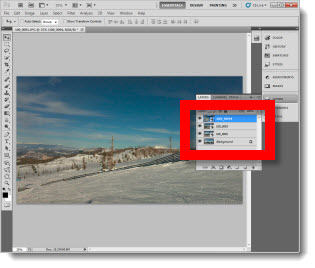
2. Open PhotoShop and import all images as separate layers. Be sure the layers are in order of what will be the side-by-side order.
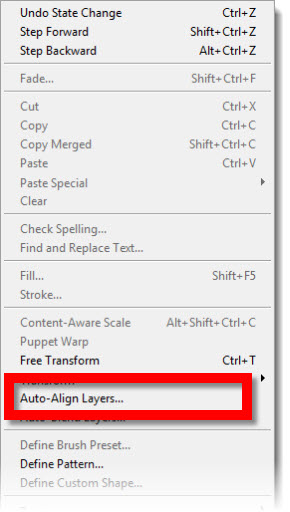
3. With all 4 layers selected go to EDIT >> AUTO-ALIGN LAYERS.
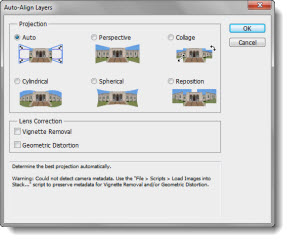
4. In the Auto-Align Layers dialog there are a number of options, for this one I am going to use AUTO.
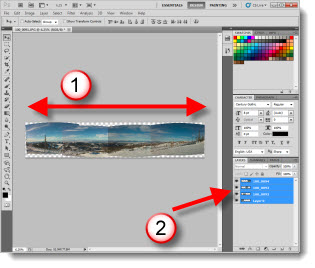
5. The result is (1) a super wide image, that is (2) made up of the layers, each repositioned side-by-side.
6. Then use the cropping tool to remove excess areas and create a clean rectangle.
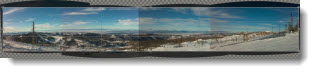
7. Because my images have slightly different exposures, the individual images can still be seen. First I quickly apply an AUTO TONE, AUTO CONTRAST, AUTO COLOR to each layer. Then I use the eraser tool to blend the edges – which is easy because the AUTO ALIGN tool overlaps the images.
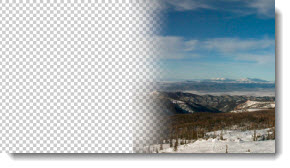
8. Now with the edges blended I have a super wide panoramic image ready to be saved as a .jpg and inserted into a presentation.

– Troy @ TLC

By |2016-08-16T10:39:49-07:00January 9th, 2011|Tutorial|

Everyone Knows How To Use PowerPoint, But Using It Well…

I like the Brainshark application. And I like the presentation philosophy of Andy Zimmerman, Brainshark’s VP of Product Marketing. On the last day of 2010 Bloomberg Businessweek’s tip was by Mr. Zimmerman and I could not say the opening line any better:

“[Everyone] knows how to use PowerPoint software. Using it well can be a different story.”

Read the full story, which is brief and has good presentation recomendations, here.

– Troy @ TLC
By |2016-08-16T10:40:53-07:00January 7th, 2011|Personal, Resource/Misc|

Windows 7 Explorer Previews – See Without Opening!

Windows 7 is without a doubt the best operating system Microsoft has released to date. I find it stable, easy to use, powerful and full of useful features. The core usability of any operating system is how it organizes and allows you to find files. I did a curiousity check and at almost half a million files on my main production computer, and over 3 million files on the main archive server, finding and identifying files easily is a big task!

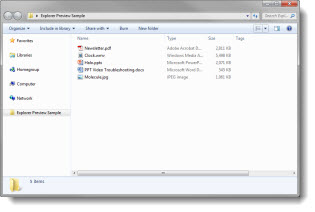
Here is the standard Windows File Explorer in Windows 7.

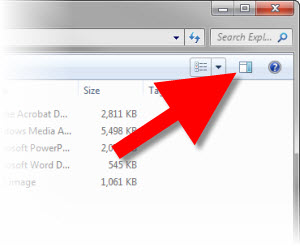
This icon in the upper right, opens the very powerful, and very useful, Preview Pane.

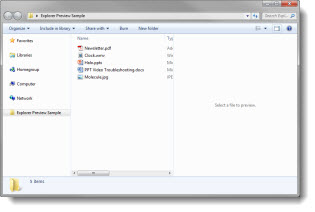
Click the Preview Pane icon and Windows Explorer adds an additional information pane on the right.

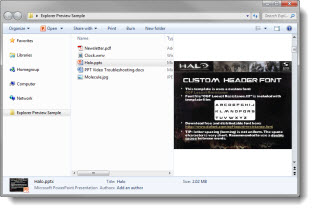
Select a PowerPoint file and the slides are previewed without opening the full application! The vertical scroll bar on the right takes you through each slide, including transitions and animations!

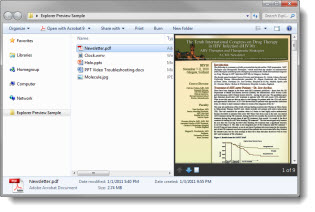
Select a PDF file and the full PDF, page-by-page is shown in the preview pane. The PDF preview adds navigation buttons in addition to the scroll bar on the right.

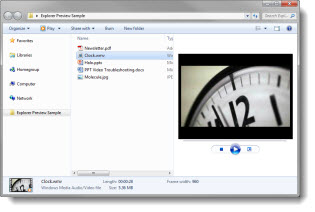
Select a movie file, which can be a .wmv, .avi, or quicktime/.mov (if running the 32-bit operating system) are previewed with an active timeline bar and vital stats about it in the bottom bar, such as file size and pixel size.

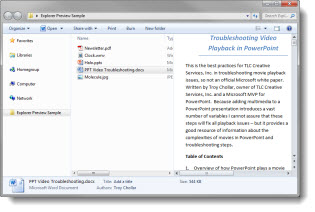
Select any Microsoft Office document – Word, Excel, Onenote, PowerPoint, and all show up in the preview pane.

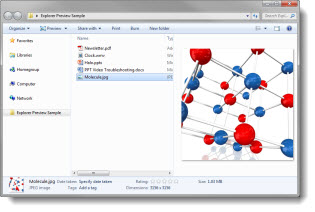
Select an image (.jpg, .gif, .png, but not .eps, .psd, .ai) for a preview and the bottom bar with all the vital stats, such as file size and dimensiions.

When looking through dozens, or thousands, of files the Windows Explorer Preview Pane in Windows 7 is GREAT!

– Troy @ TLC

By |2016-08-16T10:41:16-07:00January 5th, 2011|Tutorial|

Creating the “Happy New Year” Text in PPT 2010

2011 started with a “Happy New Year” graphic and message. Creating the graphic was easy in PPT 2010.

1. Type text and size

2. Add style formatting (fill color and 3-D bevel)

3. Duplicate orginal black text slide and apply a custom 3-D bevel

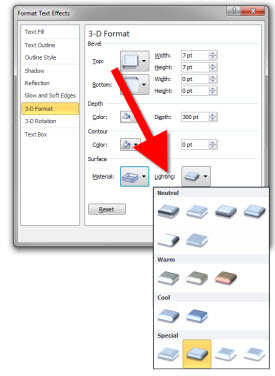
4. Then customize the Surface Material and Lighting

5. Copy the colored text to the 3D perspective text slide and adjust size of each to match

6. I added the TLC company logo, then size/positioned to take place of the dot in the explanation point

The completed slide can be downloaded here.

– Troy @ TLC

By |2016-08-16T10:41:43-07:00January 3rd, 2011|Tutorial|

Happy New Year – 2011!!

Wow, 2010 ended with great family fun and LOTS of design work – which is great! Inbetween design projects and family events while ThePowerPointBlog was on break, I have put together a number of really great posts, upgraded the software platform (which now allows things like inline movies!) and more! 2011 is going to be a great year and ThePowerPointBlog will be full throughout the entire year.And 2011 kicks off the 6th year for ThePowerPointBlog!

– Troy @ TLC

By |2016-08-16T10:42:07-07:00January 1st, 2011|Personal|

Where Have You Been… (Cabo)

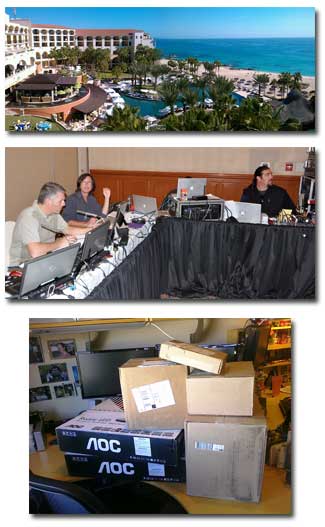
My week has been busy, limited in internet access, no cell phone service and beautiful! Cabo San Lucas, Mexico in December is perfect.

(top) view from my room, overlooking the beautiful Hilton resort and Gulf of Cortez blue water.
(middle) tech table. From left: me, Marc, Brian(behind monitors), Gary.
(bottom) my desk back home after a week away.

– Troy @ TLC

By |2016-08-16T10:43:13-07:00December 4th, 2010|Personal|

“Backstage” Defined

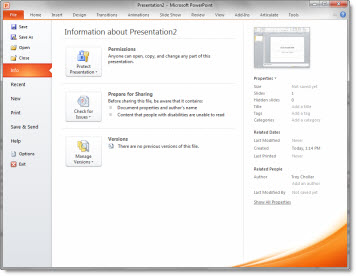
In PPT 2010 when you click the upper left button the Backstage opens.

On a recent call with the Microsoft PowerPoint team I heard this quick definition of the backstage area that is great:
“Backstage has things you do to a document” (such as save, print, convert, etc.).

– Troy @ TLC

By |2016-08-16T10:43:55-07:00November 27th, 2010|Resource/Misc|

Flow Diagram – Before & After Slide #22

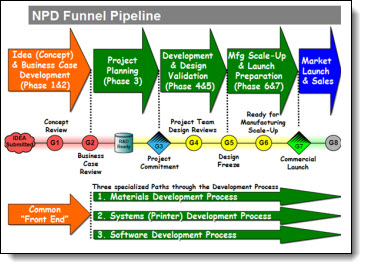
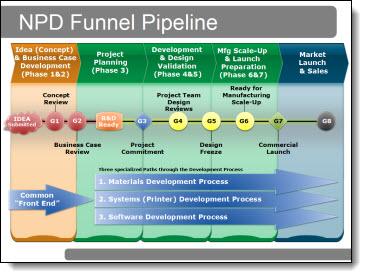
These slides come from a recent project. The original had a Visio (?) flow diagram. Aside from being an uneditable .jpg image, it was full of colors that were inconsistent with the rest of the deck and could use a bit of professional polish.

The recreated diagram used a subtler color scheme, separate elements to show the sections, and everything recreated in PPT to allow animations and section-by-section edits as needed.

– Troy @ TLC

By |2016-08-16T10:45:28-07:00November 24th, 2010|Portfolio|
Go to Top