PowerPoint Image Flip for the Fast Update
PowerPoint is a robust image editor, something that is taken for granted by those that have not endured the app evolution over the past years. But one humble feature that has seemingly always been there is the ability to rotate, or flip an object, or image. As a presentation designer, visual continuity is something I always am aware of, and revising slides where possible. As example:
Here is an iconic image from the recent Barbie movie, inserted onto a slide.

For this slide, the image was first moved to the right to setup the layout for a side-by-side comparison.

And the iconic Barbie that inspired the movie scene added.
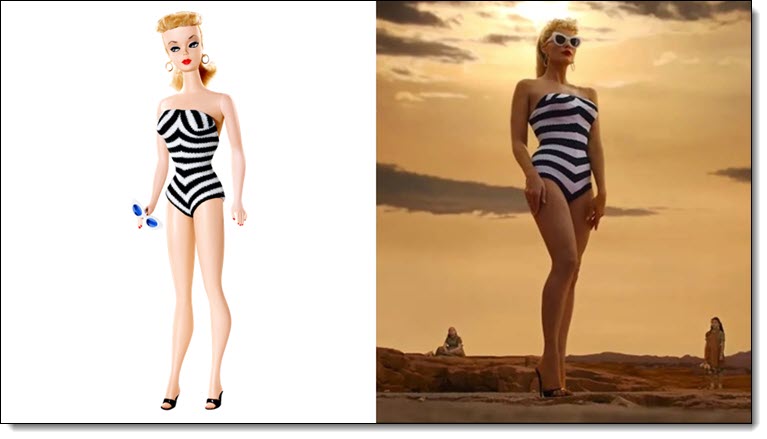
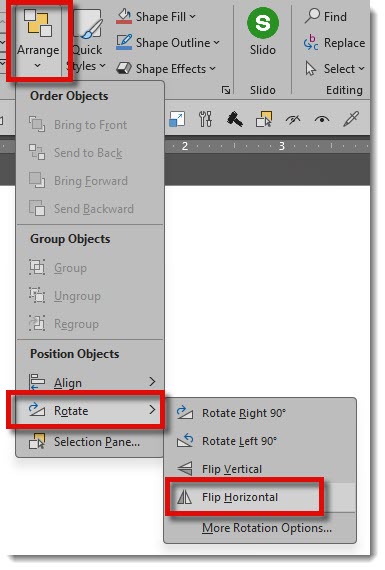
Note, the doll photo shoot has Barbie facing to her right. The opposite of the movie scene. Continuity not ideal. But the doll has nothing indicating direction, or “backwards” so the image update can be accomplished direct in PowerPoint. Select the image > PICTURE FORMAT or HOME tab > ARRANGE > ROTATE > FLIP HORIZONTAL (note: for TLC we have the rotate and flip icons on the QAT as we use them often!).
And with a few clicks that slide images now align, facing the same direction, and visual continuity achieved

Troy @ TLC