Tutorial

Video CoDecs Information in Windows 7

CoDecs are the information needed to play a video. CoDec stands for “compress – decompress.” When a video is played, the computer needs the “decompress” information that matches the way it was “compressed” to play it. Sometimes, in troubleshooting video playback issues, it is good to see a list of the CoDecs installed on a computer.

To locate a list of all Codecs installed on your Windows 7 system for playing audio and video, first begin by opening Windows Media Player.
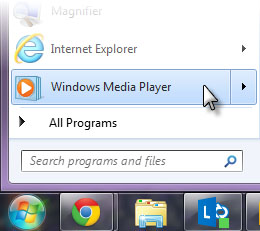
CoDecs 1

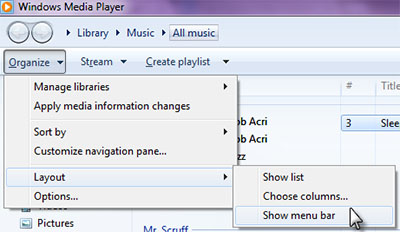
If there is no menu bar, click on Organize > Layout > Show menu bar, in the upper left-hand corner.
CoDecs 2

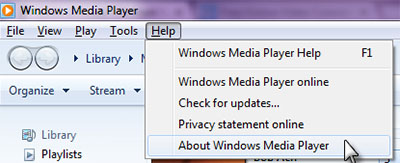
In the menu bar, select Help > About Windows Media Player
CoDecs 3

If prompted with a warning dialog box to notify you the program is protected under copyright law and international treaties, click Technical Support Information in the lower left-hand corner.
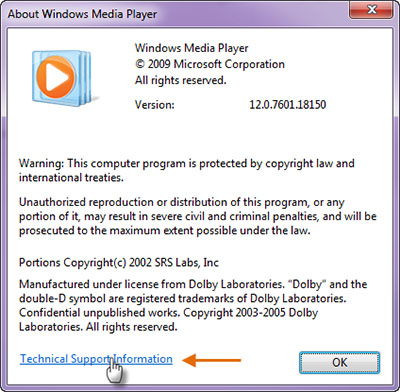
CoDecs 4

A page will open in your default internet browser with details of the Codecs used along with other system information.
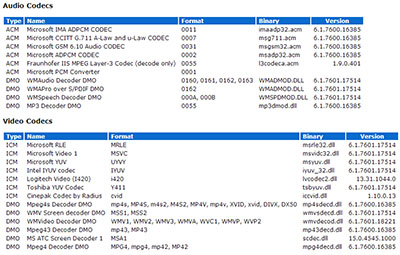
CoDecs 5

– Troy @ TLC

By |2016-08-10T09:43:17-07:00May 12th, 2014|Tutorial|

“PWN” to Download Youtube Videos

This is a very cool and fast download activator for YouTube videos. PWN originates from the “own,” which is an apt name for not having to rely on a web connection to play a video in a presentation.

Deturi.com powers this quick, easy and extremely convenient way to download YouTube videos without having to copy and paste links or save videos to convert.
1. Go to YouTube and find the video you want.
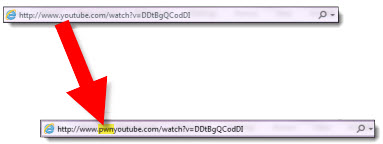
2. In the URL bar type “pwn” to the URL.
3. Type inb “pwn” between www. and youtube.

pwn 1

4. The page is redirected to the the Deturi.com download page.
5. Select from the many download options from various sites.

pwn 2
pwn 3
pwn 4

6. Note: Some of these sites require Java to be installed and updated on your computer.
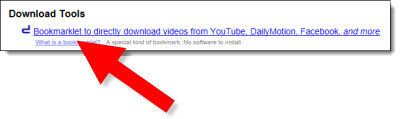
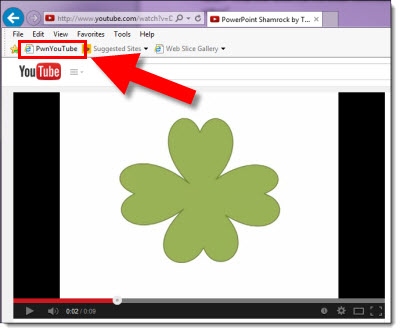
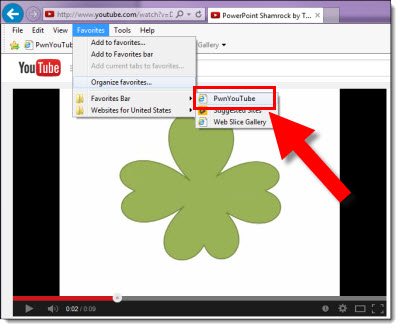
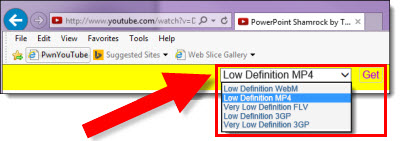
7. The bookmarklet option makes saving streaming videos in the basic formats very fast and simple. Save the bookmarklet to your Favorites Menu/Bar to easily download the video in the future. Select the link under Download Tools that says “Bookmarklet to directly download videos” OR a yellow bar will appear under the top menus with download options for the streaming video.

pwn 5
pwn 6
pwn 7
pwn 8

You now have the video saved to your computer without ever entering additional URLS or copying and pasting information.

– Troy @ TLC
By |2016-08-10T09:43:37-07:00May 9th, 2014|Tutorial|

Keepvid.com Tutorial

Keepvid.com allows you to download streaming videos from of a variety of websites, including YouTube, Vimeo, Metacafe, and more. The process is quick, easy and very convenient.
Note: The keepvid.com has lots of buttons to download OTHER software. I recommend ONLY clicking on the options listed in this tutorial.

To get started, you must first make sure that Java is enabled. Below the big Download and Play Now buttons, make sure that Java says On next to it. You may still be prompted to install or update Java on your computer if you do not have the most recent version installed.

keepvid 1

Once Java has been installed/updated and is enabled on your system, locate the video you want to download. Copy the link to your video and paste it in the field to the left of the Download button. When you click on Download, you may be asked for permission to run KeepVidDownloader. If so, click on Run.

keepvid 2

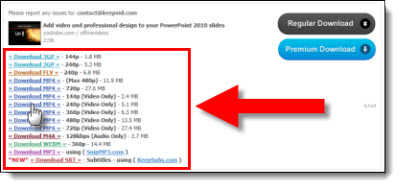
A list of links to your video file will appear on the bottom of the page in various sizes and formats. Formats to select from include 3GP, FLV, MP4, M4A (Audio Only), WEBM, MP3 and SRT (Subtitles).

keepvid 3

Click on the desired format to save the file to location of your choice. Note: You must click on the actual link for your specific format and size to simply save the video file. If you click on the large Download button(s) to the right you will be sent to iLivid.com and prompted to use their file management system.
You now have the video in the format of your choice downloaded onto your computer to be used as needed!

– Troy @ TLC

By |2016-08-10T09:44:03-07:00May 7th, 2014|Tutorial|

Set Video to Autoplay in PowerPoint

Video in presentations has been a big item for me over the years. With each new version, and update, of PowerPoint I am constantly disappointed in the default settings applied to inserted videos.

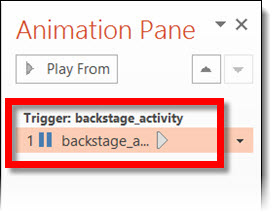
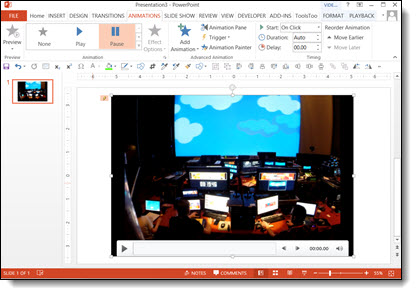
Currently, and in all legacy versions, when a video is inserted the default animation settings is a Trigger animation.

A trigger animation is ‘triggered’ one of two ways, direct interaction (ie. move mouse on screen and click on the programmed item) or secondary action from a programmed animation (ie. when one item is animated it activates the trigger animation).

So, when a video is inserted onto a slide and then present, the video will not play until you move the mouse cursor on the slide and click on the video. Obviously for majority of my meetings the goal is to hide PowerPoint (and hide any software) to create a seamless environment where things ‘just happen’. See a mouse move across a screen is a bad thing.

Up next is a quick step-by-step tutorial on changing the video animation settings to what we use at TLC for virtually all presentation videos.

– Troy @ TLC
By |2016-08-10T09:44:38-07:00May 5th, 2014|Tutorial|

SharePoint Calendars and Internet Explorer Visual Formatting Issue

TLC adopted Office 365 before it was publicly available and have only good things to say about its use in a small business environment. Recently something has gone awry with the SharePoint calendars – something we rely on daily.

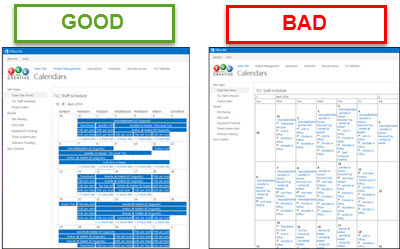
Up until 2 weeks ago, they looked like the left example, but suddenly the visual formatting changed to the ugly and hard to use right example.

But this formatting issue is only seen when using Internet Explorer. If logged in with Firefox, Chrome or any other browser, nothing changed, all looks good. So ironically, only the Microsoft web browser seems to be rendering the Microsoft SharePoint calendars useless!

After some research and testing, here is the fix we have implemented on every computer here:

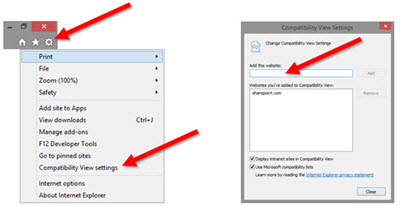
– Open Internet Explorer
– Click the TOOLS icon in the upper right
– Select COMPATABILITY VIEW SETTINGS
– In the ADD THIS WEBSITE field, enter SHAREPOINT.com
– Click ADD and CLOSE
– Now SharePoint calendars should once again display as expected

– Troy @ TLC

By |2016-08-10T09:46:05-07:00April 19th, 2014|Resource/Misc, Tutorial|

Using Multiple Masters To Organize

Multiple masters are usually used in relation to different templates in a single file. At TLC, we use multiple master slides for design organization as much as different templates.

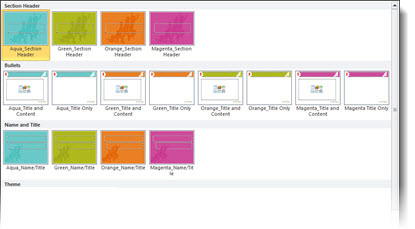
This is from a recent project that was all one template, but with 4 distinct color options. The client requested a simple structure, specifically not 4 duplicate sets of master slides. So we organized the Master Slides into 3 categories:
Top row = section divider slides in each color
Middle row = all of the content slide layouts in each color
Bottom row = title slides in each color

Just another way of providing solutions for clients using the features of PowerPoint’s master slides.

– Troy @ TLC
By |2016-08-10T09:47:58-07:00March 17th, 2014|PowerPoint, Tutorial|

Creating Quote Mark Graphics in PowerPoint 2013

PowerPoint 2010 introduced the very great “Merge Shape” tools (see this post for details). With this toolset, editable vector shapes can be can be created directly in PowerPoint – something I refer to as “Illustrator 2.0.” With PowerPoint 2013, it includes the ability to convert text to vector, which is what we will use to create the stylized quote mark graphics for a complete PowerPoint workflow.

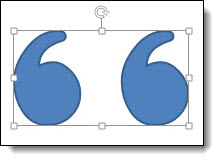
quote mark graphics 1

1. Add text in PowerPoint.

quote mark graphics 2

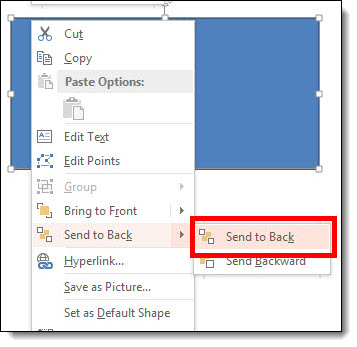
2. Add PPT shape, and send to back behind text.

quote mark graphics 3

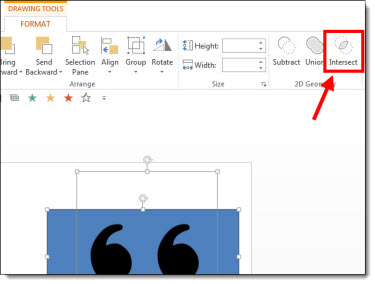
3. Select text and shape. On FORMAT ribbon >> MERGE SHAPES >> INTERSECT

quote mark graphics 4

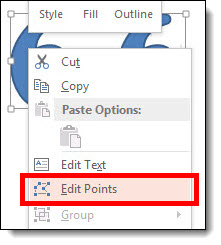
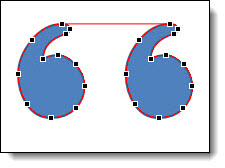
4. The text is no longer editable, as it is now shapes. Right click and select EDIT POINTS just like any shape in PPT.

quote mark graphics 5
quote mark graphics 6
quote mark graphics 7

5. Stylize with no fill, light grey outline, drop shadow effect described in this post.

– Troy @ TLC

By |2016-08-10T09:48:18-07:00March 14th, 2014|PowerPoint, Tutorial|

Creating Quote Mark Graphics in Adobe Illustrator for PowerPoint

The previous post showed our visually stylized quote marks on slides with color backgrounds. For us, the process for creating the quote mark graphics is with Adobe Illustrator.

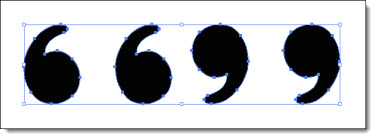
1. First, find a great font for the quote marks. Designer Amber selected Spirax Regular, which you can download here.

2. Select the text and create outlines, which converts from editable text to vector images.

3. The spacing for the quotes was a bit to far apart. Now that they are graphic elements they are easy to select and move a bit closer together.

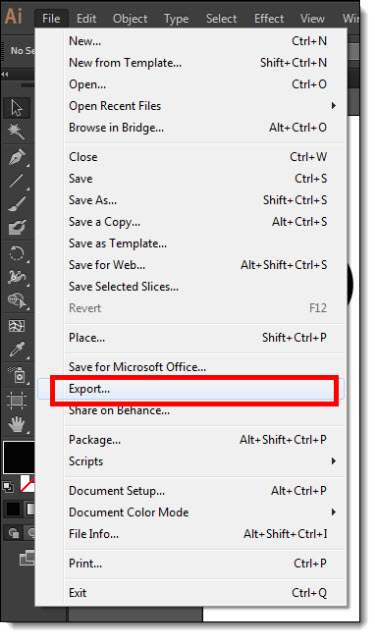
4. Now we want to export the graphics from Adobe Illustrator in a PowerPoint friendly vector format. Go to FILE >> EXPORT

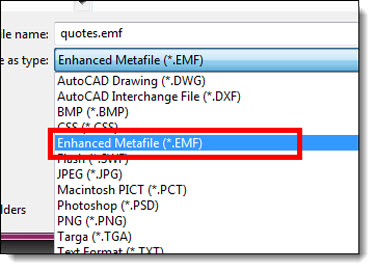
5. Select ENHANCED METAFILE >> EXPORT

Now with the quote graphics on our computer, we are ready to add them to any slide. See the previous post (here) for details on how to format the graphics in Powerpoint.

– Troy @ TLC

By |2016-08-10T09:48:37-07:00March 12th, 2014|Personal, Tutorial|

Dynamic Quotes with Background Fill!

Here is one of our favorite visual tricks at TLC Creative Services for making slides with a key quote stand out. Background fill!

I am doing this as a 3-post series: this one shows the end result (see above) and PowerPoint formatting, the next post will detail our development process in Adobe Illustrator, and the third will show a PowerPoint only development process for the graphics. Thanks to Amber, a TLC staff designer, for creating the sample images for this series.

Using the quote mark .emf graphics, they are not very impressive without some styling applied and a special option for their fill color. Insert the .emf graphic (download here).
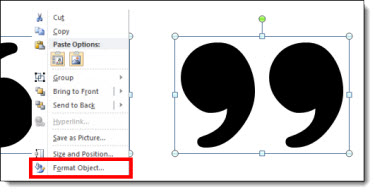
1. Right click on a quote mark and select FORMAT SHAPE.

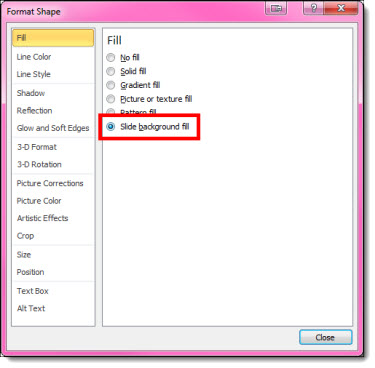
2. Go to FILL and select SLIDE BACKGROUND FILL

3. The Quote marks will disappear on the slide because they are set to be the same background color as the slide.

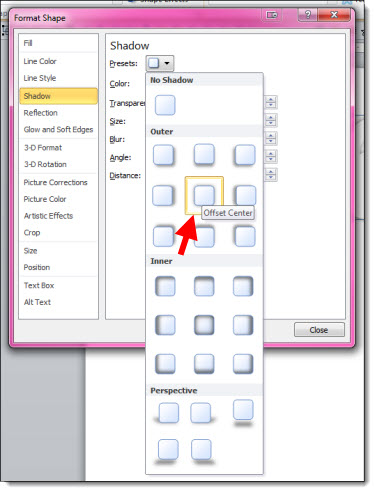
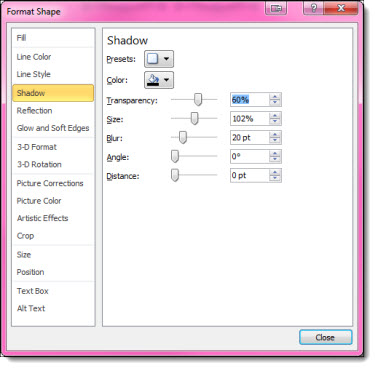
4. Add a shadow effect, bevel, outline, glow or other styling effects to your quote marks. For ours, we have added a subtle drop shadow.

5. Still not super dynamic, but the quote marks are looking more styled.

6. But when placed on a colorful image background – dynamic! Move the quote mark graphics to any part of the slide and their fill updates.

Note: The slide background needs to be set with the Background Fill, not an image on the slide for this effect to work.

– Troy @ TLC
By |2016-08-10T09:48:55-07:00March 10th, 2014|PowerPoint, Templates/Assets, Tutorial|

Force Office 2013 CTR to Update

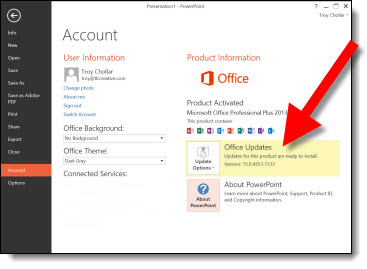
If you have the CTR (Click-to-Run) Office 2013 install, it is supposed to automatically update when you are online. Last week, 3 days after the SP1 release Office had still not updated. I forced Office to check for updates and SP1 was installed.

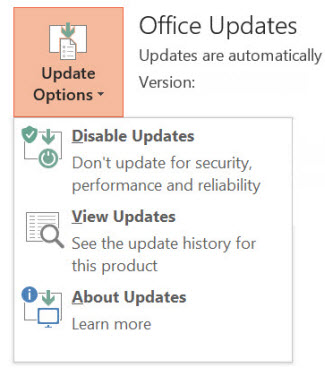
Go to FILE >> ACCOUNT >> right pane.

Click the UPDATE OPTIONS drop down menu.

Select DISABLE UPDATES and yes to the warning dialog that will pop up.

Then click the UPDATE OPTIONS drop down menu again and select ENABLE UPDATES.

This forces Office to go online and check for new updates.

After clicking Enable within 2 seconds I had an update notice and SP1 was installed!

– Troy @ TLC
By |2016-08-10T09:49:51-07:00March 5th, 2014|Tutorial|
Go to Top